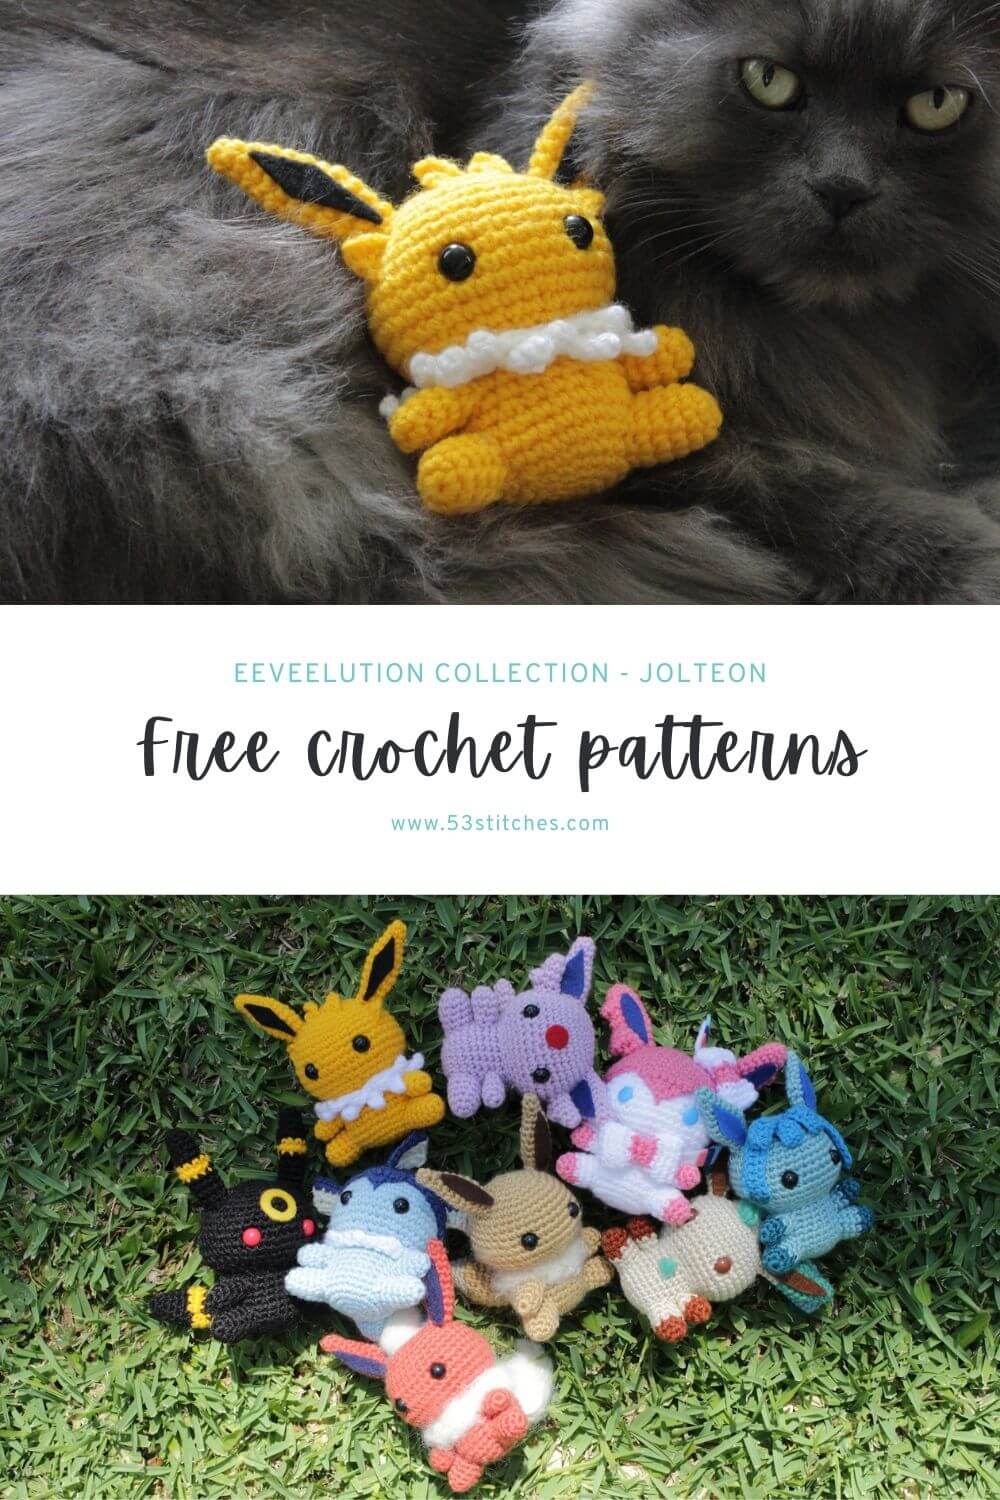
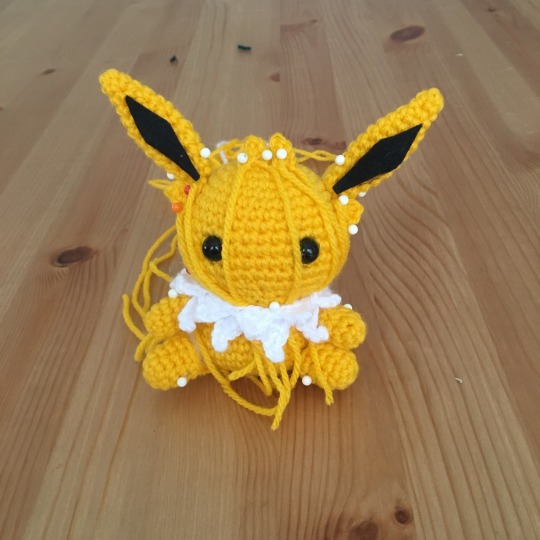
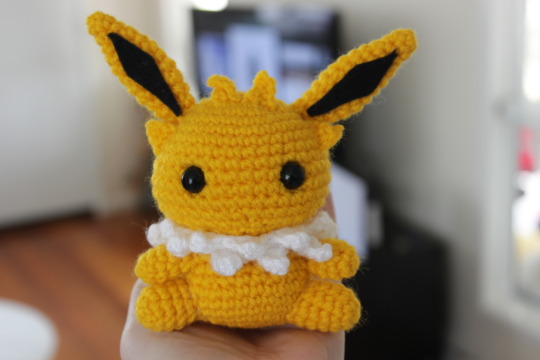
We’re nearly done with the Eevelution series with Jolteon! This one was a lot of fun to make, and I ended up trying out some new methods to get the various triangle shapes for Jolteon’s collar and tail feathers. This free Jolteon amigurumi pattern is pretty simple and so would be a good project for beginners!
You can purchase and ad-free PDF of this pattern over on my Ravelry or Etsy, and if you do a huge thank-you in advance for your wonderful support! You can also find a diy crochet kit on my Etsy which has all the materials you need to make your own!
What materials will you need?
Note some of the links on this site are affiliate links. This means I get paid a small fee if you decide to purchase anything at no extra cost to you. I will only ever link products I happily use myself.
- 3.00mm crochet hook
- Yellow yarn
- White yarn
- Dark purple / black felt
- 10mm safety eyes, black
- Polyester filling
- Glue
- Yarn needle
Quick reference for beginners
Check out some of the below tutorials if you get stuck on any of the stitches or techniques
- How to read patterns
- Magic ring
- Single crochet
- Increase
- Decrease
- Attaching amigurumi limbs
- Half double crochet
- Double crochet
- Chain
If you get stuck anywhere else, check out the FAQ.
Jolteon amigurumi pattern
HEAD
1. (in Yellow) MR 6 (6)
2. [ inc ]x 6 (12)
3. [ inc, sc ]x 6 (18)
4. sc, [ inc, sc 2 ]x 5, inc, sc (24)
5. [ inc, sc 3 ]x 6 (30)
6. sc 2, [ inc, sc 4 ]x 5, inc, sc 2 (36)
7-10. sc 36 (36)
11. [ inc, sc 5 ]x 6 (42)
12-13. sc 42 (42)
14. [ dec, sc 5 ]x 6 (36)
15. sc 2, [ dec, sc 4 ]x 5, dec, sc 2 (30)
16. [ dec, sc 3 ]x 6 (24)
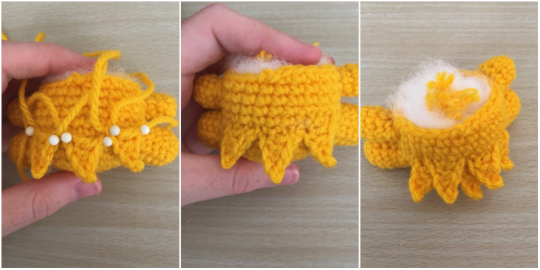
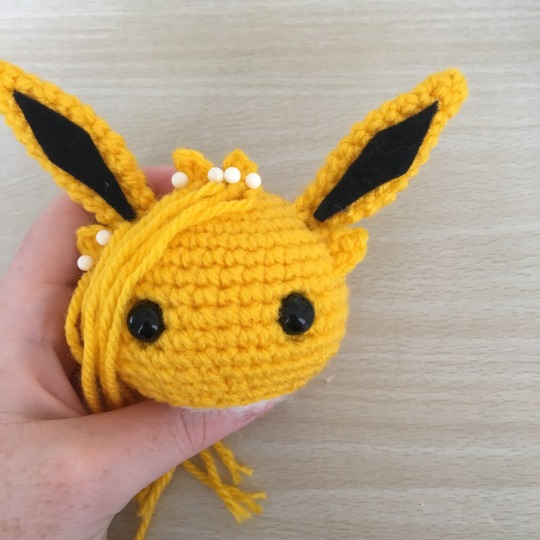
Finish off, leaving a tail for attaching to the body. Attach the safety eyes between rows 11 and 12, with approximately 7 stitches between them. Stuff firmly.
BODY
1. (in Yellow) MR 6 (6)
2. [ inc ]x 6 (12)
3. [ inc, sc ]x 6 (18)
4. sc, [ inc, sc 2 ]x 5, inc, sc (24)
5. [ inc, sc 3 ]x 6 (30)
6-8. sc 30 (30)
9. [ dec, sc 3 ]x 6 (24)
10-12. sc 24 (24)
Finish off, no tail necessary. Stuff.
ARMS (make 2)
1. (in Yellow) MR 6 (6)
2. [ inc, sc 2 ]x 2 (8)
3-4. sc 8 (8)
5. dec, sc 6, (7)
Finish off, leaving a tail for attaching to the body. No stuffing necessary.
LEGS (make 2)
1. (in Yellow) MR 6 (6)
2. [ inc, sc ]x 3 (9)
3-6. sc 9 (9)
Finish off, leaving a tail for attaching to the body. Stuff.
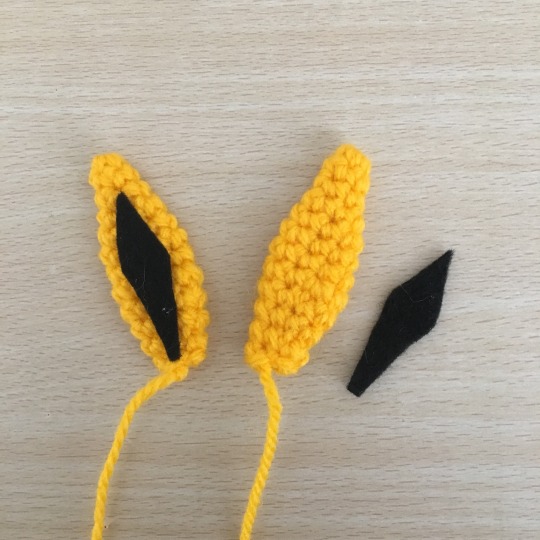
EARS (make 2)
1. (in Yellow) MR 4 (4)
2. sc 4 (4)
3. [ inc, sc ]x 2 (6)
4. sc 6 (6)
5. [ inc, sc 2 ]x 2 (8)
6-8. sc 8 (8)
9. [ inc, sc 3 ]x 2 (10)
10. [ dec, sc 3 ]x 2 (8)
11. sc 8 (8)
12. [ dec, sc 2 ]x 2 (6)
Finish off, leaving a tail long enough to attach to the body later. Take some black or very dark purple felt and cut out two diamonds to go inside the ear – I couldn’t find a purple dark enough, so I used black. Glue the insides of the ears in place!
COLLAR
*when it says “turn” the next sc will be in the second chain from the hook, see pictures below.
ch 5, turn, sc, sc, hdc, dc (one triangle) – repeat 9 times
ch 4, turn, sc, hdc, dc (one triangle) – repeat 10 times
The collar is kind of just one long row. The pictures below illustrate each step a bit better if you haven’t made something similar before. The important part is after you turn your work, the next sc is in the second stitch from your hook – the stitch marked number 4.

TAIL? (make 5)
*It’s kind of a tail? In my notes I’ve labelled them “butt triangles” 😛
1. ch 5, turn, sl st, sc, hdc, dc, finish off.
The tail is made using the same triangle-y technique as the collar. Same with the fringe and ear fuzz pieces.
FRINGE (make 2)
1. (in Yellow) ch 4, turn, sl st, sc, sc, finish off.
EAR FUZZ (make 2)
1. (in Yellow) ch 3, turn, sc, hdc, finish off.
Putting it all together
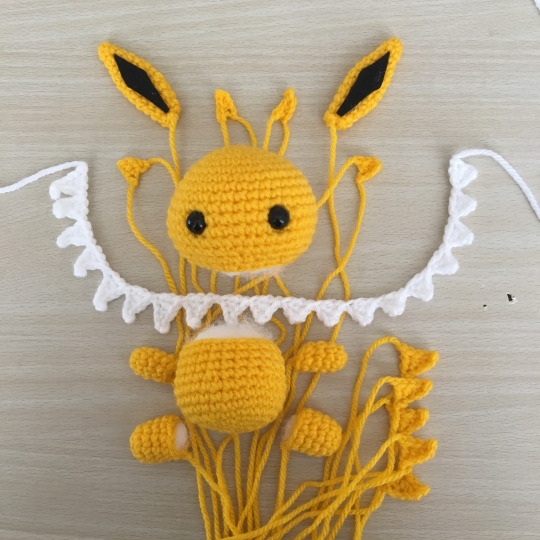
Alright, that’s all of the pieces crocheted, onto assembly. As usual, I like to pin the pieces together to get an idea of placement before sewing them on.
I’ve also put together a bit of a photo-collage of how I attach the limbs, since I’ve gotten a couple of questions lately. There’s nothing too fancy going on here. I pin it in place first, and then I basically thread the needle through every stitch of the leg – you can see in the pictures that I go through stitches in the body, and then through the leg, back through the body, back through the leg, etc. PlanetJune has a great tutorial.

I attach them in this order: legs to body first, then arms to body. Then I take the little tail triangles, pin them in place and attach them. Three go right across the bottom of the body, and the other two go in the spaces between them – kind of like an upside down version of the olympic rings. Take the tail of the triangle, and just stitch along the open top edge.
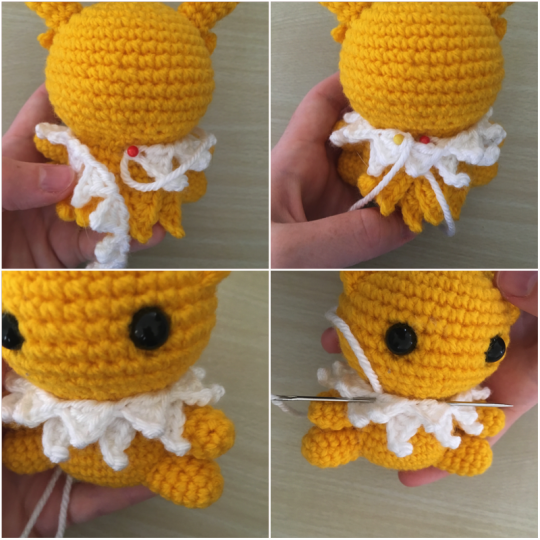
Next I usually attach the ears to the head. The head also has a couple of little fluffy bits – the bits of the “fringe” go between the ears, and the two bits of “ear fluff” go just underneath the ears. The one underneath the right ear has already been sewn on in the picture below.
I like to attach the head before the collar because it’s a little easier. There should have been 24 stitches in the last round of the head and the last round of the body. Simply line them up, and whipstitch closed.
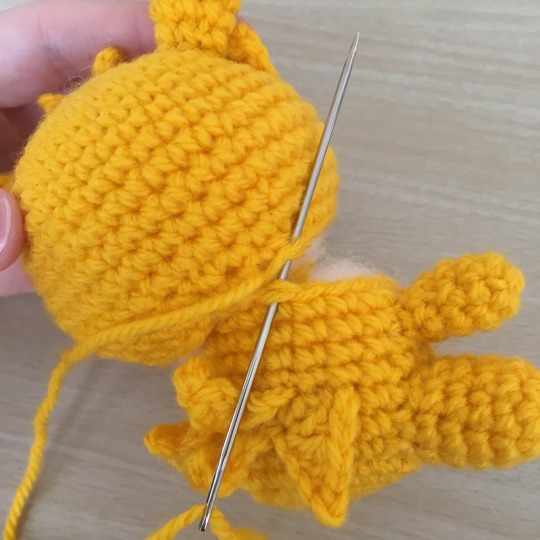
To attach the collar we’re going to wrap it around the neck twice. Start with the end with the larger triangles, and pin it in place at the back of the doll, then wrap the collar around the neck. When it gets to the point where it overlaps, you want to pull it so that the smaller triangles line up with the gaps between the larger triangles. Use the tails to sew it in place – I don’t bother going around the entire collar, I usually secure it at every 3rd triangle or so, and at the ends.
And you’re done! Jolteon was actually a lot of fun once I solved the triangle dilema – I tossed up using felt, but like it a bit better when the texture matches for most of the doll. As always, if you have fun and make a Jolteon yourself, tag your creations @53stitches on Instagram or Tumblr so I can find them.
Other Pokemon crochet patterns
Whether you’re halfway through the collection or just getting started with Jolteon, you can make every one of the Eeveelution crochet dolls now. Follow the links below to easily jump to the next one:
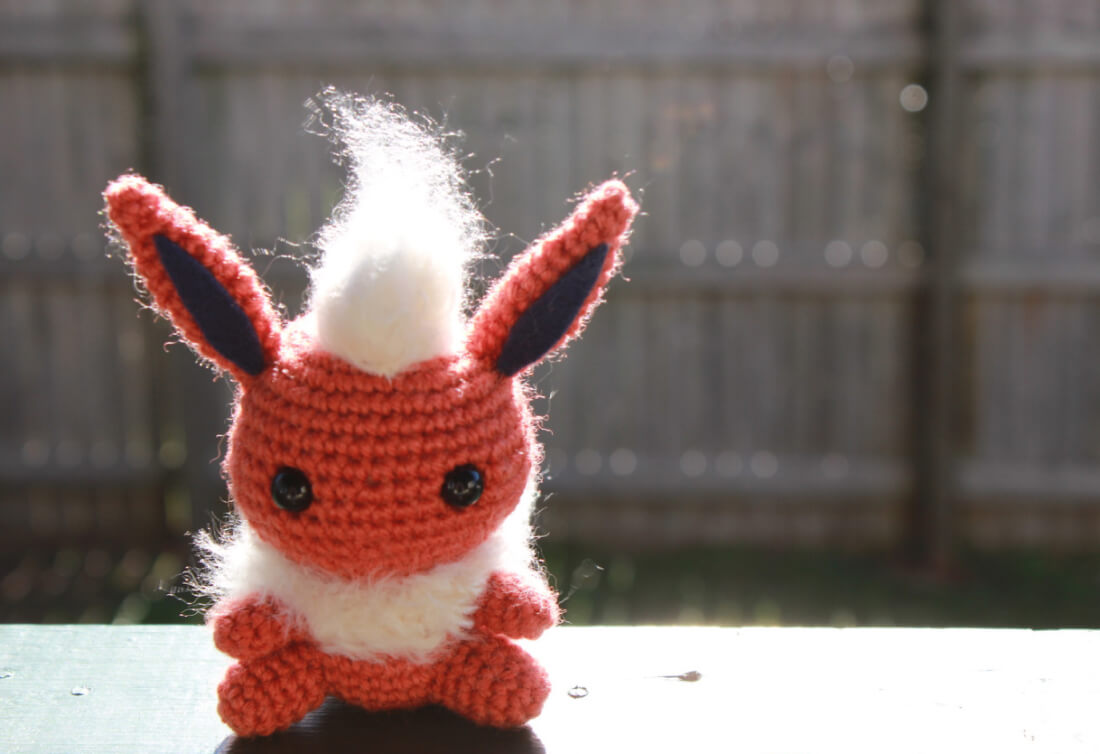
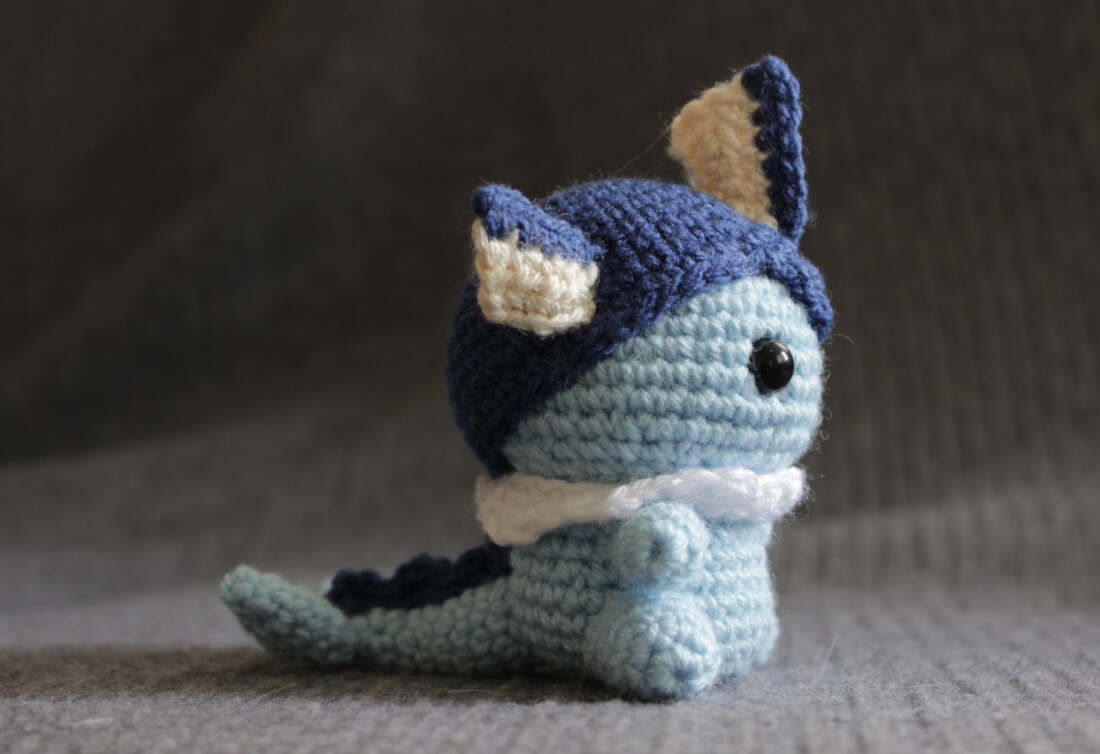
Vaporeon | Eevee | Flareon | Umbreon | Espeon | Leafeon | Glaceon | Sylveon
You can also check out my other Pokemon crochet patterns here.