
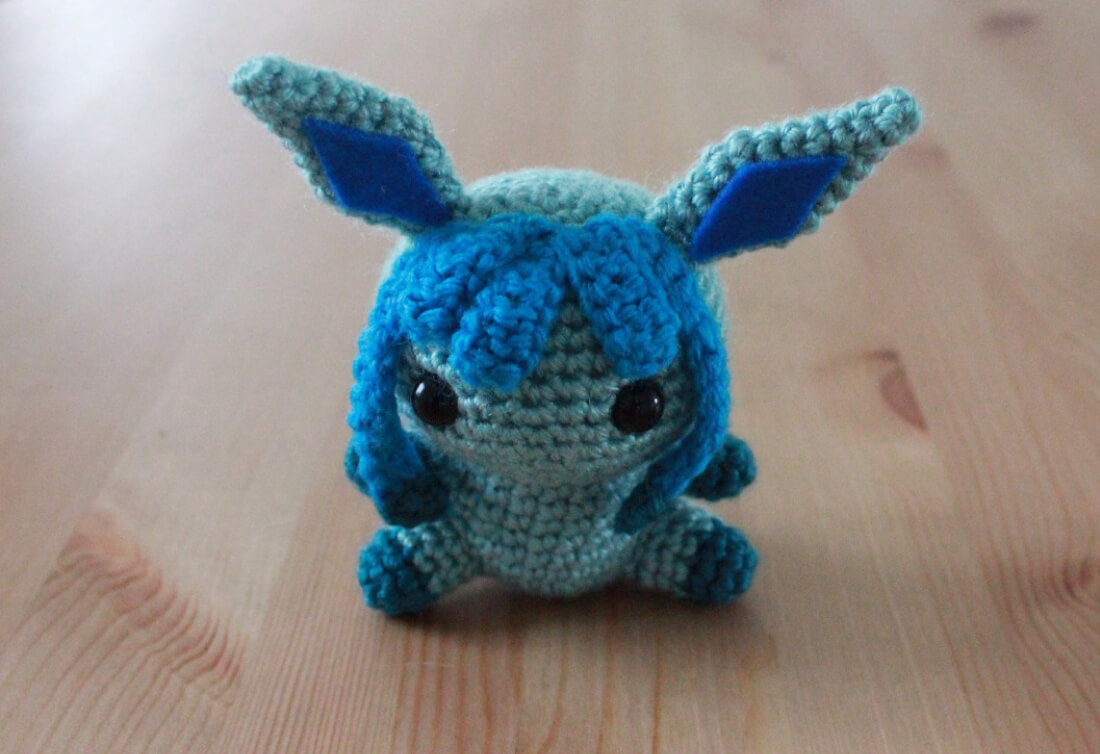
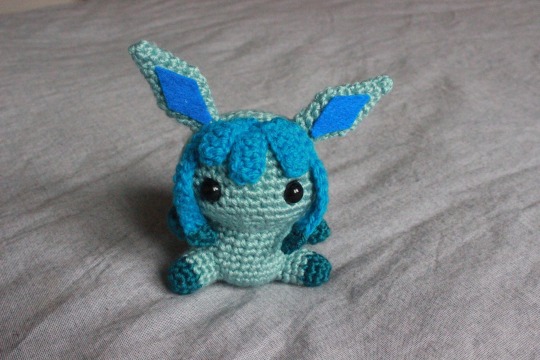
Continuing with the Eeveelution series, today we’ve got Glaceon on the menu! Glaceon has such an interesting colour palette, and some fun pointy ears and tail to work out. I hope you like what I’ve done. Without further ado, here’s the Glaceon crochet pattern!
You can purchase and ad-free PDF of this pattern over on my Ravelry or Etsy, and if you do a huge thank-you in advance for your wonderful support! You can also find a diy crochet kit on my Etsy which has all the materials you need to make your own!
Materials you’ll need
- 3.00mm crochet hook
- 2 x 10mm safety eyes
- Pale aqua 8 ply yarn
- Teal 8 ply yarn
- Blue 8 ply yarn
- Teal felt
I found the colouring really tricky for this one. In a few pictures it looks like a very pale blue, but sometimes it’s got a hint of green as well. It’s up to you! I’ve labelled the colours “Pale Aqua” for the body, “Teal” for the feet, tail end and body spots, and “Blue” for the fringe/bangs.
Quick reference for beginners
Check out some of the below tutorials if you get stuck on any of the stitches or techniques
- How to read patterns
- Magic ring
- Single crochet
- Increase
- Decrease
- Chain
- Half double crochet
- Double crochet
- How to change colours
- Attaching amigurumi limbs
If you get stuck anywhere else, check out the FAQ.
Glaceon crochet pattern
HEAD
1. (in Pale Aqua) MR 6 (6)
2. [ inc ]x 6 (12)
3. [ inc, sc ]x 6 (18)
4. sc, [ inc, sc 2 ]x 5, inc, sc (24)
5. [ inc, sc 3 ]x 6 (30)
6. sc 2, [ inc, sc 4 ]x 5, inc, sc 2 (36)
7-10. sc 36 (36)
11. [ inc, sc 5 ]x 6 (42)
12-13. sc 42 (42)
14. [ dec, sc 5 ]x 6 (36)
15. sc 2, [ dec, sc 4 ]x 5, dec, sc 2 (30)
16. [ dec, sc 3 ]x 6 (24)
Finish off, leaving a tail long enough to attach to the body later. Insert the safety eyes between rows 11 and 12, with approximately 7 or 8 stitches between them.
BODY
1. (in Pale Aqua) MR 6 (6)
2. [ inc ]x 6 (12)
3. [ inc, sc ]x 6 (18)
4. sc, [ inc, sc 2 ]x 5, inc, sc (24)
5. [ inc, sc 3 ]x 6 (30)
6-8. sc 30 (30)
9. [ dec, sc 3 ]x 6 (24)
10-12. sc 24 (24)
Finish off. No tail necessary.
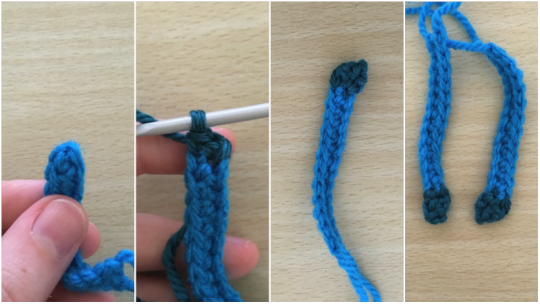
FRINGE/BANGS
Short (make 3)
1. (in Blue) ch 6 (6)
2. ch 2, turn, dc 6 (6)
Long (make 2)
1. (in Blue) ch 12 (12)
2. ch 1, turn, sc 12 (12)
Finish off, leaving a tail long enough to attach to the head later.
For the long bangs, we’re also going to take some teal yarn and pick up 2 stitches at the end of the piece. See the pictures below. This is to add that teal tip. You could also use teal felt cut into a diamond shape for a more accurate shape.
LEG (make 2)
1. (in Teal) MR 6 (6)
2. [ inc, sc ]x 3 (9)
3. sc 9 (9)
4-6. (in Pale Aqua) sc 9 (9)
Finish off, leaving a tail long enough to attach to the body later.
ARM (make 2)
1. (in Teal) MR 6 (6)
2. [ inc, sc 2 ]x 2 (8)
3. sc 8 (8)
4. (in Pale Aqua) sc 8 (8)
5. dec, sc 6, (7)
Finish off, leaving a tail long enough to attach to the body later.
TAIL
1. (in Pale Aqua) MR 6 (6)
2. sc 6 (6)
3. [ inc, sc ]x 3 (9)
4. sc 9 (9)
5. [ inc, sc 2 ]x 3 (12)
6. [ inc, sc 3 ]x 3 (15)
7. [ dec, sc 3 ]x 3 (12)
8. [ dec, sc 2 ]x 3 (9)
9-10. sc 9 (9)
11. [ dec, sc ]x 3 (6)
12-13. sc 6 (6)
Finish off, leaving a tail long enough to attach to the body later. I find this piece tends to curve a lot, so if you’re having difficulty with that as well, try ironing it to help it lay flat.
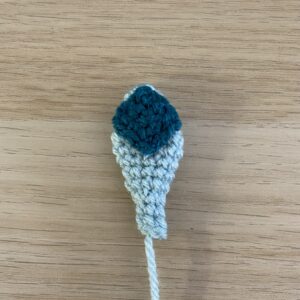
Tail End
1. (in Teal) ch 4 (4)
2-4. ch 1, turn, sc 4 (4)
Finish off, leaving tail long enough to attach to the main tail. Then, taking this tail, position it at the end of the main tail, like pictured below, to create the darker diamond shaped tip. If you have colour of felt that’s similar to the teal yarn you’re using, you could also cut a diamond shape out of that and glue it in place – I couldn’t find a colour that matched.

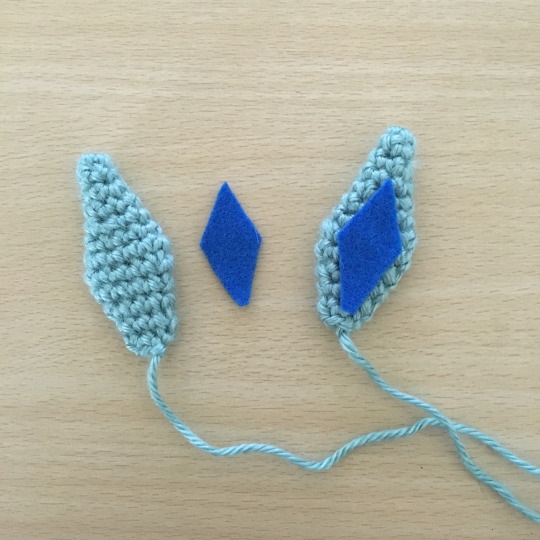
EARS (make 2)
1. (in Pale Aqua) MR 4 (4)
2. sc 4 (4)
3. [ inc, sc ]x 2 (6)
4. sc 6 (6)
5. [ inc, sc 2 ]x 2 (8)
6. sc 8 (8)
7. [ inc, sc 3 ]x 2 (10)
8. [ inc, sc 4 ]x 2 (12)
9. [ dec, sc 4 ]x 2 (10)
10. [ dec, sc 3 ]x 2 (8)
11. sc 8 (8)
12. [ dec, sc 2 ]x 2 (6)
Finish off, leaving a tail long enough to attach to the head later.
Now take a piece of teal/blue felt and cut out two diamond-like pieces to be the inside of the ear. I’m not 100% sure what colour the inner ear is – on some pictures it’s blue, on some it matches the teal of Glaceon’s feet – up to you! I went with a bluer felt, since I had that colour available. Glue these pieces in place on the ear.
Putting it all together
That is all of the crochet work done. Now it’s just assembly and details!
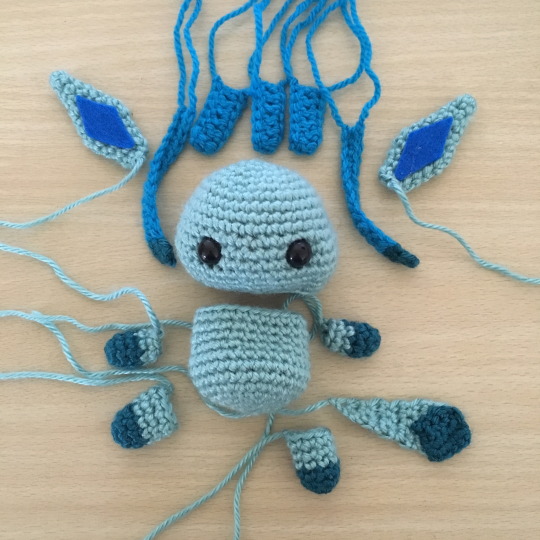
Stuff the head, body and legs. The arms, ears and tail don’t require stuffing. I like to pin all of the pieces together to get an idea of placement before I attach them.
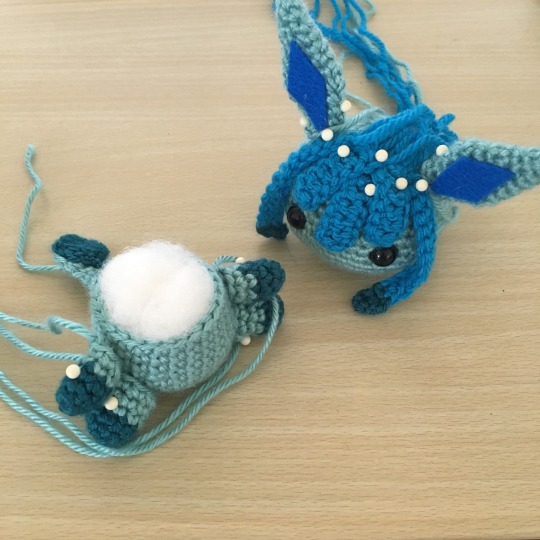
I usually attach them in this order: legs, tail, arm, then the head, ears, short bangs, long bangs. I find the ears and bangs easier to centre after the head has already been attached.
For the bangs, I find it easiest to attach one of the short ones in the middle first, and then the other two short ones either side. Then finally the longer pieces either side. This just makes it a little easier to get them centered.
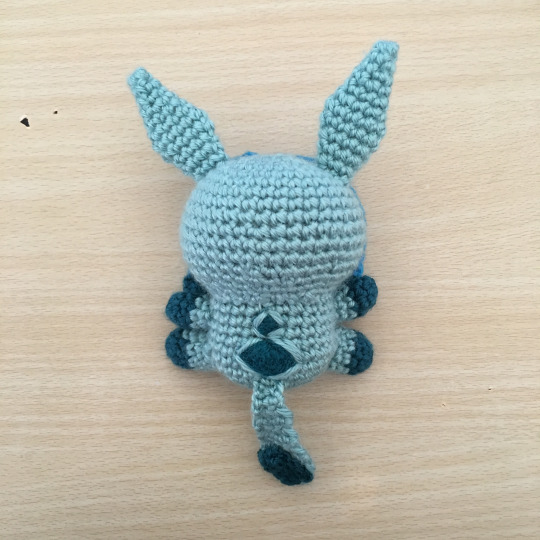
Now that Glaceon is assembled there’s one final step! The two teal diamond shapes on it’s back. I usually brush out yarn and needle felt the shapes in place – or you could cut out teal felt for the two diamond shapes, one is slightly smaller and higher, and the other is larger and goes lower on the back. It can be tricky to get a clean diamond shape when you’re new to needle felting – which I certainly am. I went around the edges with a length of yarn the same colour as the body to tidy and sharpen the shape.
Done!
Other Pokemon crochet patterns
I have patterns for the complete Eeveelution collection available, follow the links below to easily jump to the next one:
Vaporeon | Jolteon | Flareon | Umbreon | Espeon | Leafeon | Eevee | Sylveon
You can also check out my other Pokemon crochet patterns here.


cupcake
November 27, 2021 at 11:22 pmim actually really confused about the tail… it looks flat in the pictures but you crotchet it in rounds?
53stitches
January 4, 2022 at 5:22 pmHello! Yes, the pictures are from the original version of this pattern, where I made the tail as a flat piece. However, I decided I didn’t like that it didn’t quite match the rest of the doll and later updated the design. I didn’t take photos of the progress at that point though – so the version written down is the correct pattern and I need to get the photos updated. I hope that helps!