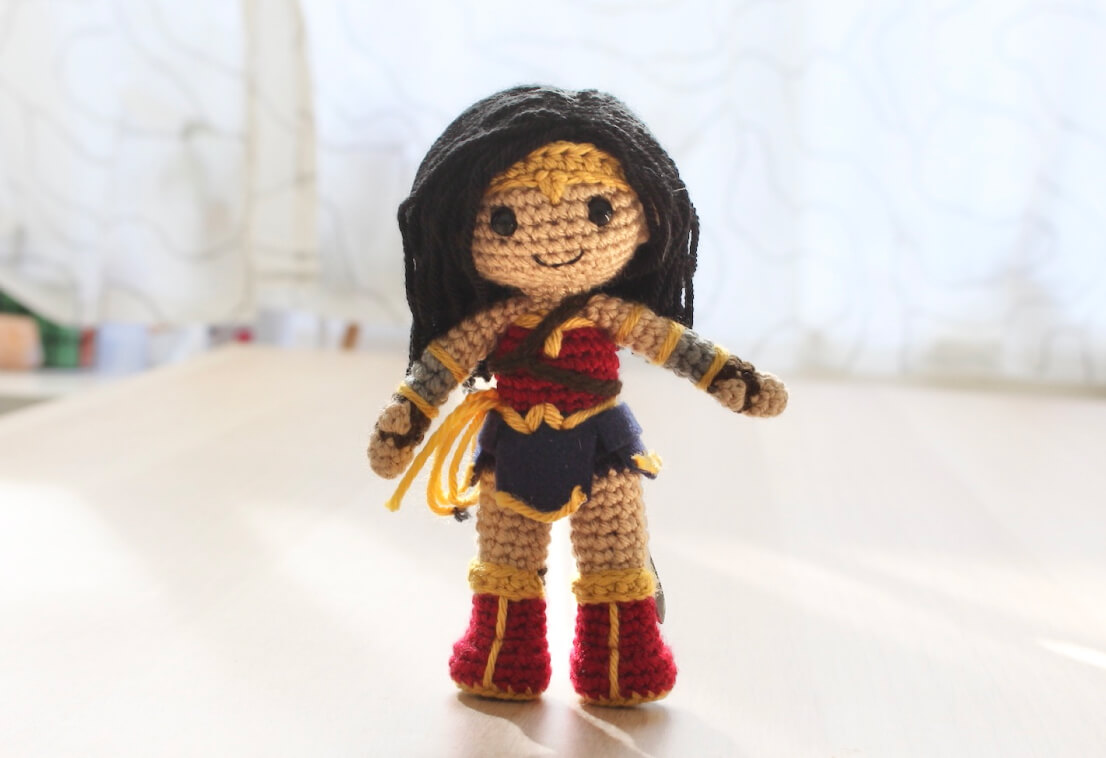
I’ve made a few different versions of Wonder Woman amigurumi over the years. She’s so much fun to put together and a long time favourite character of mine. One of the things I love about comic books and the movie iterations we have a glut of these days is seeing the wonderful new costume variations. The Wonder Woman movie was no exception – I ended up making a real life version of it for a party, but of course that means I have to have an adorable crochet version too. This free Wonder Woman amigurumi crochet pattern will walk you through the steps to make your very own Diana of Themyscira, inspired by her movie costume!
You can purchase and ad-free printable PDF of this pattern over on my Ravelry, and if you do a huge thank-you in advance for your wonderful support!
What materials will you need?
Note some of the links on this site are affiliate links. This means I get paid a small fee if you decide to purchase anything at no extra cost to you. I will only ever link products I happily use myself.
- 3.00 mm crochet hook
- Yarn needle
- Scissors
- Stitch markers
- Polyester fiberfill or some other stuffing material
- Beige yarn (Stylecraft Special DK in 1710 Stone)
- Blue yarn (Stylecraft Special DK in 1854 French Navy)
- Red yarn (Stylecraft Special DK in 1123 Claret)
- Silver yarn (Stylecraft Special DK in 1805 Warm Grey)
- Brown yarn (Stylecraft Special DK in 1054 Walnut)
- Gold yarn (Stylecraft Special DK in 1856 Dandelion)
- Black yarn (Stylecraft Special DK in 1002 Black)
- Blue felt
- Fabric glue
- 2 x 8.00mm safety eyes
There are affiliate links in the brackets next to the colours for the yarn I recommend for this project, but any DK weight yarn will do!
Quick reference for beginners
Check out some of the below tutorials if you get stuck on any of the stitches or techniques
- How to read patterns
- Magic ring
- Single crochet
- Increase
- Decrease
- How to change colours
- Attaching amigurumi limbs
- Half double crochet
- Chain
- Back loop only
- Front loop only
- Popcorn stitch
If you get stuck anywhere else, check out the FAQ or the tutorials page.
Wonder Woman free crochet pattern
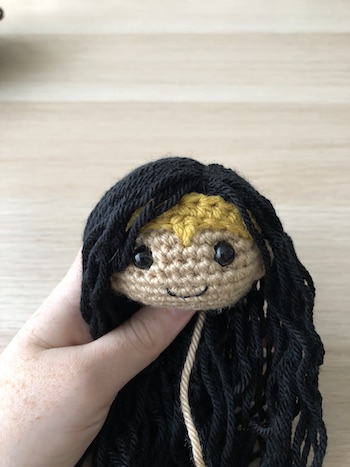
Head
row 1. (in Beige) MR 6 (6)
row 2. [ inc ]x 6 (12)
row 3. [ inc, sc ]x 6 (18)
row 4. sc, inc, [ sc 2, inc ]x 5, sc (24)
row 5. [ inc, sc 3 ]x 6 (30)
row 6. sc 2, inc, [ sc 4, inc ]x 5, sc 2 (36)
rows 7-12. sc 36 (36)
row 13. sc 2, dec, [ sc 4, dec ]x 5, sc 2 (30)
row 14. [ dec, sc 3 ]x 6 (24)
row 15. sc, dec, [ sc 2, dec ]x 5, sc (18)
Finish off, leaving a tail approximately 20cm or 7.5 inches. Insert your safety eyes between rows 9 and 10, with approximately 5 stitches between them. Stuff firmly.
Hair Cap
row 1. (in Black) MR 6 (6)
row 2. [ inc ]x 6 (12)
row 3. [ inc, sc ]x 6 (18)
row 4. sc, inc, [ sc 2, inc ]x 5, sc (24)
row 5. [ inc, sc 3 ]x 6 (30)
row 6. sc 2, inc, [ sc 4, inc ]x 5, sc 2 (36)
rows 7-12. sc 36 (36)
Finish off, leaving a tail approximately 20cm or 7.5 inches. Use the tail to attach the wig cap to the stuffed head. I don’t go through every stitch of the wig cap, it only needs to be secured in 4 or 5 places to hold properly.
TIP Depending on the yarn you use for the head and hair, you may need more than 12 rows, or less than 12 rows to find the right fit for the wig cap. Adjust as needed.
Ears (make 2)
row 1. (in Beige) ch 3 (3)
row 2. ch 1, turn, (starting in 2nd chain from hook) sl st, sc, sl st (3)
Finish off, leaving a tail approximately 12cm or 5 inches.
Next I use pins to position the ears, and then use the tails to attach them. I try to give them a little curve, like real ears would have. The top of the ear should be in line with the middle of the eye, and about 5 stitches away from the eye, or wherever it meets the edge of the wig cap.
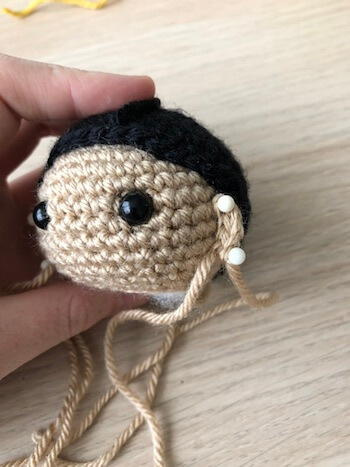
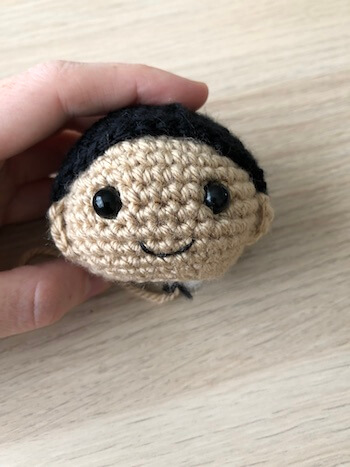
Embroider the mouth using a few strands of embroidery thread, or cross-stitch thread. You can also use yarn to sew on the mouth, though it makes it a bit thicker.
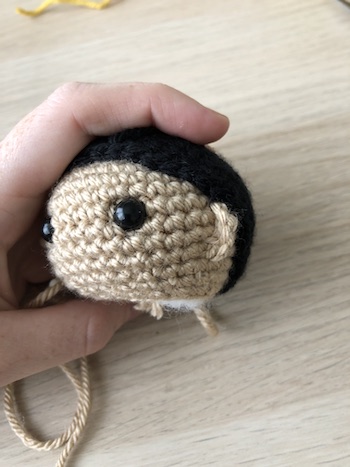
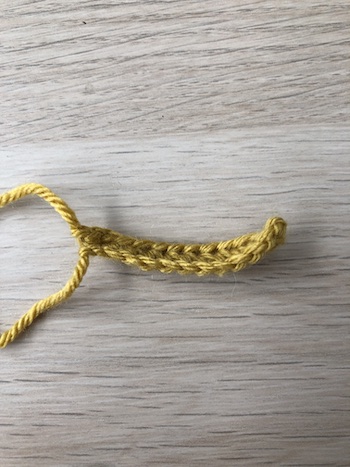
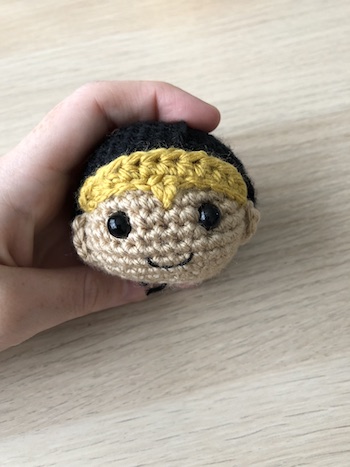
Tiara
row 1. (in Gold) ch 11 (11)
row 2. ch 1, turn, (starting in 2nd chain from hook) sc 2, hdc 7, sc 2 (11)
Pin the tiara into place on the head. It should go from ear to ear. Use the tails to secure in place. Then, still using the tail, embroider a “v” in the center.
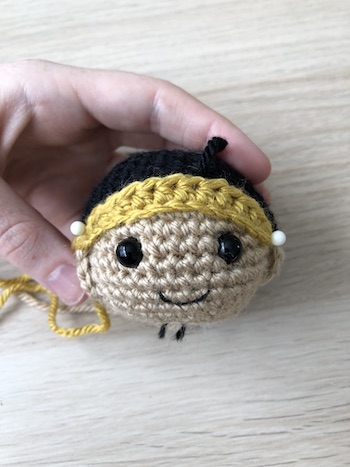
Hair
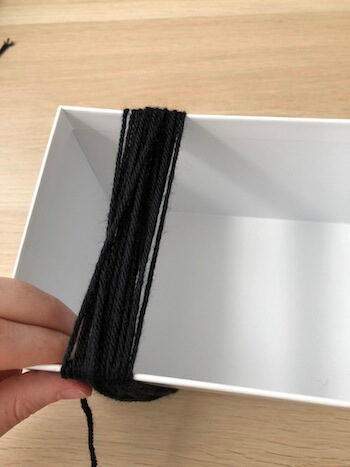
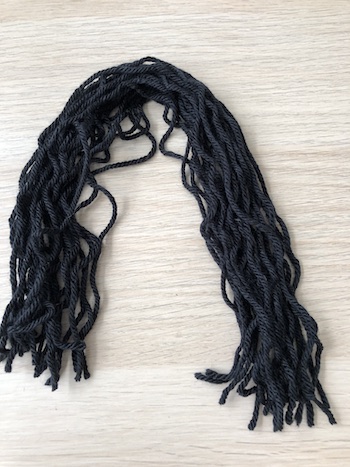
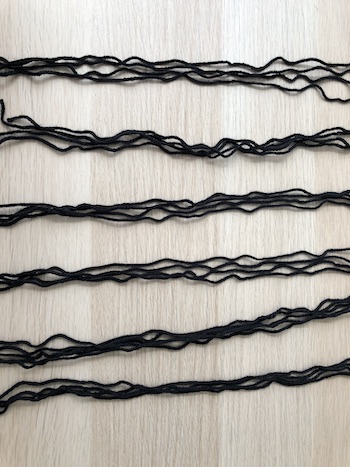
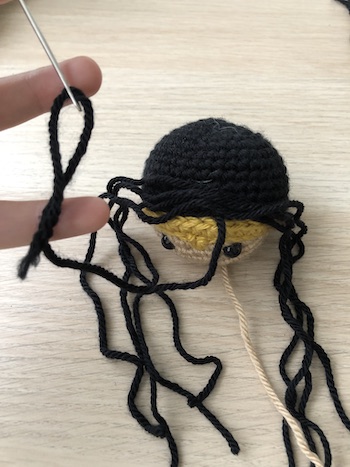
To make the hair we’ll want to create ‘bunches’ of yarn. Each bunch will have 5 strands of yarn. The length of the yarn strands should be about twice as long as you want the hair to be – I usually make my pieces longer, rather than shorter, because I can always give her a haircut at the end if needed.
An easy way to quickly create these bunches is to get a piece of cardboard or a box (I’ve used a box without a lid in the image), or something similar, and wrap the yarn around it, then cut it straight across at any point and all strands will be the same length.
Take a length of black yarn on a needle and bring it up through the neck to where you want the part to be. Then, for the first bunch, place the center at the crown of the head, then, taking that yarn on the needle, go back into the wig cap over the bunch. Pull it tight to hold the bunch in place.
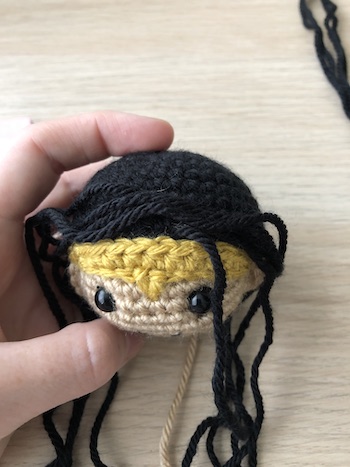
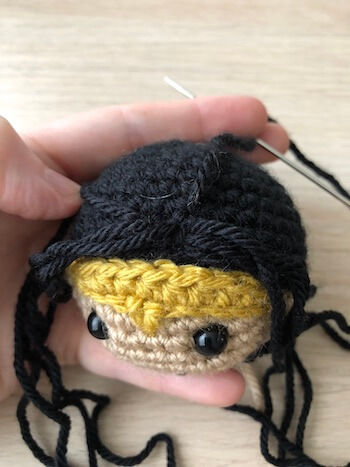
The next bunches will go up against the previous one, so that you’re building the hair up, embroidering a hairline all the way down the head until all the bunches are gone and the head is covered.
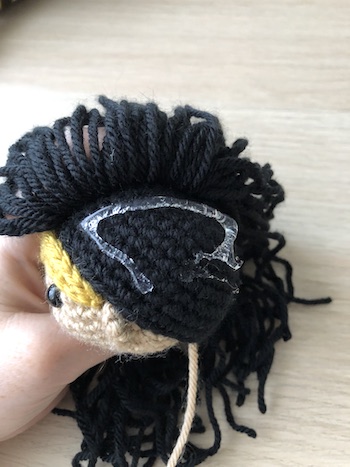
To help secure the hair in place and to help it sit a little flatter against the head, I take fabric glue and create a triangle shape right at the hairline and in line with the ear. Flatten the hair against this so that it sits nicely.
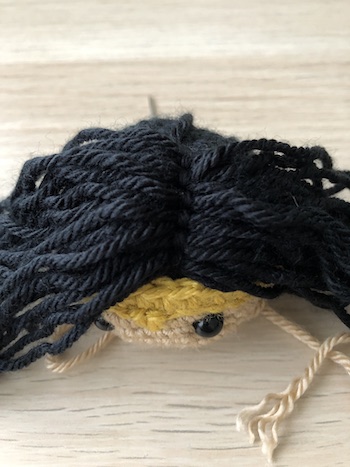
Then you’re done with the hair!
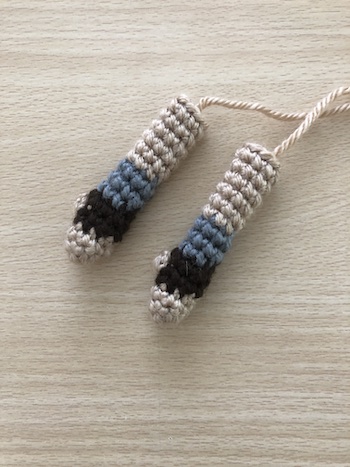
Arms (make 2)
row 1. (in Beige) MR 6 (6)
row 2. [ inc, sc 2 ]x 2 (8)
row 3. sc 8 (8)
row 4. (change to Brown) sc 8 (8)
row 5. (continue in Brown) sc 3, (change to Beige) 4sc popcorn, (change to Brown) sc 4 (8)
row 6. (continue in Brown) sc 8 (8)
rows 7-9. (change to Silver) sc 8 (8) 10-15. (change to Beige) sc 8 (8)
The arms are so small there’s no need for stuffing. Leave a tail approximately 20cm or 7.5 inches long and finish off.
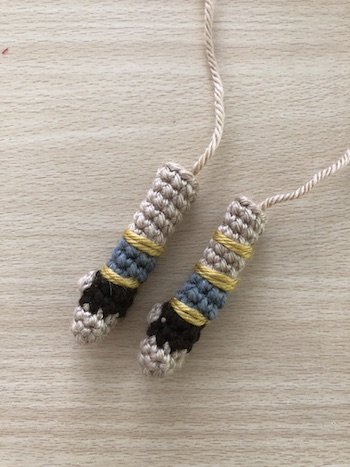
Take a length of gold yarn, and embroider detailing around the guards (i.e. the silver rows). On the left arm, you also want to embroider the arm brace, between rows 12 & 13.
TIP The popcorn stitch in the arm is the thumb. If it’s a bit tricky or you prefer straight arms, simply replace it with a sc.
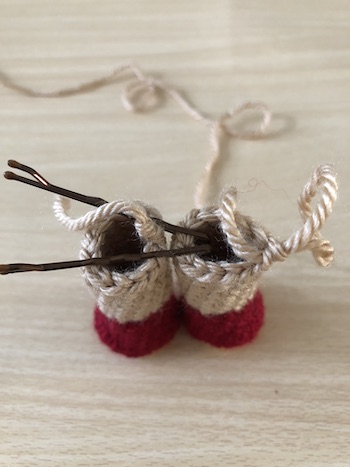
Legs (make 2)
row 1. (in Gold) MR 6 (6)
row 2. [ inc ]x 6 (12)
row 3. [ inc, sc ]x 6 (18)
row 4. (change to Red) BLO sc 18 (18)
rows 5-7. sc 18 (18)
row 8. sc 2, dec 7, sc 2 (11)
rows 9-11. sc 11 (11)
rows 12-18. (change to Beige) sc 11 (11)
row 19. inc, sc 10 (12)
Finish off both legs.
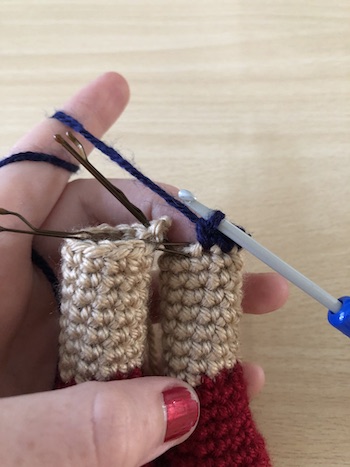
Joining the legs
Take the two legs and position them so that both feet are pointing correctly. I like to place two bobby pins across the stitches where the legs will join to make it a little easier to keep track of.
Position both legs. Make sure the feet are pointing forwards, and the start of the round is at the back to avoid visible colour changes.
- Insert bobby pins to mark the crossover stitches from one leg to the other.
- sc as normal until you reach the first bobby pin. The next stitch will be in the same legyou are currently working on. The one after will be on the other leg.
- sc as normal around. Do the same thing when you reach the second bobby pin. Yourwork should look like the third picture below when finished. You’ve just completed the first round of the body.
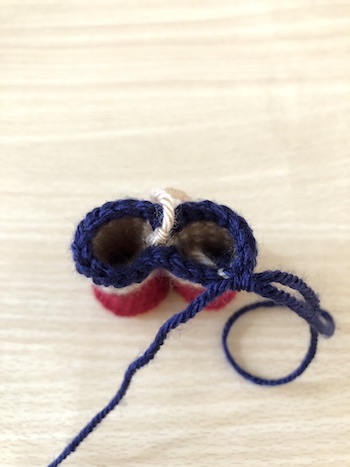
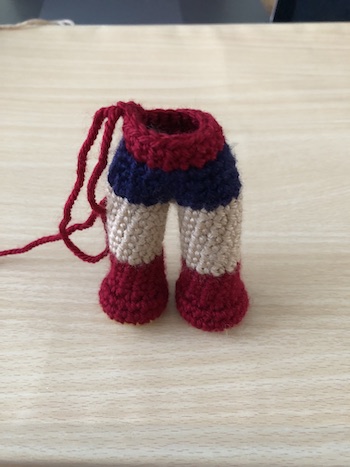
Body
rows 1-2. (in Dark Blue) sc 24 (24)
row 3. sc 3, [ dec, sc 6 ]x 2, dec, sc 3 (21)
row 4. [ dec, sc 5 ]x 3 (18)
row 5. (change to Red) FLO sc 18 (18)
row 6. sc 18 (18)
row 7. [ inc, sc 2 ]x 6 (24)
row 8. sc 24 (24)
(stuff the legs before beginning decreases)
row 9. sc 3, [ dec, sc 6 ]x 2, dec, sc 3 (21)
row 10. [ dec, sc 5 ]x 3 (18)
row 11. (change to Beige) sc 2, [ dec, sc 2 ]x 2, dec, sc 2 (15)
row 12. [ dec, sc 3 ]x 3 (12)
row 13. sc 12 (12)
row 14. [ sc, inc ]x 6 (18)
Finish off and stuff the rest of the body.
TIP Stuff the legs before beginning the decreases. Make sure it’s not stuffed too much. You should be able to press the bottom of the feet in and have the doll stand.
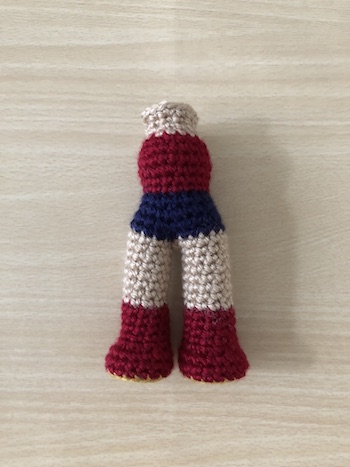
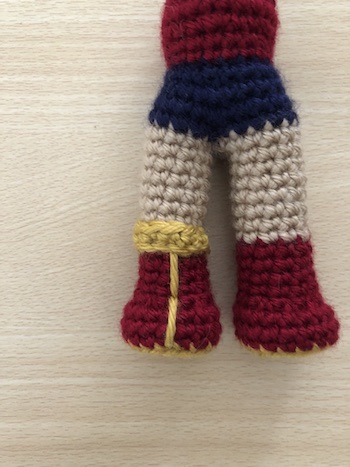
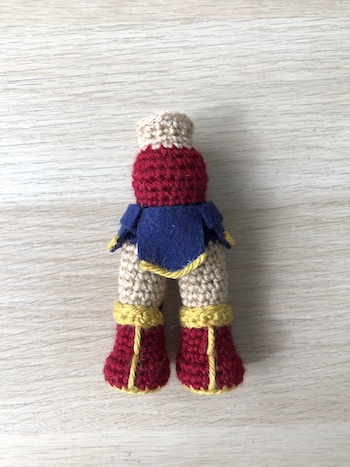
Knee Guards (make 2)
row 1. (in Gold) sc 8 (8)
row 2. ch 1, turn, (starting in second chain from hook) hdc 8 (8)
The knee guards go at the front of the leg. Using the tails, sew the guards in place so that the center of the guard is in the center of the front of the leg.
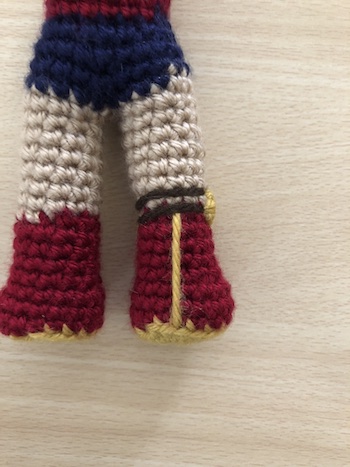
Take a length of brown yarn, and embroider the knee guard straps at the back of the knee, in line with the top and bottom of the knee guard.
Take a length of gold yarn and embroider a line straight down the center of the boot, at the back and at the front. At the front, I usually split this line into two where the boot starts to curve so that it sits a little flatter.
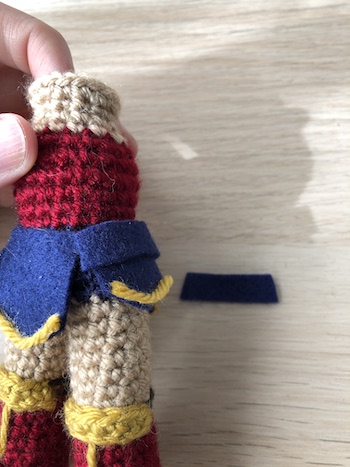
Skirt
Wonder Woman’s skirt is made of 6 pieces of dark blue felt. First, cut out the triangular pieces – there are two smaller pieces for the side, and two larger pieces for the front and back. To create the gold trim for these pieces, we’re going to take a length of gold yarn and glue it along the triangular edge.
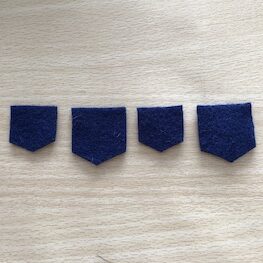
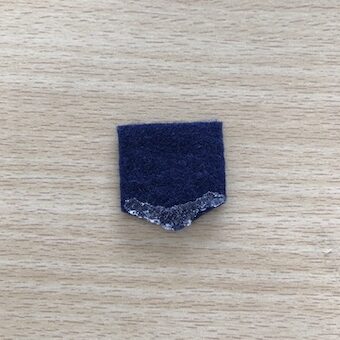
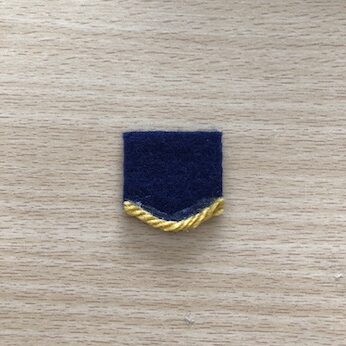
Alternatively, you could also achieve the same look with gold fabric paint or a separate piece of felt.
To attach the pieces to the body, I like to pin it in place and then remove one pin and peel back the edge to glue it. I use Helmar’s Fabric Glue, which I’ve found to be really long-lasting and which seals really quickly. If you don’t have fabric glue that’s as strong, you could also sew the skirt pieces in place along the straight edge, near the waist.
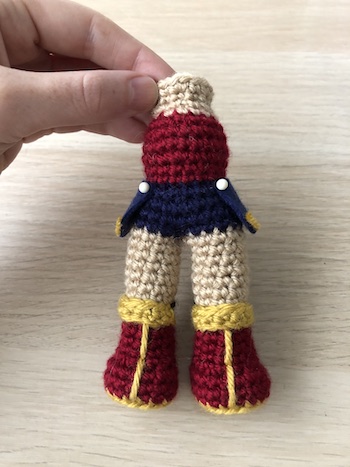

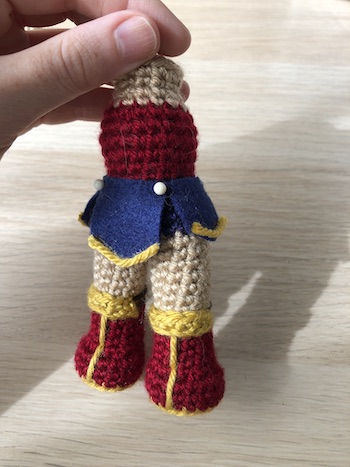
I glue the side pieces first, followed by the front and back pieces.
Once that’s done, you want to cut two rectangular (or very slight trapezoidal shapes) that are the same width as the side pieces. These go on top of the side pieces to create the layered effect her skirt has.

Assembly and details
Next, take a length of gold yarn and embroider the band around the waist:
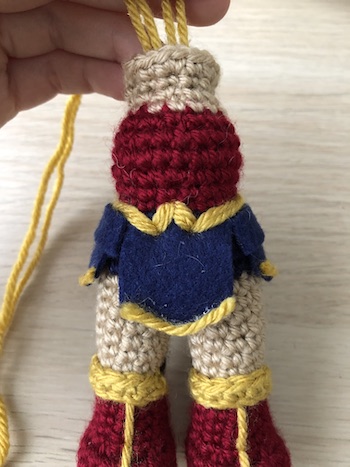
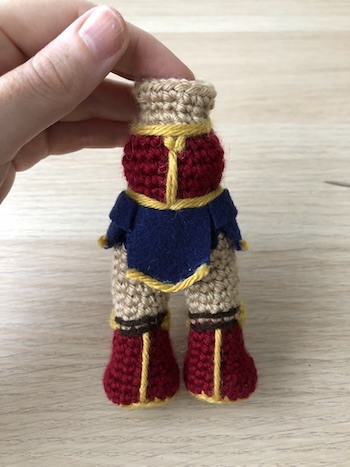
Attach the arms. I like to pin them in place to get an idea of where they should be placed, then they are attached as a flattened piece using the tail.


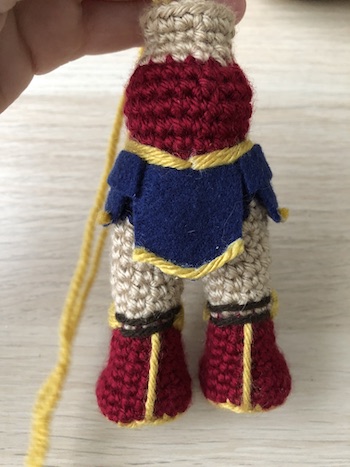
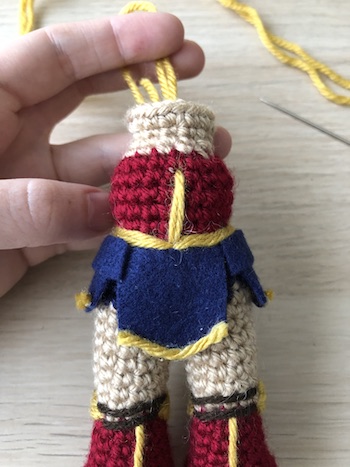
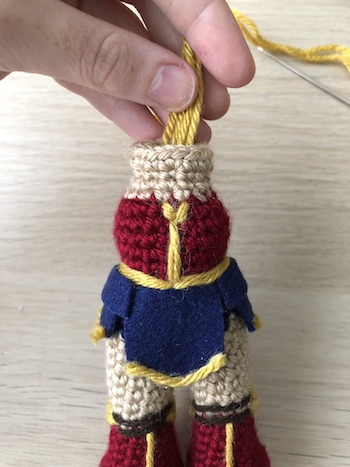
Now we’re going to complete the shield strap. The shield strap is just a regular chain, approximately 36 stitches long, but you may need it shorter or longer depending on your dolls size.
Shield Strap
row 1. (in Brown) ch 36 (36)
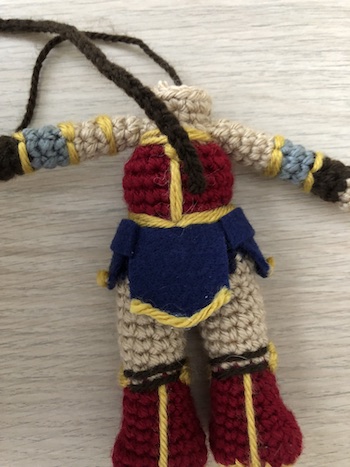
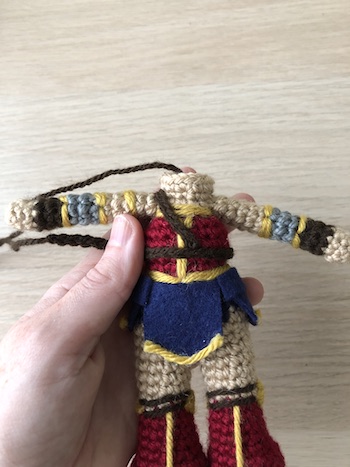
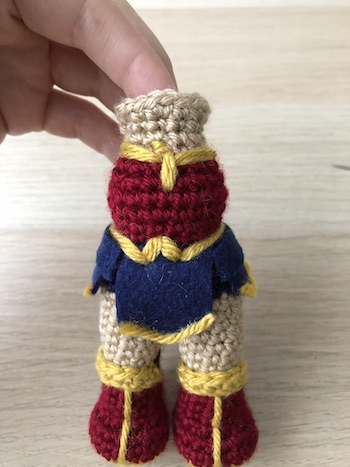
We want to wrap the strap around her body. Start at the back of the doll, at the bottom right of the line down the center (1). Go over the opposite shoulder, and then bring the strap diagonally across the front of the body to wrap around to the back again so it meets up and crosses over with that starting position (2). Keep going until it wraps around to the front of the body again, and it should finish in the center of that diagonal cross.
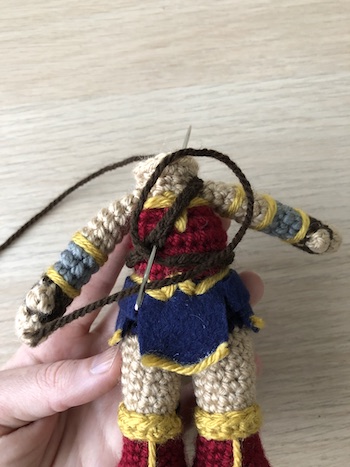
We’re basically wrapping the chain around the body 1 & 1/2 times and intersecting as we do. Use the tail of the strap to embroider it in place (3). I usually secure it where-ever it intersects (so once at the back and once at the front).
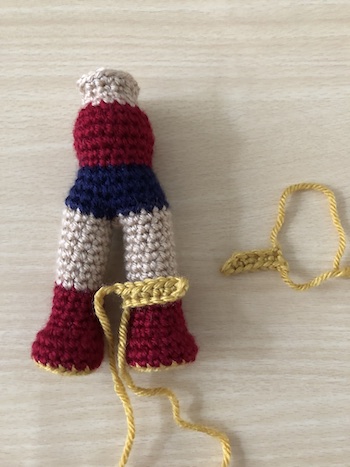
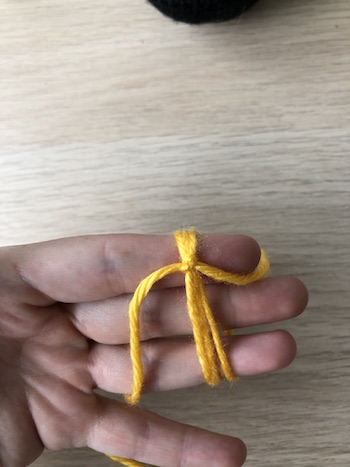
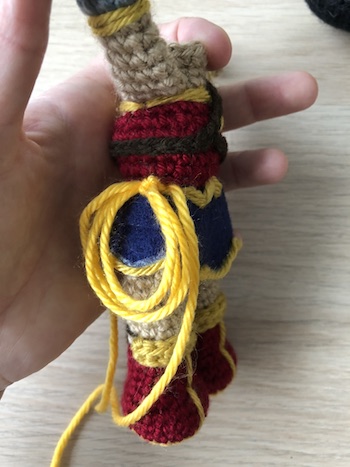
Make the lasso by looping a length of gold yarn twice, and then knotting it at the top so the loops don’t move. Attach it to the right-side hip. I usually glue it in place and then double secure it with a length of yarn in the same gold colour to make sure it stays.

Finally, attach the head. There should have been 18 stitches in the last round of the head and the body, so they match up evenly. Simply align the head, and whipstitch closed. Sometimes I get halfway and then realise the head is off-centre. That’s fine, just undo the stitches and move it right or left as needed.
And with that you’ve finished your Wonder Woman amigurumi crochet doll!

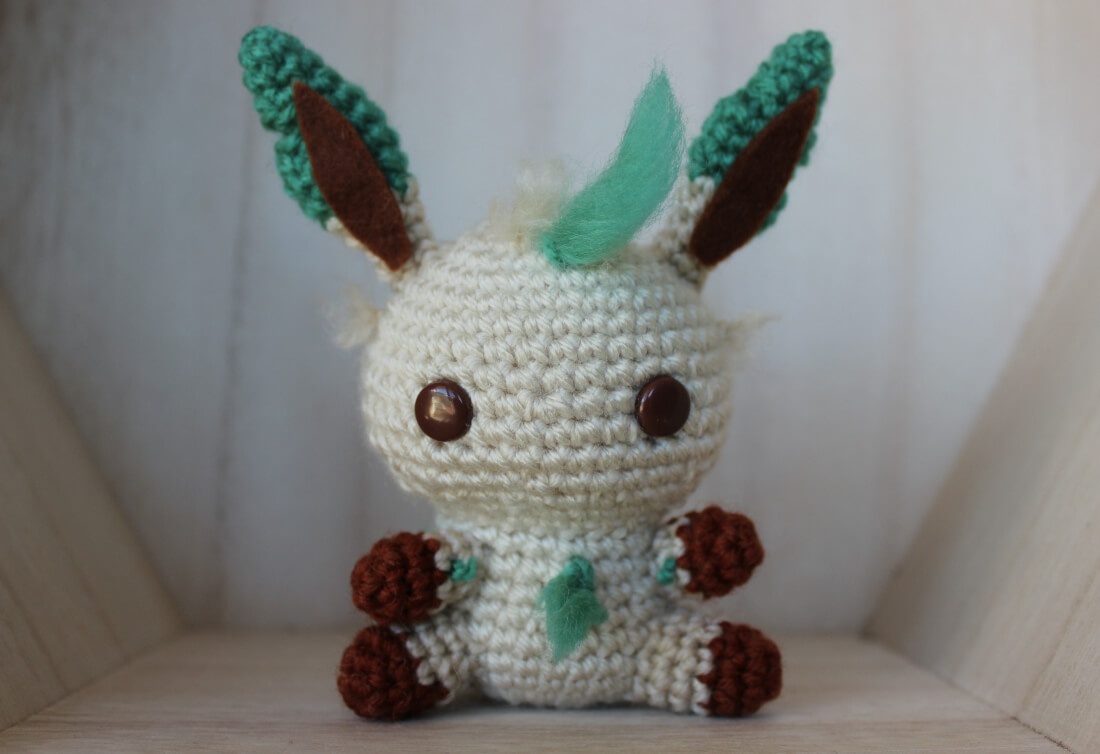
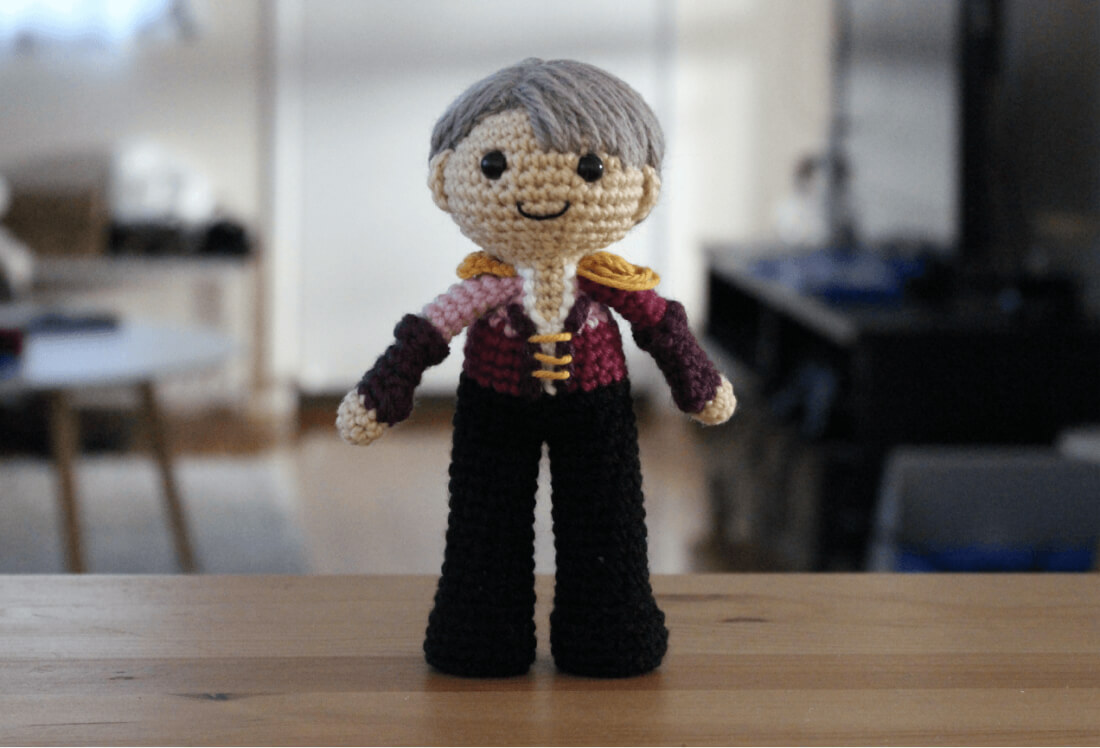
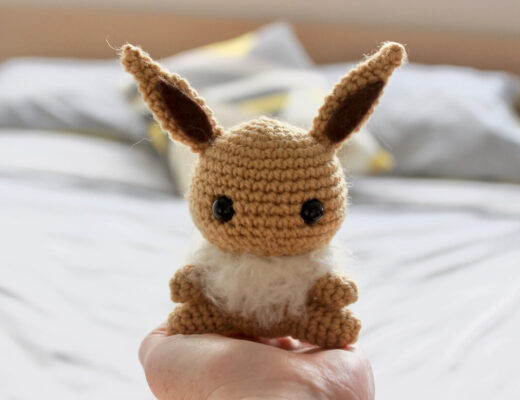
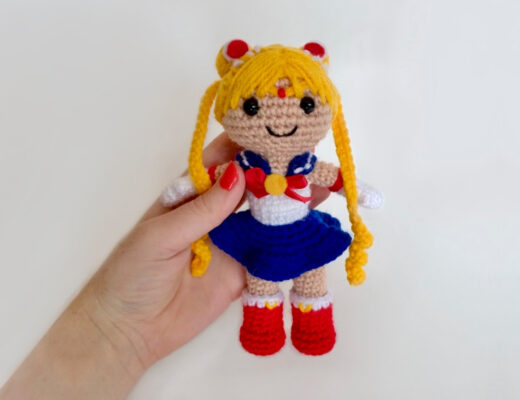
Other patterns in this series
If you make your own and you share on Instagram or Tumblr, don’t forget to tag @53stitches so I can check it out ☺️
For other DC characters to try out to keep Wonder Woman company, check out our DC comics category – we’ve got Batman, Superman and more on the way!