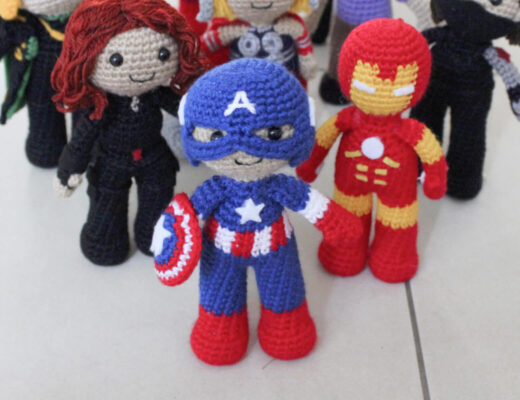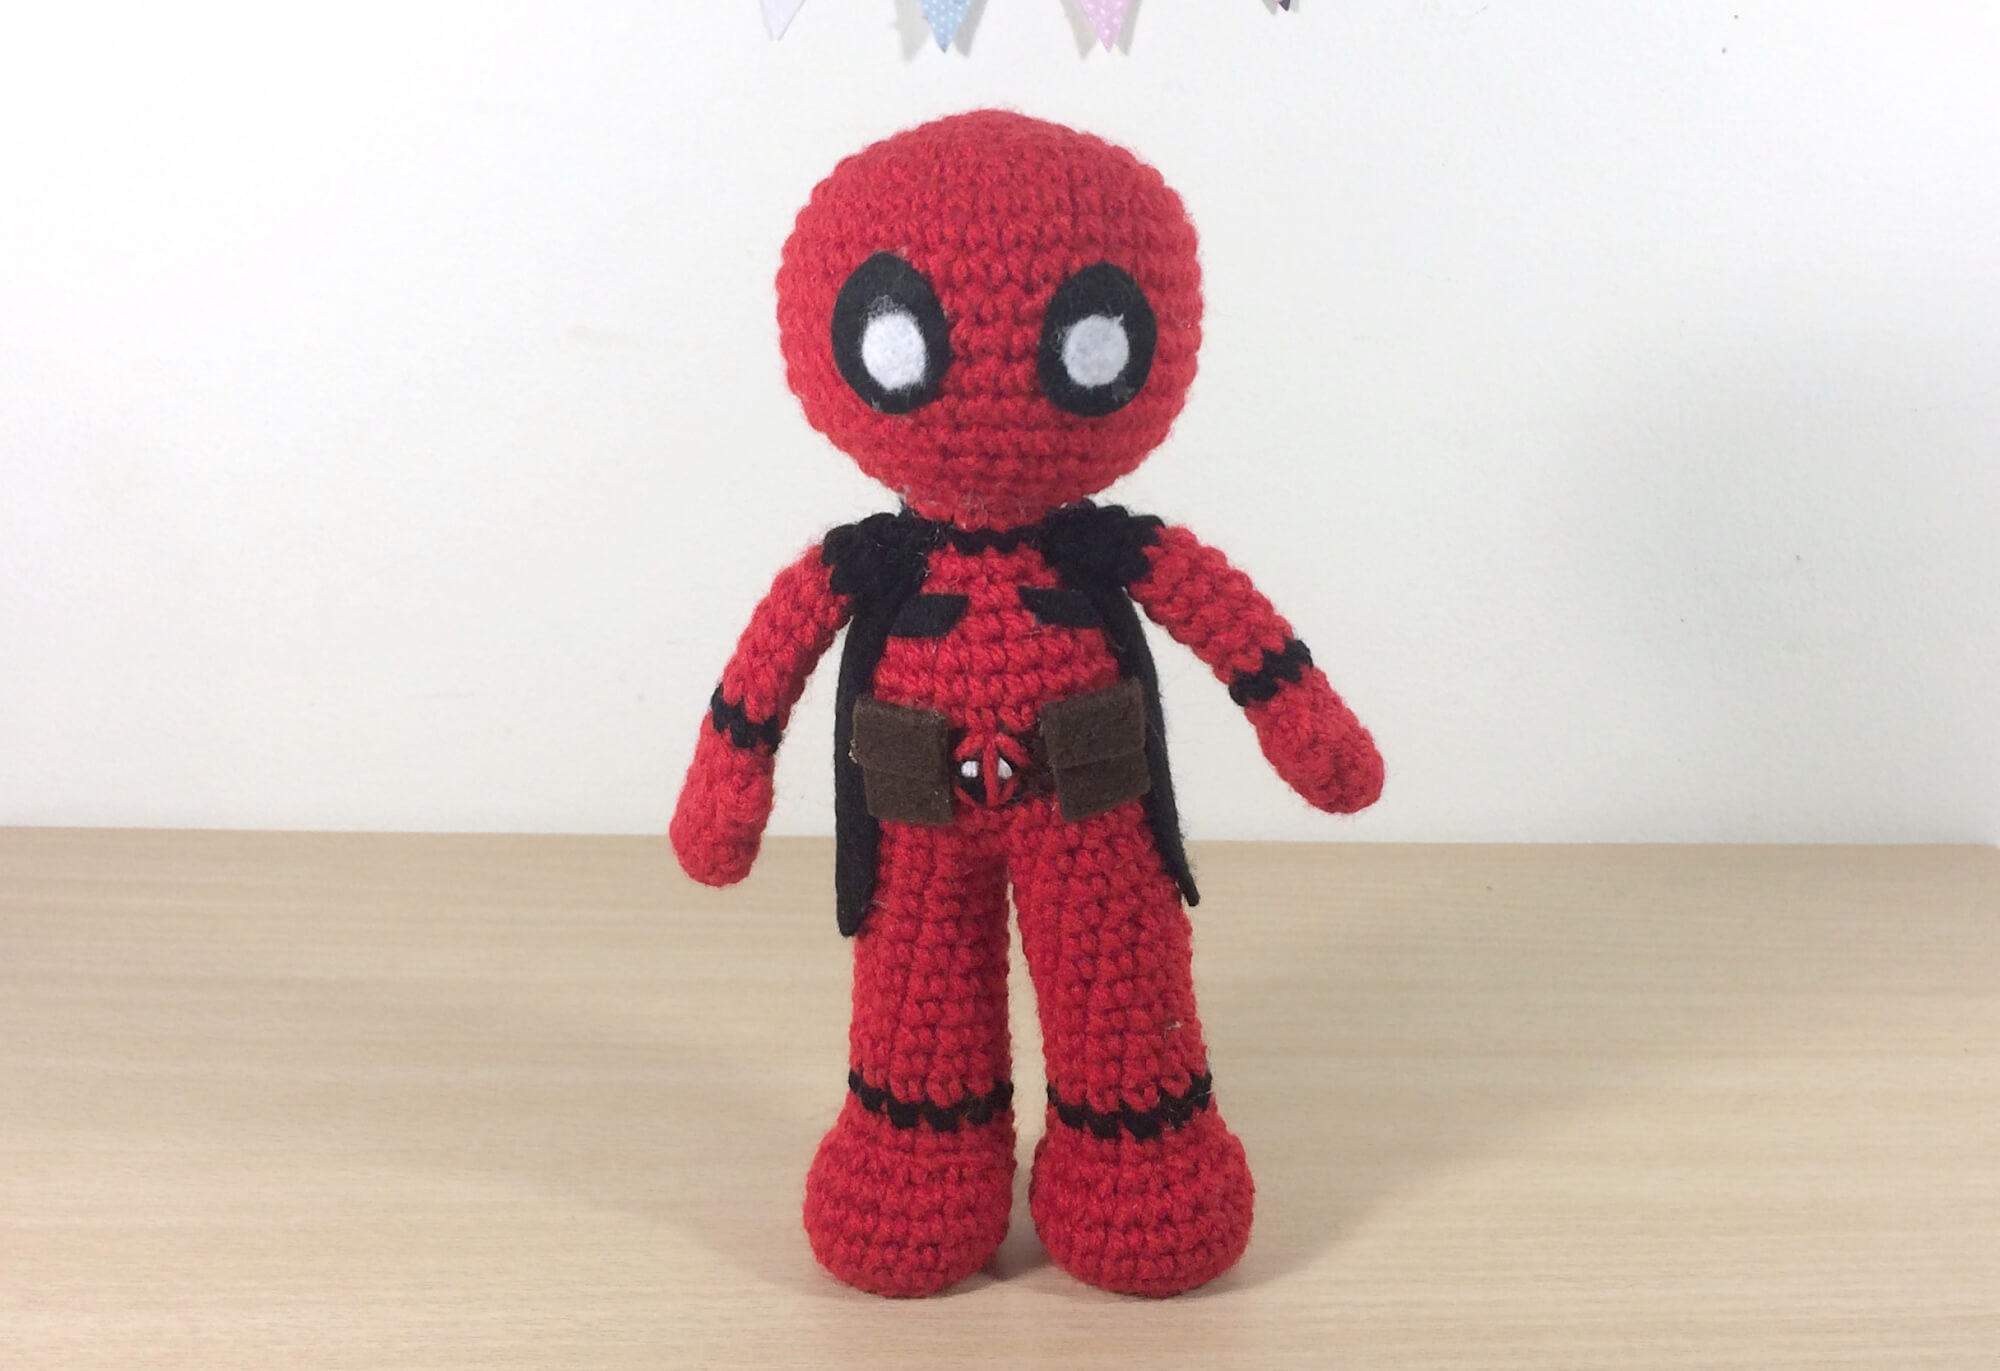
When I first started making crochet patterns, this Deadpool amigurumi design was one of my first and most popular. The photos have aged a little since he was first created, but the end result is still just as cute! There are a bunch of Marvel crochet patterns I’ve got in the collection that I’m slowly adding to the blog for free, so keep an eye out for more soon.
You can purchase a printable ad-free version of this pattern over on my Ravelry, and if you do a huge thank-you in advance for your wonderful support!
What materials will you need?
Note some of the links on this site are affiliate links. This means I get paid a small fee if you decide to purchase anything at no extra cost to you. I will only ever link products I happily use myself.
- Red yarn (Stylecraft Special DK in 1246 Lipstick)
- Brown yarn (Stylecraft Special DK in 1054 Walnut)
- Black yarn (Stylecraft Special DK in 1002 Black)
- White thread / yarn
- Black felt
- White felt
- Brown felt
- Fabric glue
- 3.0mm crochet hook
- Polyester filling
The yarn I use is an 8ply Australian brand with a guage of 22 stitches x 30 rows. This is equivalent to a DK yarn. When finished, your doll should be about 17.5 cm or 12 inches tall.
Quick reference for beginners
Check out some of the below tutorials if you get stuck on any of the stitches or techniques
- How to read patterns
- Magic ring
- Single crochet
- Increase
- Decrease
- How to change colours
- Attaching amigurumi limbs
- Back loop only
If you get stuck anywhere else, check out the FAQ.
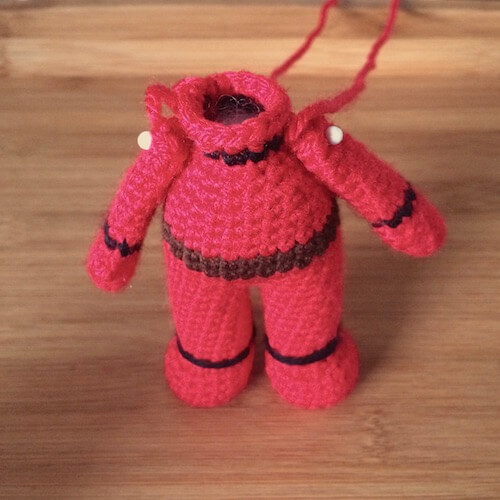
Deadpool plush amigurumi crochet pattern
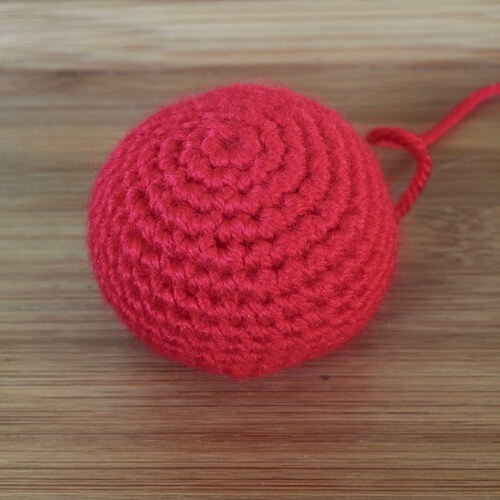
HEAD
row 1. (in Red) MR 6 (6)
row 2. [ inc ]x 6 (12)
row 3. [ inc, sc ]x 6 (18)
row 4. sc, inc, [ sc 2, inc ]x 5, sc (24)
row 5. [ inc, sc 3 ]x 6 (30)
row 6. sc 2, inc, [ sc 4, inc ]x 5, sc 2 (36)
rows 7-13. sc 36 (36)
row 14. sc 2, dec, [ sc 4, dec ]x 5, sc 2 (30)
row 15. [ dec, sc 3 ]x 6 (24)
row 16. sc, dec, [ sc 2, dec ]x 5, sc (18)
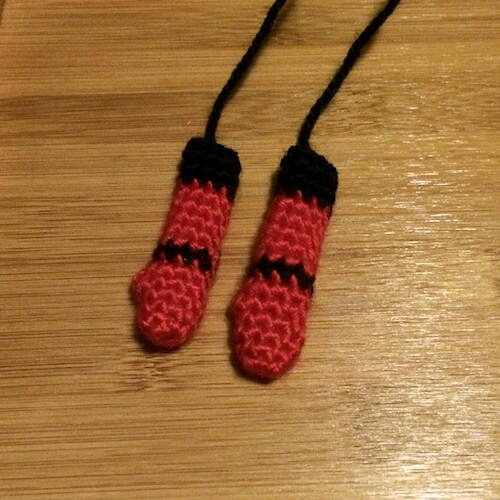
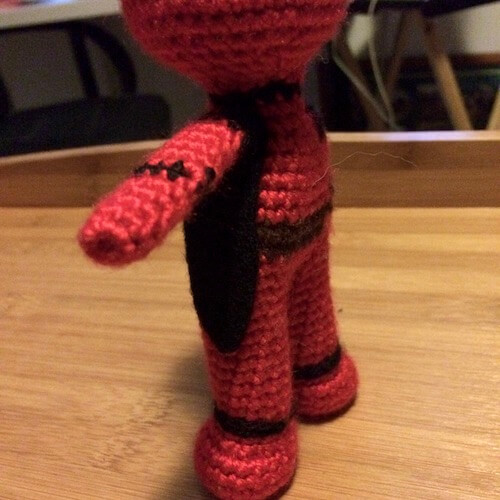
ARM (make 2)
row 1. (in Red) MR 6 (6)
row 2. [ inc, sc 2 ]x 2 (8)
rows 3-4. sc 8 (8)
row 5. sc 3, 4sc popcorn, sc 4 (8)
row 6. sc 8 (8)
row 7. (change to Black) sc 8 (8)
rows 8-12. (change to Red) sc 8 (8)
rows 13-15. (change to Black) sc 8 (8)
No need for stuffing, leave tail for sewing and finish off!
TIP The popcorn stitch in the arm is the thumb, if you prefer straight arms, simply replace the popcorn stitch with a sc.
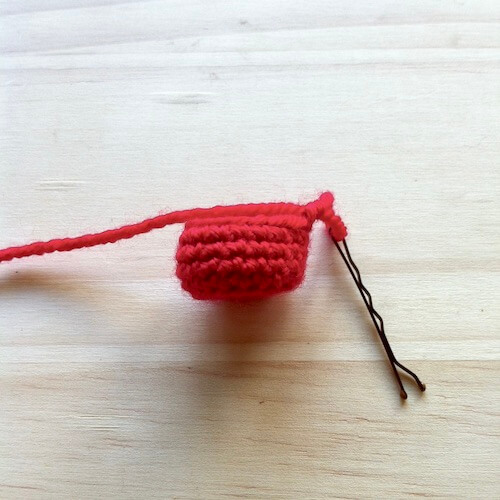
LEG (make 2)
row 1. (in Red) MR 6 (6)
row 2. [ inc ]x 6 (12)
row 3. [ sc, inc ]x 6 (18)
row 4. BLO sc 18 (18)
rows 5-7. sc 18 (18)
row 8. sc 3, dec 6, sc 3 (12)
row 9. sc 12 (12)
row 10. (change to Black) sc 12 (12)
rows 11-19. (change to Red) sc 12 (12)
Finish off, no tail is necessary as they are not sewn onto anything.
TIP Crocheting one round in the back loop only makes it easier to give the foot shape, as it’s easier to make the base flat.

BODY
Take the two legs and position them so that both feet are pointing correctly. I like to place two bobby pins across the stitches where the legs will join to make it a little easier to keep track of. The right leg should be the one still on your hook, so that the colour change at the start of the round later will be at the back of the doll.
Usually it’s four more stitches on the right leg before the fifth stitch jumps over to the left leg. Hopefully the pictures below will help illustrate.
Join with two bobby pins, this is where you’ll go from one leg to the other.
Make one sc in the right leg in the stitch the bobby pin marks. The next sc will be on the left leg, in the stitch the bobby pin marks.
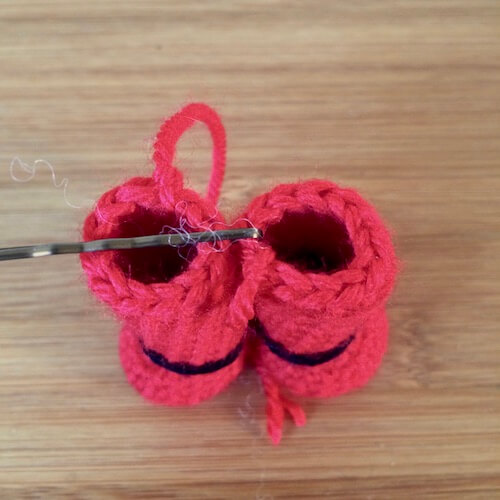
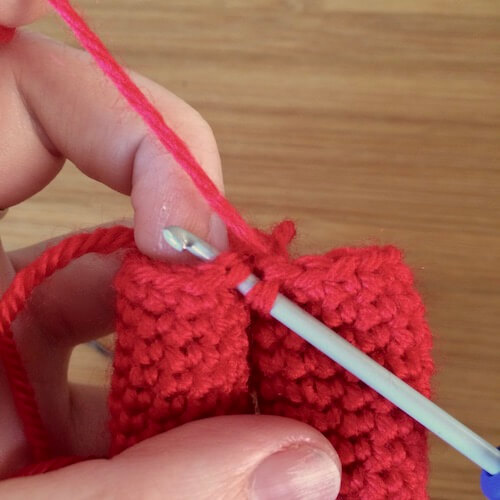
Do the same when you reach the opposite bobby pin. This is what it should look like after the first round of the body.
rows 1-3. (in Red) sc 24 (24)
rows 4-5. (change to Brown) sc 24 (24)
rows 6-8. (change to Red) sc 24 (24)
(at this point stuff the legs)
row 9. sc 3, dec, [ sc 6, dec ]x 2, sc 3 (21)
row 10. [ dec, sc 5 ]x 3 (18)
row 11. sc 2, dec [ sc 4, dec ]x 2, sc 2 (15)
row 12. [ dec, sc 3 ]x 3 (12)
row 13. (change to Black) sc 12 (12)
row 14. (change to Red) [ sc, inc ]x 3 (18)
Stuff the legs before beginning the decreases. Make sure he’s not stuffed so firmly that he can’t still stand.
Putting it all together
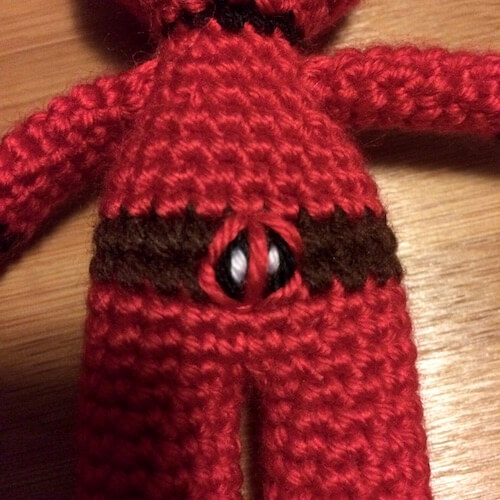
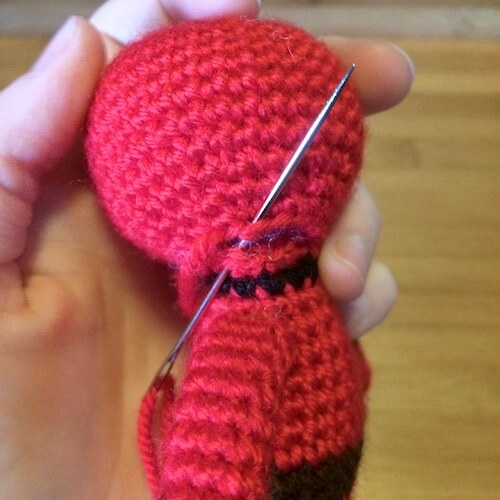
Cut out a small black circle out of felt. Take white yarn or thread and sew this black circle onto the centre of the belt. Then outline this circle with red yarn, and add a line through the centre from top to bottom. See pictures.
Attach the arms next. I like to pin them in place first so that I can get an idea of positioning, and then attach them as a flattened piece.
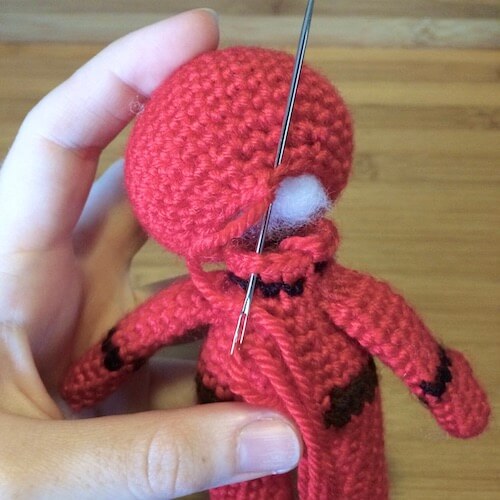
Attach the head. There should have been 18 stitches in the last round of the head and the body, so they match up evenly. Simple align the head properly, and whipstitch closed!
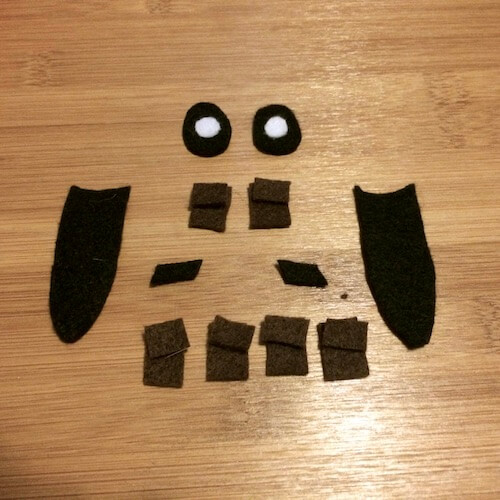
Cut out the following shapes in black, white and brown felt. The shape of the felt shapes changes with each doll but will resemble those pictured. Compare them against your doll until you have something you’re happy with.
- two black egg shaped eyes
- one small black circle for the belt logo
- two black strips for the under the arms
- two small black rectangles for the chest
- 6 brown rectangles for the pockets
- 6 smaller rectangles to be the pocket flaps
The black circle goes in the centre of the belt, sew it in place using white thread, as pictured, to give the emblem on his belt. Then circle it in red, and sew the vertical stripe in red, and sew on the outside of the circle.
Glue on the black stripes under the arms and the small black rectangles onto the chest. Next glue the smaller rectangles onto the bigger rectangles, and then attach two to the front and four to the back.
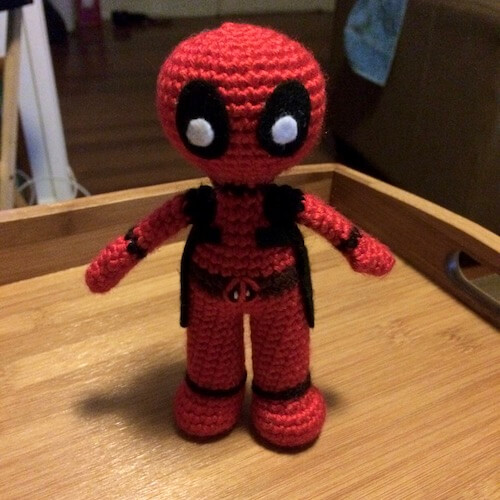

And with that you’ve finished your Deadpool crochet amigurumi!

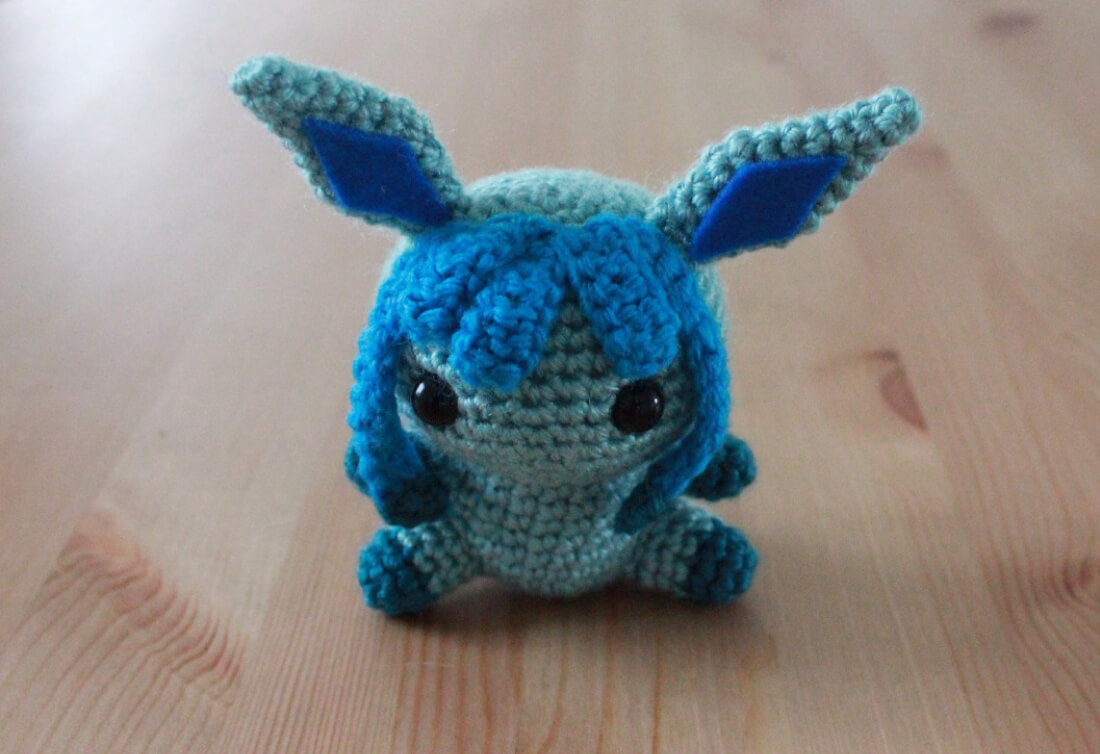
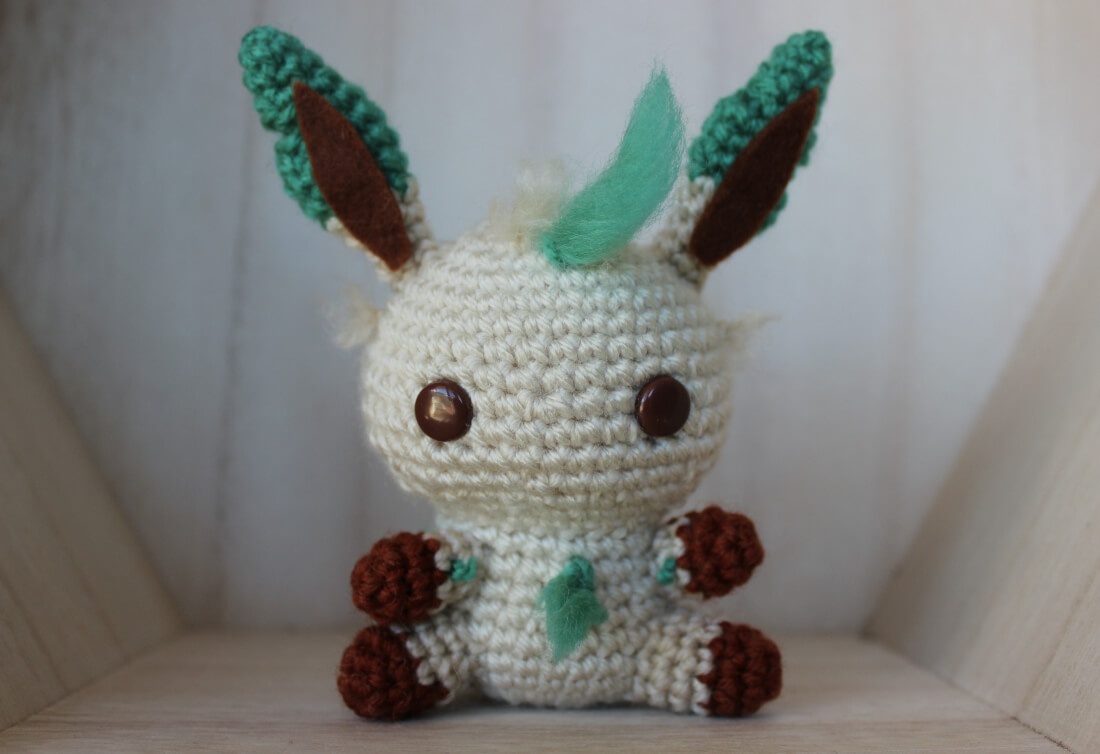
Other patterns in this series
If you make your own and you share on Instagram or Tumblr, don’t forget to tag @53stitches so I can check it out ☺️
For other comic characters to try out check out our Marvel and DC comics category – we’ve got more on the way!