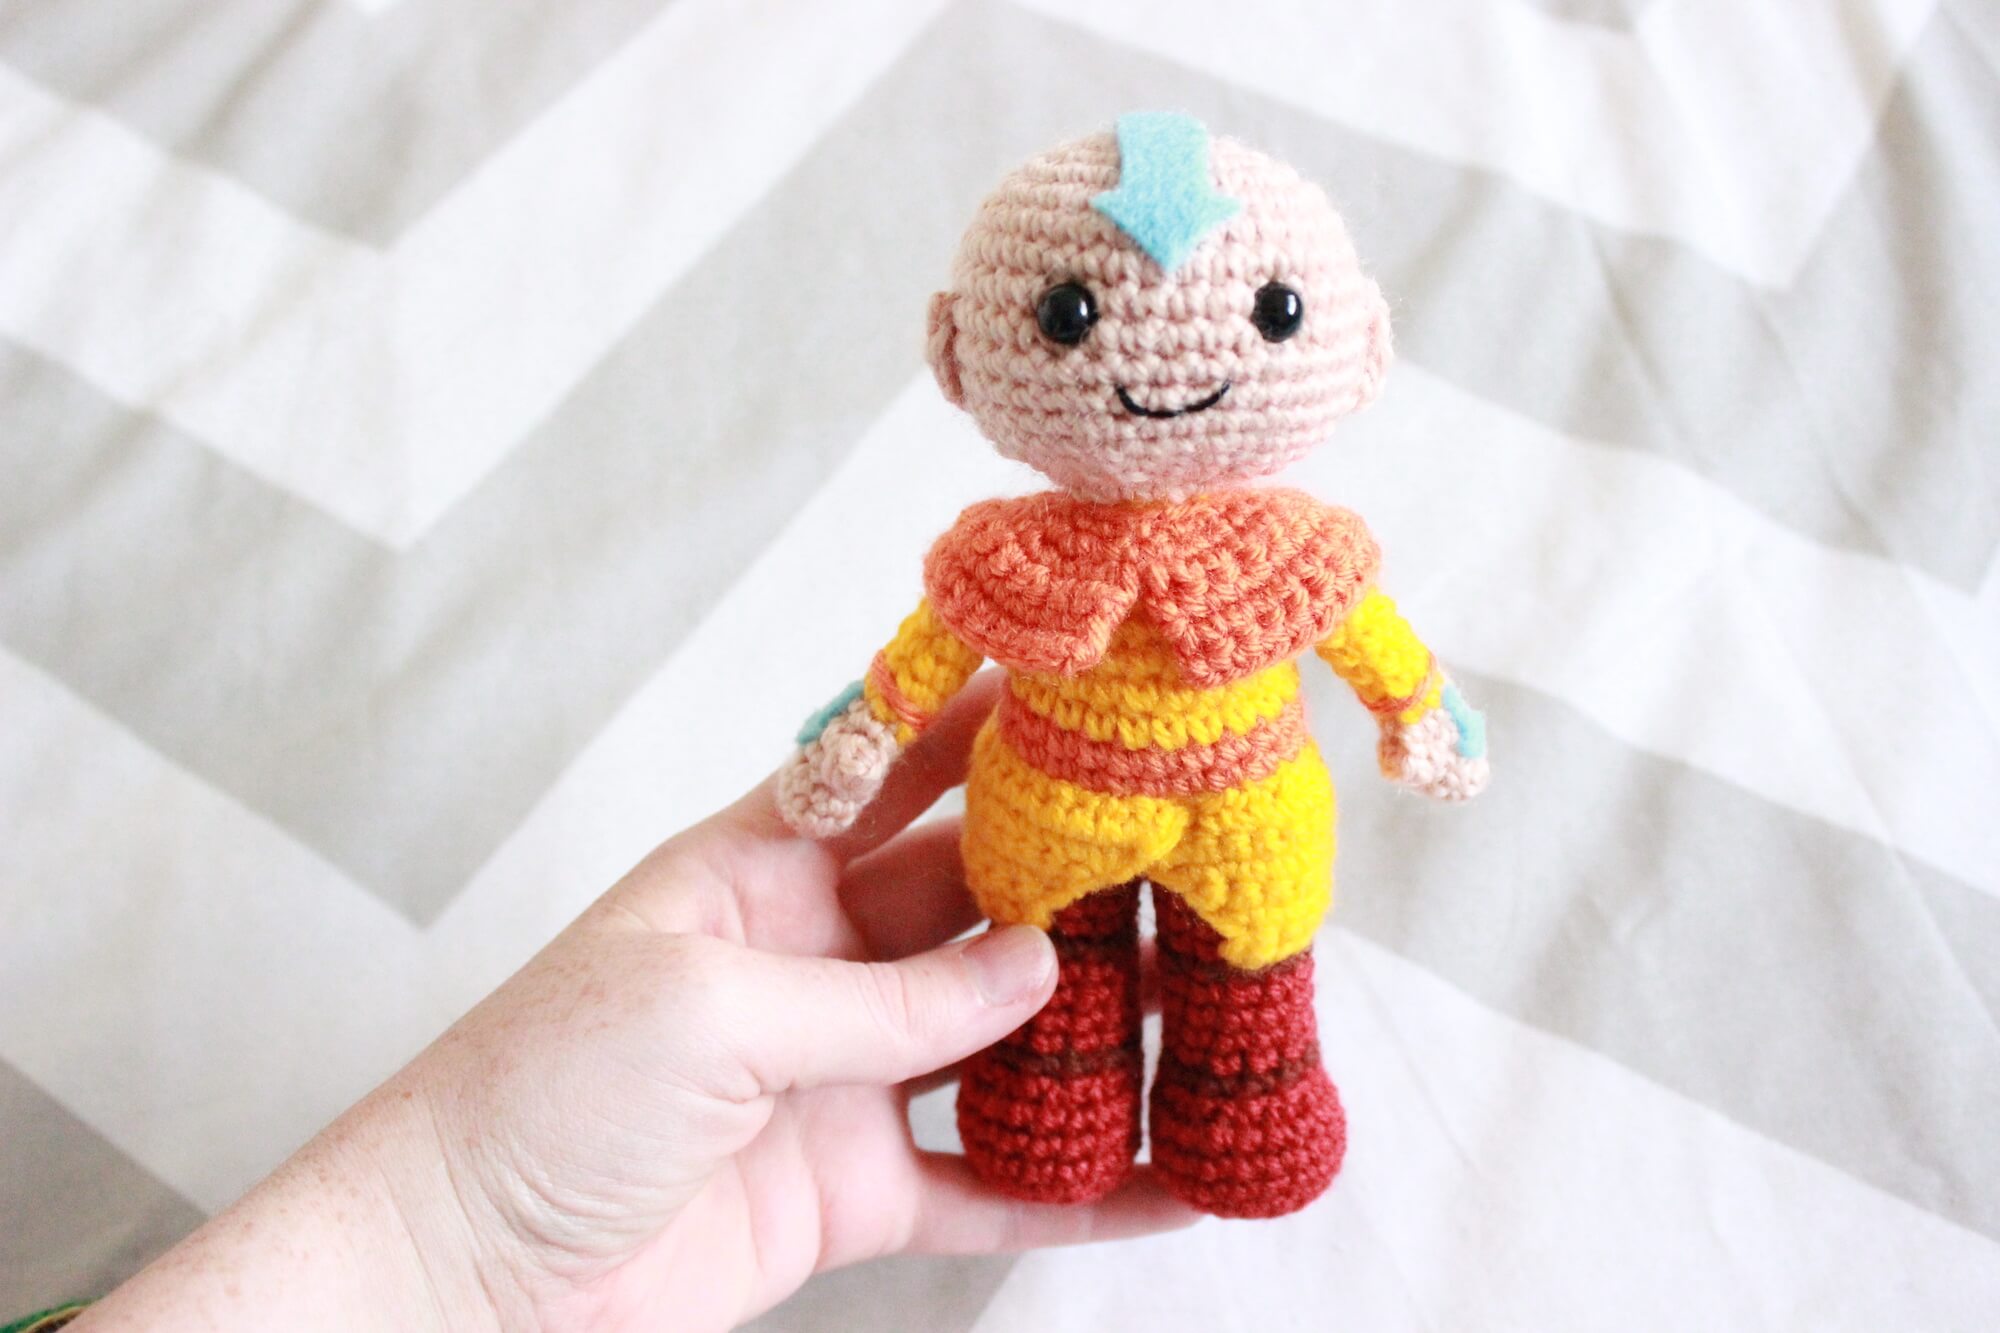
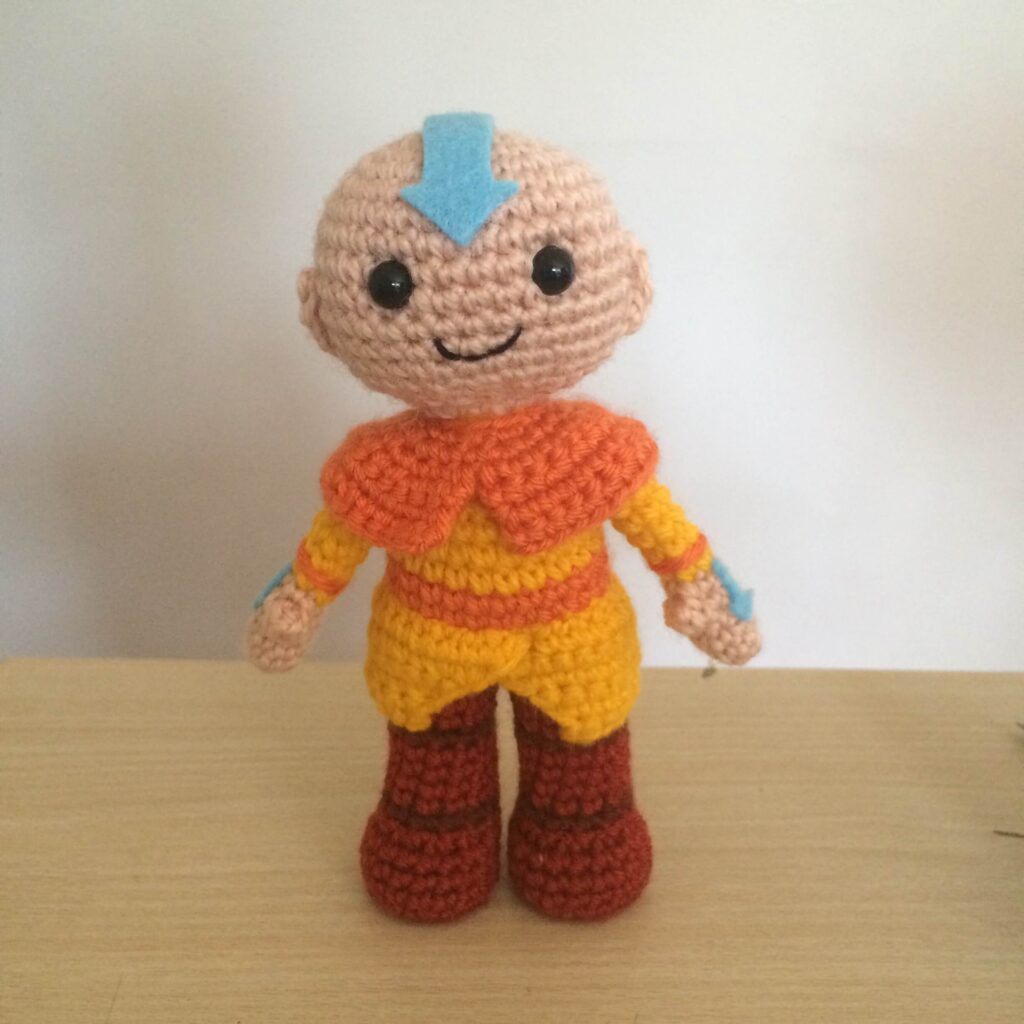
I believe amigurumi Aang can save the world! Avatar: The Last Airbender is one of my favourite shows of all time, it’s such a comfort watch that still holds up so well – better even, every year I get older. The characters and their designs are so easily recognisable and make the perfect little crochet dolls. I’ve made many of these characters over the year, but thought we’d start with Aang – what would team avatar be without their avatar, after all? The rest of the avatar crochet patterns will be added to the blog for free over the coming couple of weeks, so keep an eye out!
What materials will you need?
Note some of the links on this site are affiliate links. This means I get paid a small fee if you decide to purchase anything, at no extra cost to you. I will only ever link products I happily use myself.
The colour codes in the brackets are for Stylecraft Special DK yarn, my preferred amigurumi yarn. You can use any DK weight yarn.
- 3.00mm crochet hook
- Beige yarn (1710 – Stone)
- Yellow yarn (1856 – Dandelion)
- Orange yarn (1711 – Spice)
- Brown yarn (1054 – Walnut)
- Red-brown yarn (1029 – Copper)
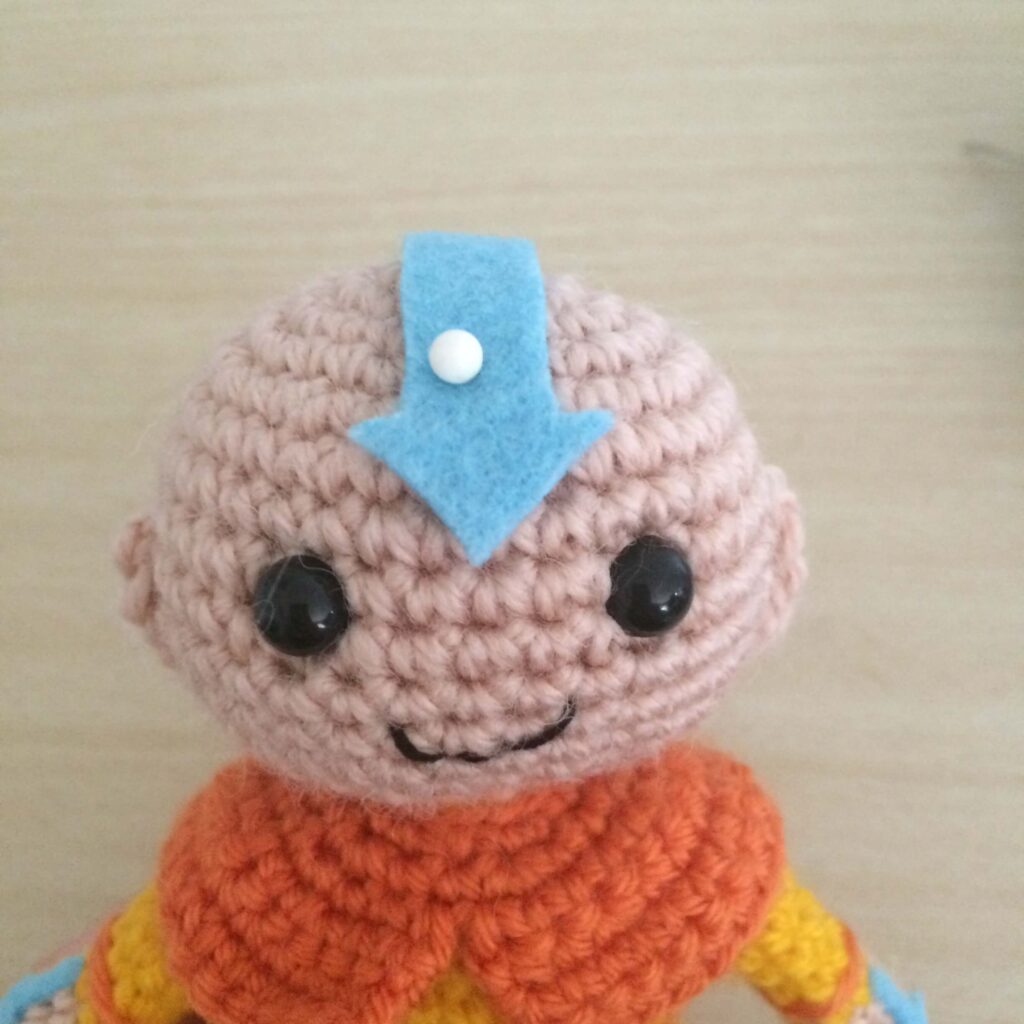
- Light blue felt
- Black thread
- Stuffing
- 2 x 8.00mm safety eyes
- Scissors
- Pins
- Fabric glue
When finished, your doll should be about 17.5cm (or about 12 inches) tall. Your doll may have slightly different dimensions depending on the hook, yarn and your crocheting tension.
Quick reference for beginners
Check out some of the tutorials below if you get stuck, or want a refresher, on any of the stitches we use in this pattern! All of my human dolls, but particularly the detailed ones like Avatar characters, can be a bit tricky for beginners. So take it slow, and take a break if you find yourself getting frustrated!
- How to read patterns
- Magic ring
- Single crochet
- Increase
- Decrease
- How to change colours
- Chain
- Attaching amigurumi limbs
- Back loop only
- Slip stitch
- Popcorn stitch
If you get stuck anywhere else, check out the FAQ.
Aang – The last Airbender avatar crochet patterns free
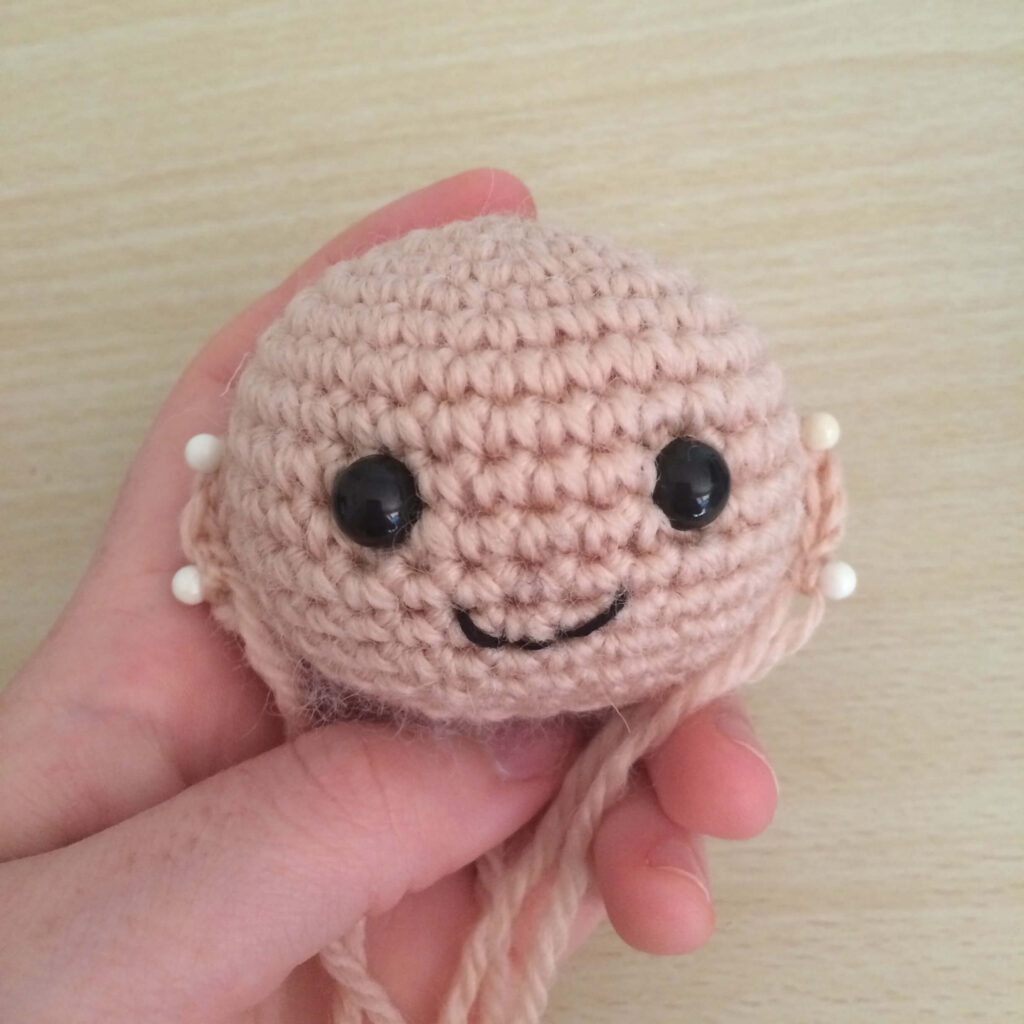
HEAD
row 1: (in Beige) MR 6sc (6)
row 2: [ inc ]x 6 (12)
row 3: [ inc, sc ]x 6 (18)
row 4: [ sc, inc, sc ]x 6 (24)
row 5: [ inc, sc 3 ]x 6 (30)
row 6: [ sc 2, inc, sc 2 ]x 6 (36)
rows 7-13: sc 36 (36)
row 14: [ sc 2, dec, sc 2 ]x 6 (30)
row 15: [ dec, sc 3 ]x 6 (24)
row 16: [ sc, dec, sc ]x 5 (18)
Finish off with a slip stitch in the next stitch, and leave a tail approximately 20cm or 7.5 inches. Insert your safety eyes between rows 9 & 10, with about 5 stitches between them. Stuff firmly. Embroider the mouth using a few threads of black embroidery or cross stitch thread.
TIP: You can also use yarn to sew on the mouth, but it will make it a bit thicker. For a more expressive or detailed mouth, try felt.
EARS
row 1: (in Beige) ch 3 (3)
row 2: ch 1, turn, sl st, sc, sl st (3)
Finish off, leaving a tail approximately 12cm or 5 inches.
Next, I use pins to position the ears, and then use the tails to attach them. I try to give them a curve, like real ears would have. The top of the ear should be in line with the middle of the eye, and about 5 stitches away from the eye.

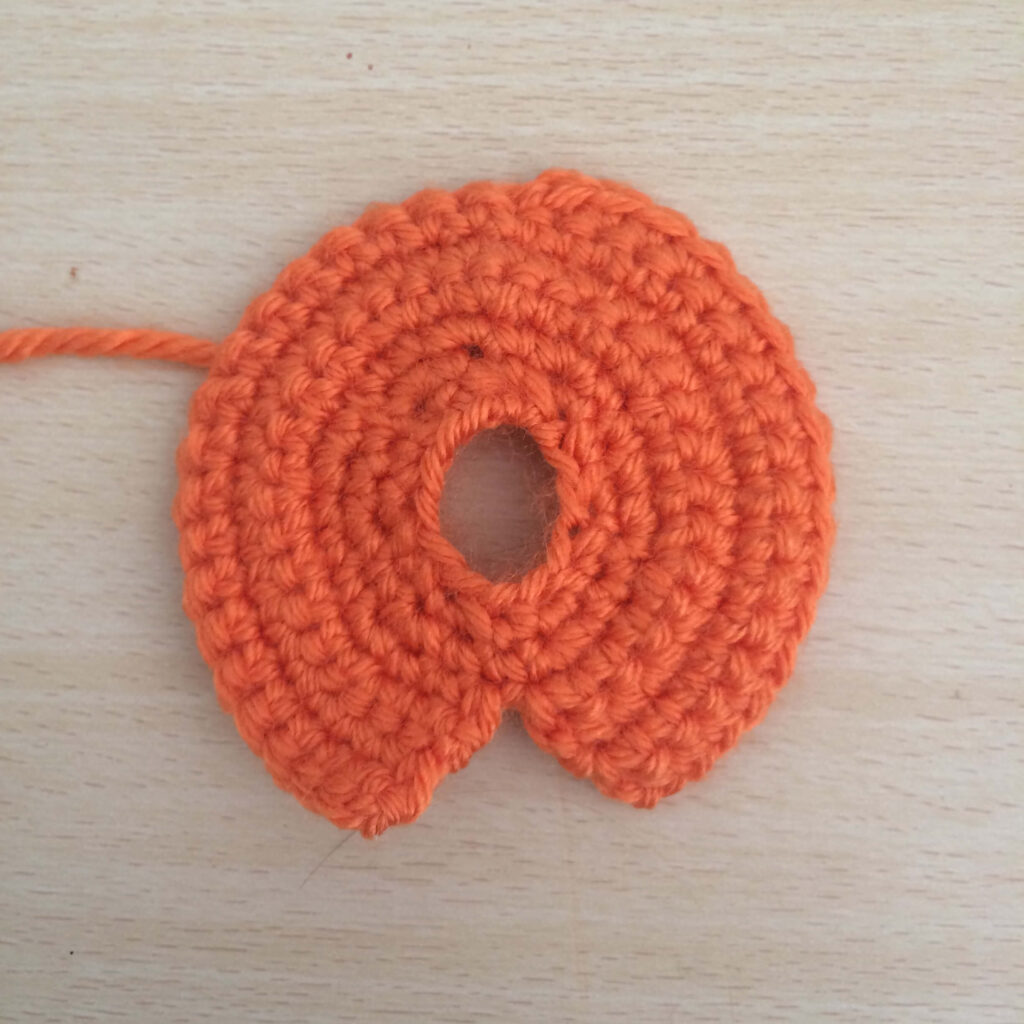
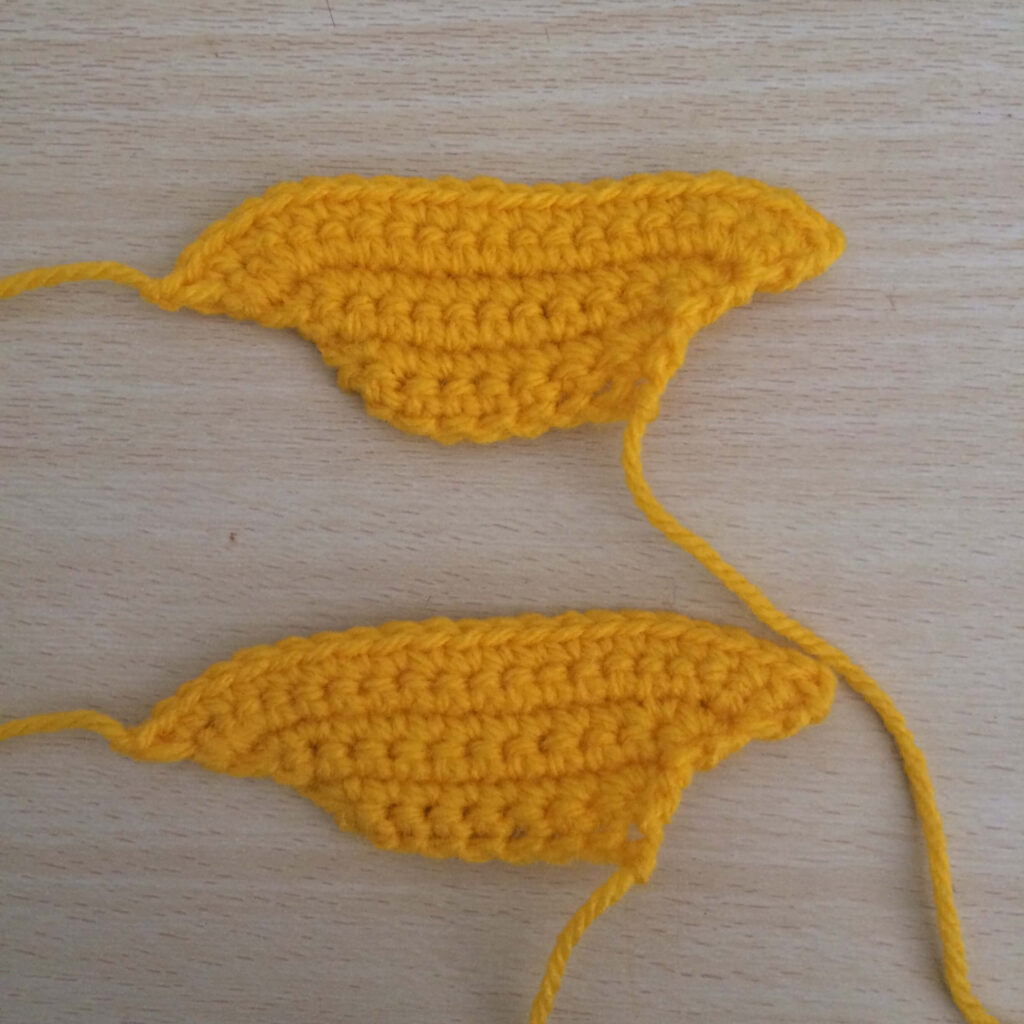
CAPE
row 1: (in Orange) ch 13 (13)
row 2: (starting in the first ch made initially, i.e. joining the ends to form a circle) sl st, sc, [ inc, sc ]x 5 (18)
row 3: [ sc, inc, sc ]x 6 (24)
For row 4 we’ll go halfway and then turn, which is why the stitch count changes
row 4: [ inc, sc 3 ]x 3 (15)
row 5: ch 1, turn, sc 2, [ inc, sc 4 ]x 2, inc, sc 2, [ inc, sc 3 ]x 3 (33)
row 6: ch 1, turn, sc 2, [ inc, sc 4 ]x 2, inc, sc 20 (36)
row 7: ch 1, turn, sc 36 (36)
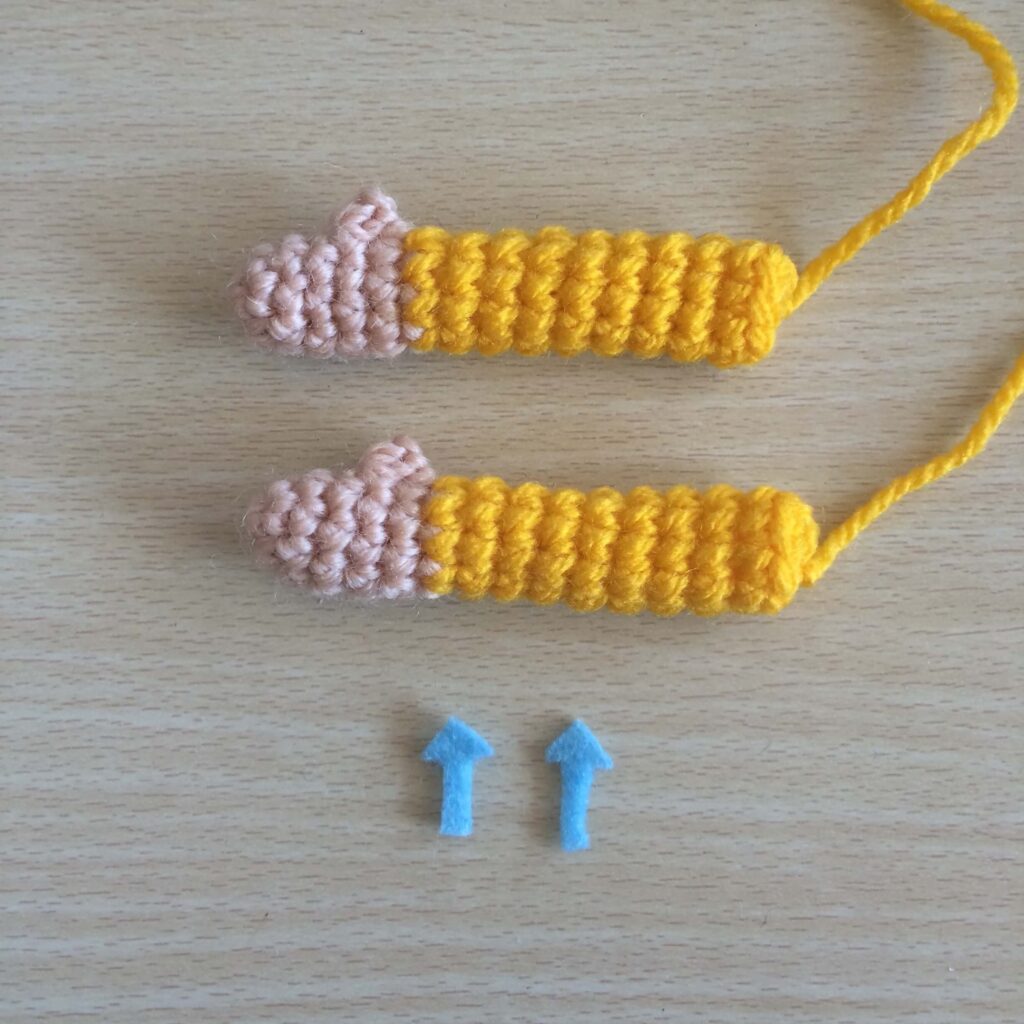
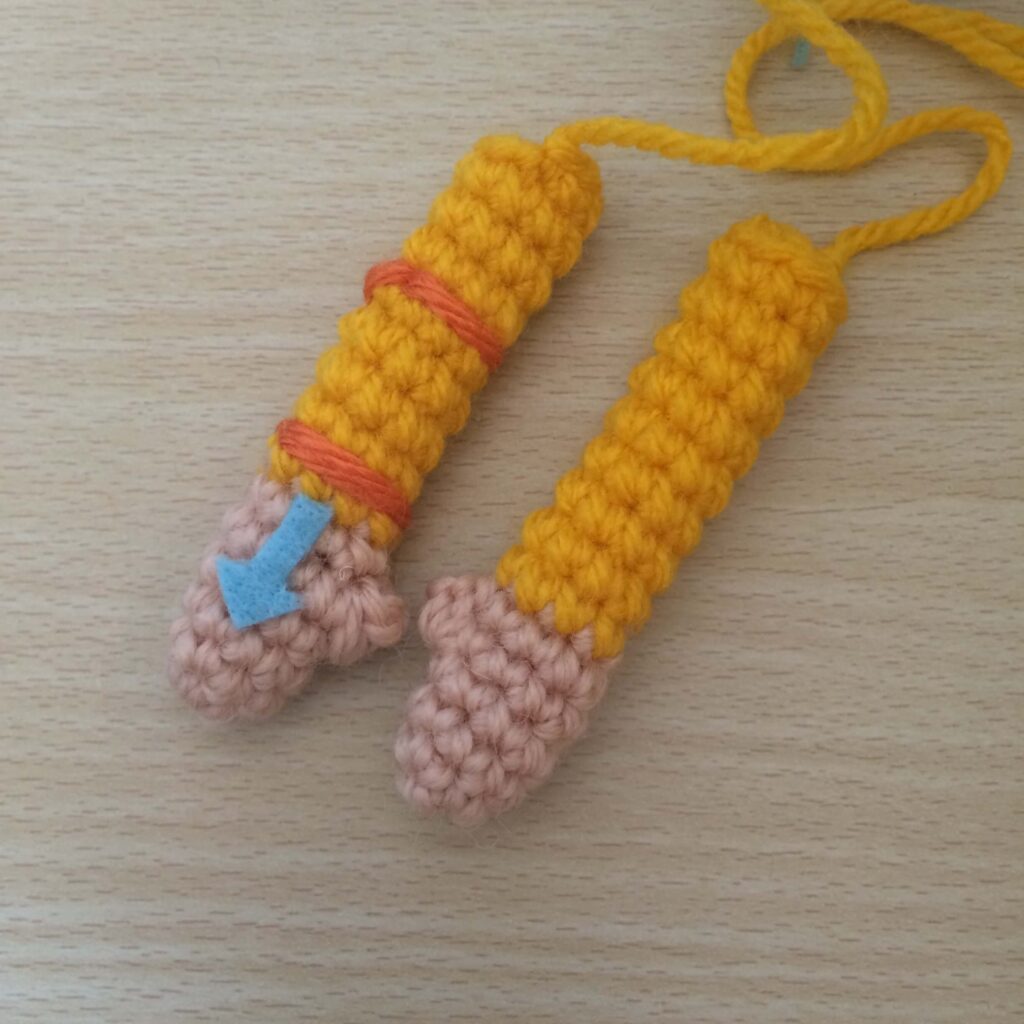
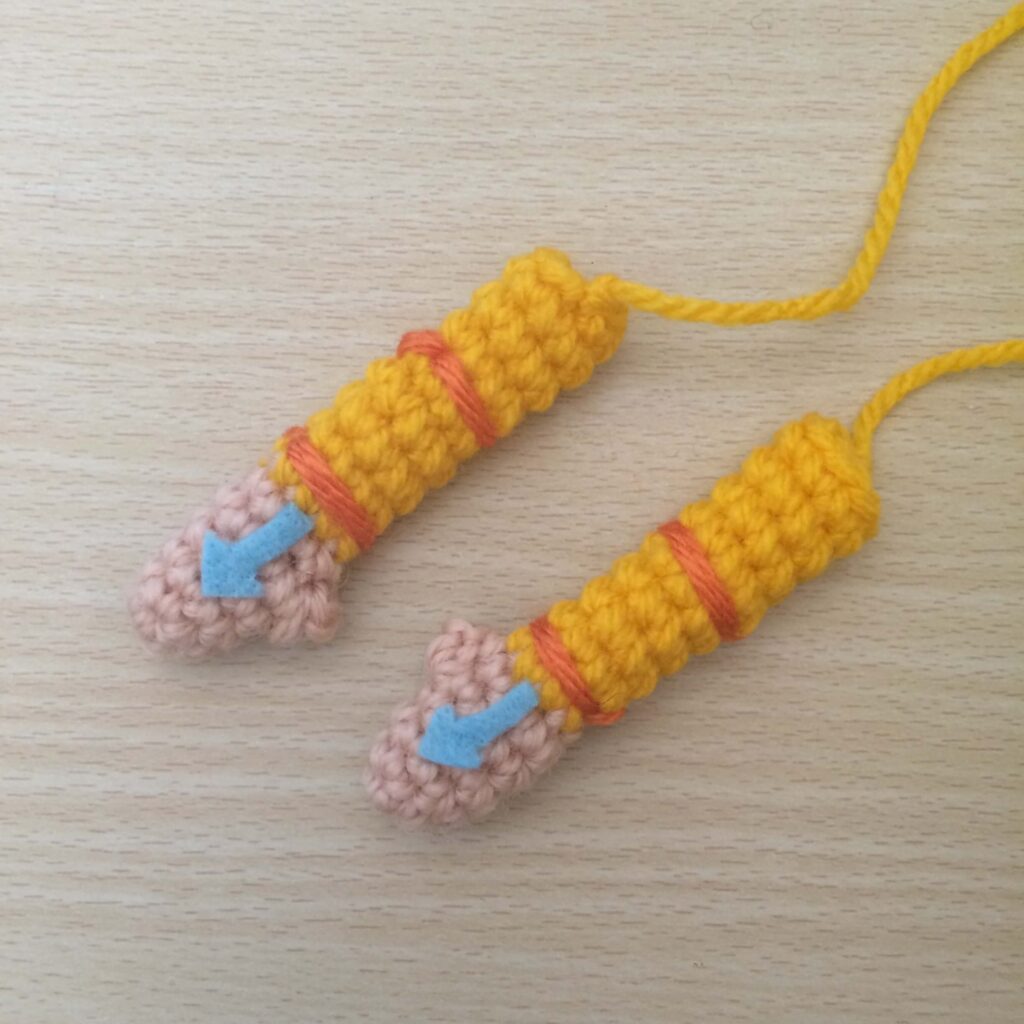
ARMS (make 2)
row 1: (in Beige) MR 6sc (6)
row 2: [ inc, sc 2 ]x 2 (8)
rows 3-4: sc 8 (8)
row 5: sc 3, 4sc popcorn, sc 4 (8)
row 6: sc 8 (8)
rows 7-15: (in Yellow) sc 8 (8)
The arms are so small there’s no need for stuffing. Leave a tail approximately 20cm or 7.5 inches long and finish off. Take a length of orange yarn and embroider stripes at the wrist, one row above the colour change; and then another one 4 rows above that.
TIP The popcorn stitch in the arm is the thumb. If it’s a bit tricky or you prefer straight arms, simply replace it with a sc.
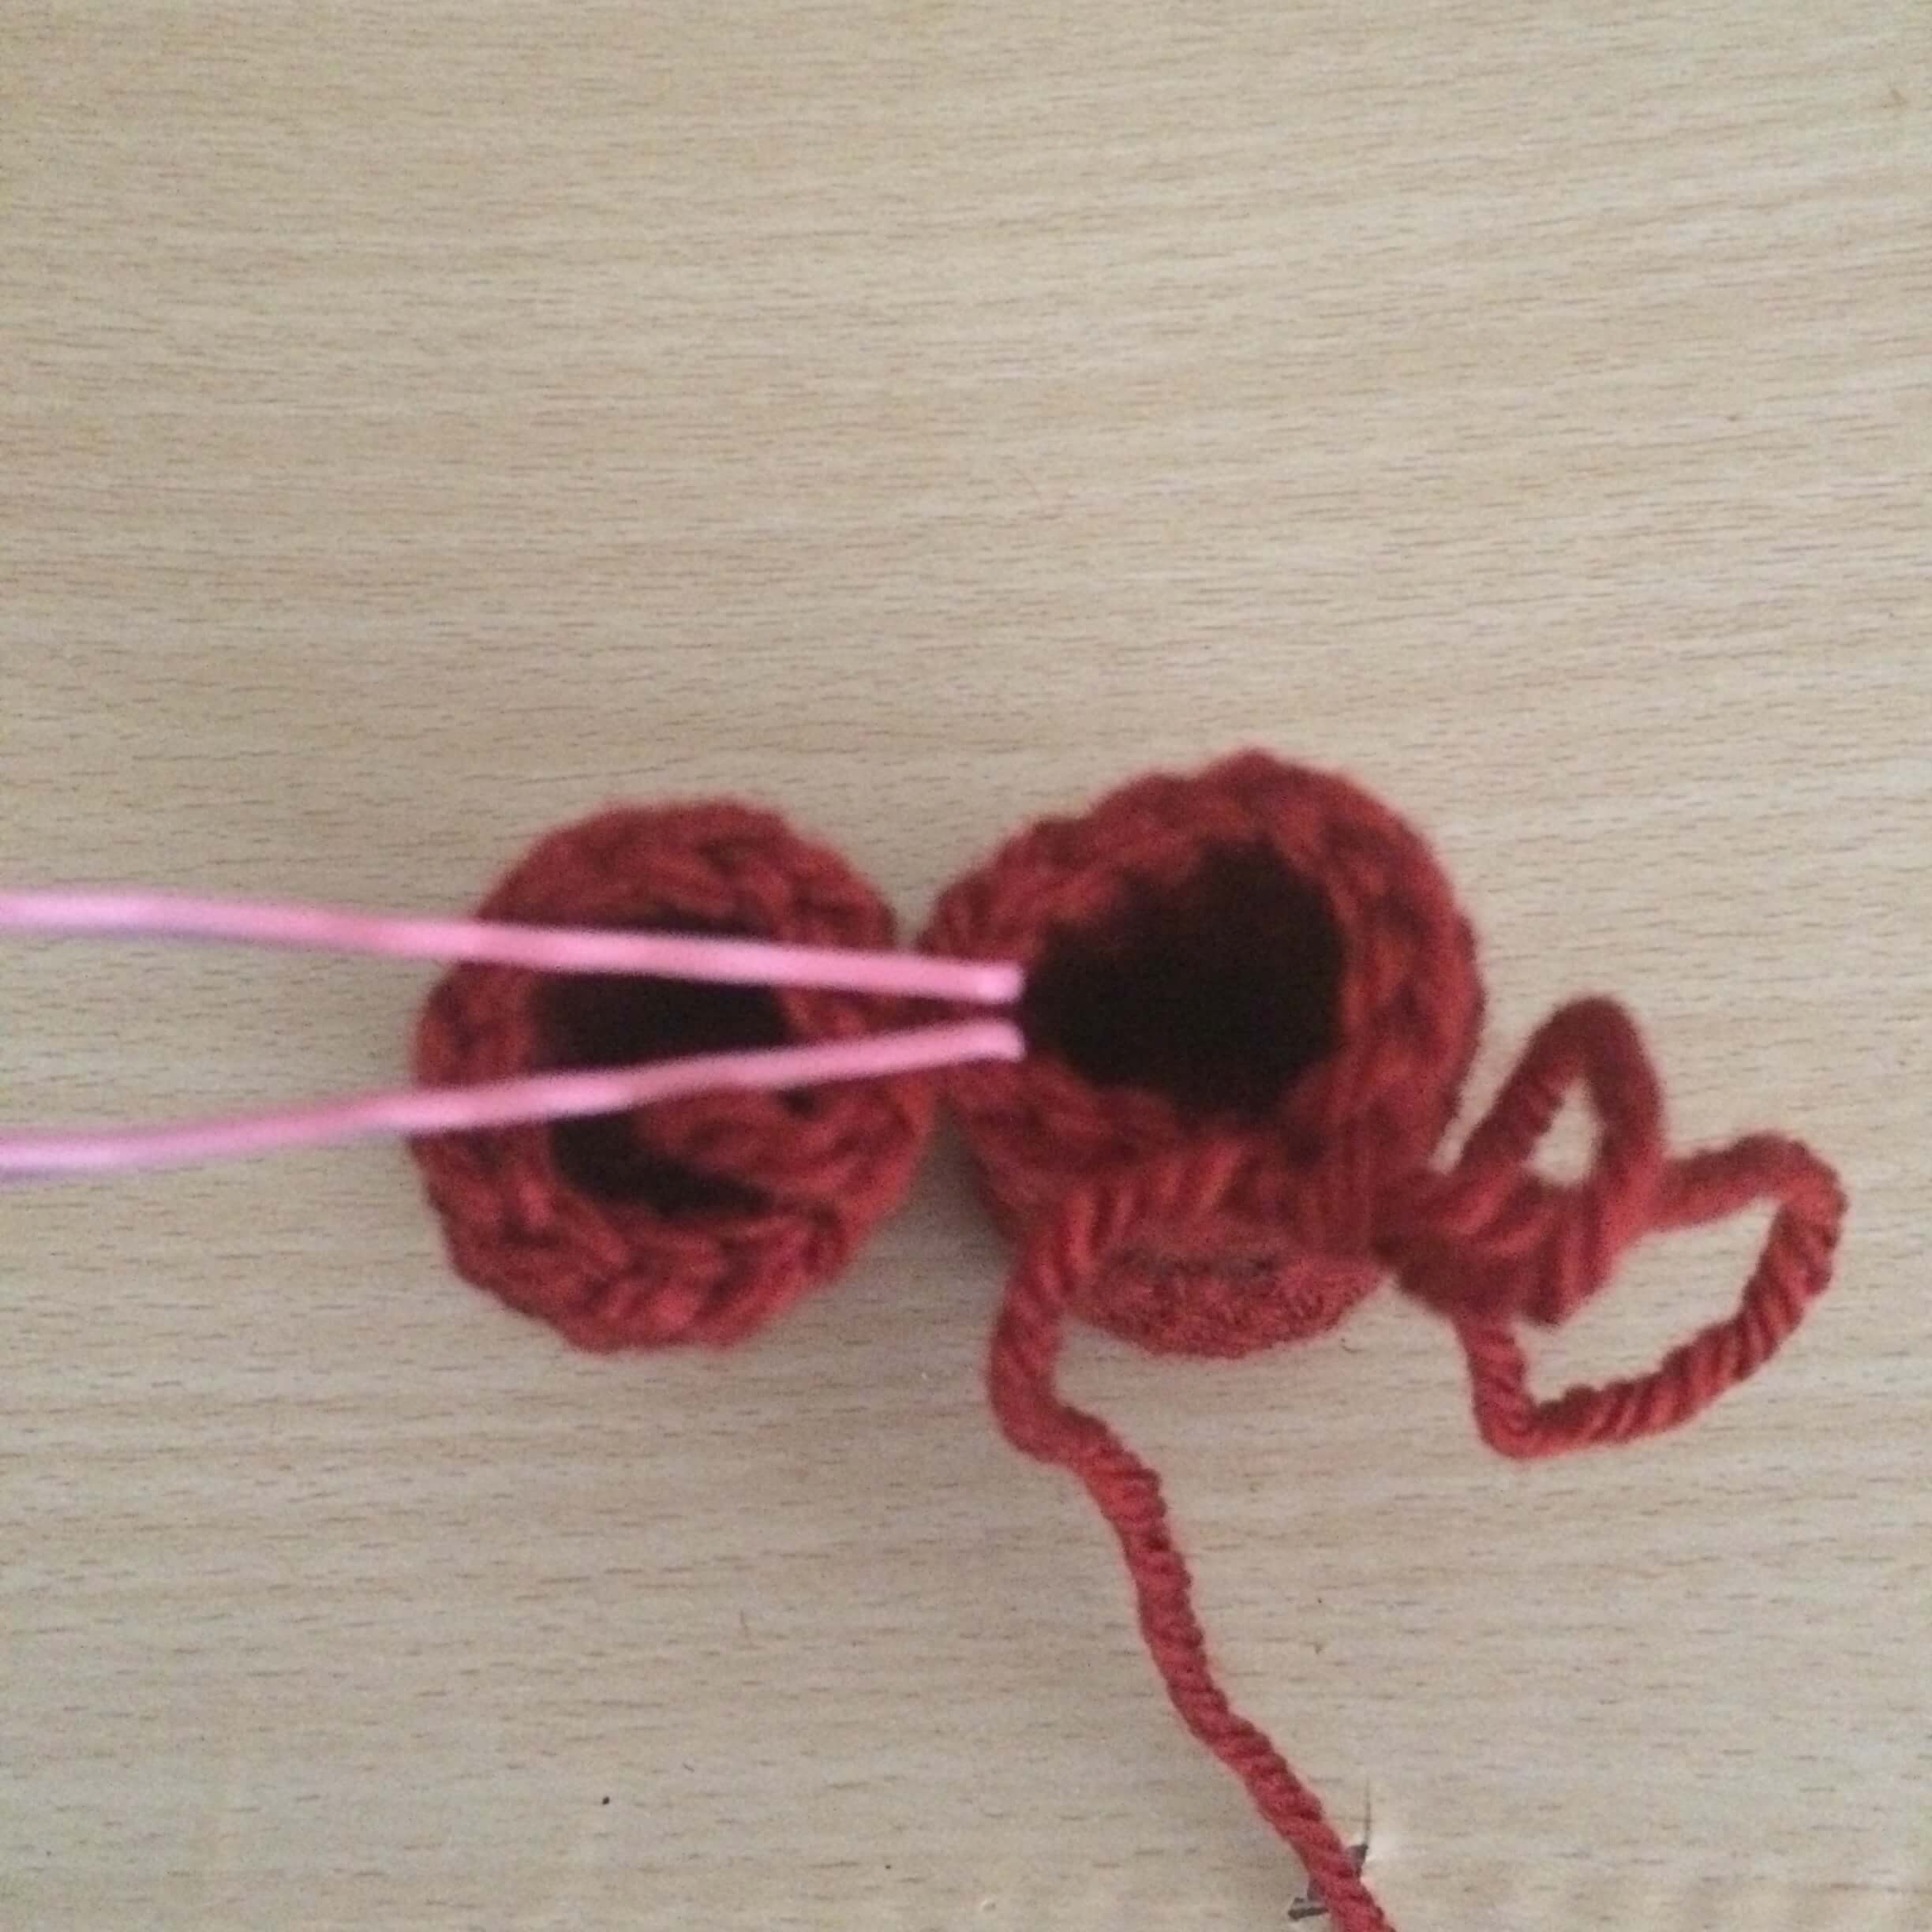
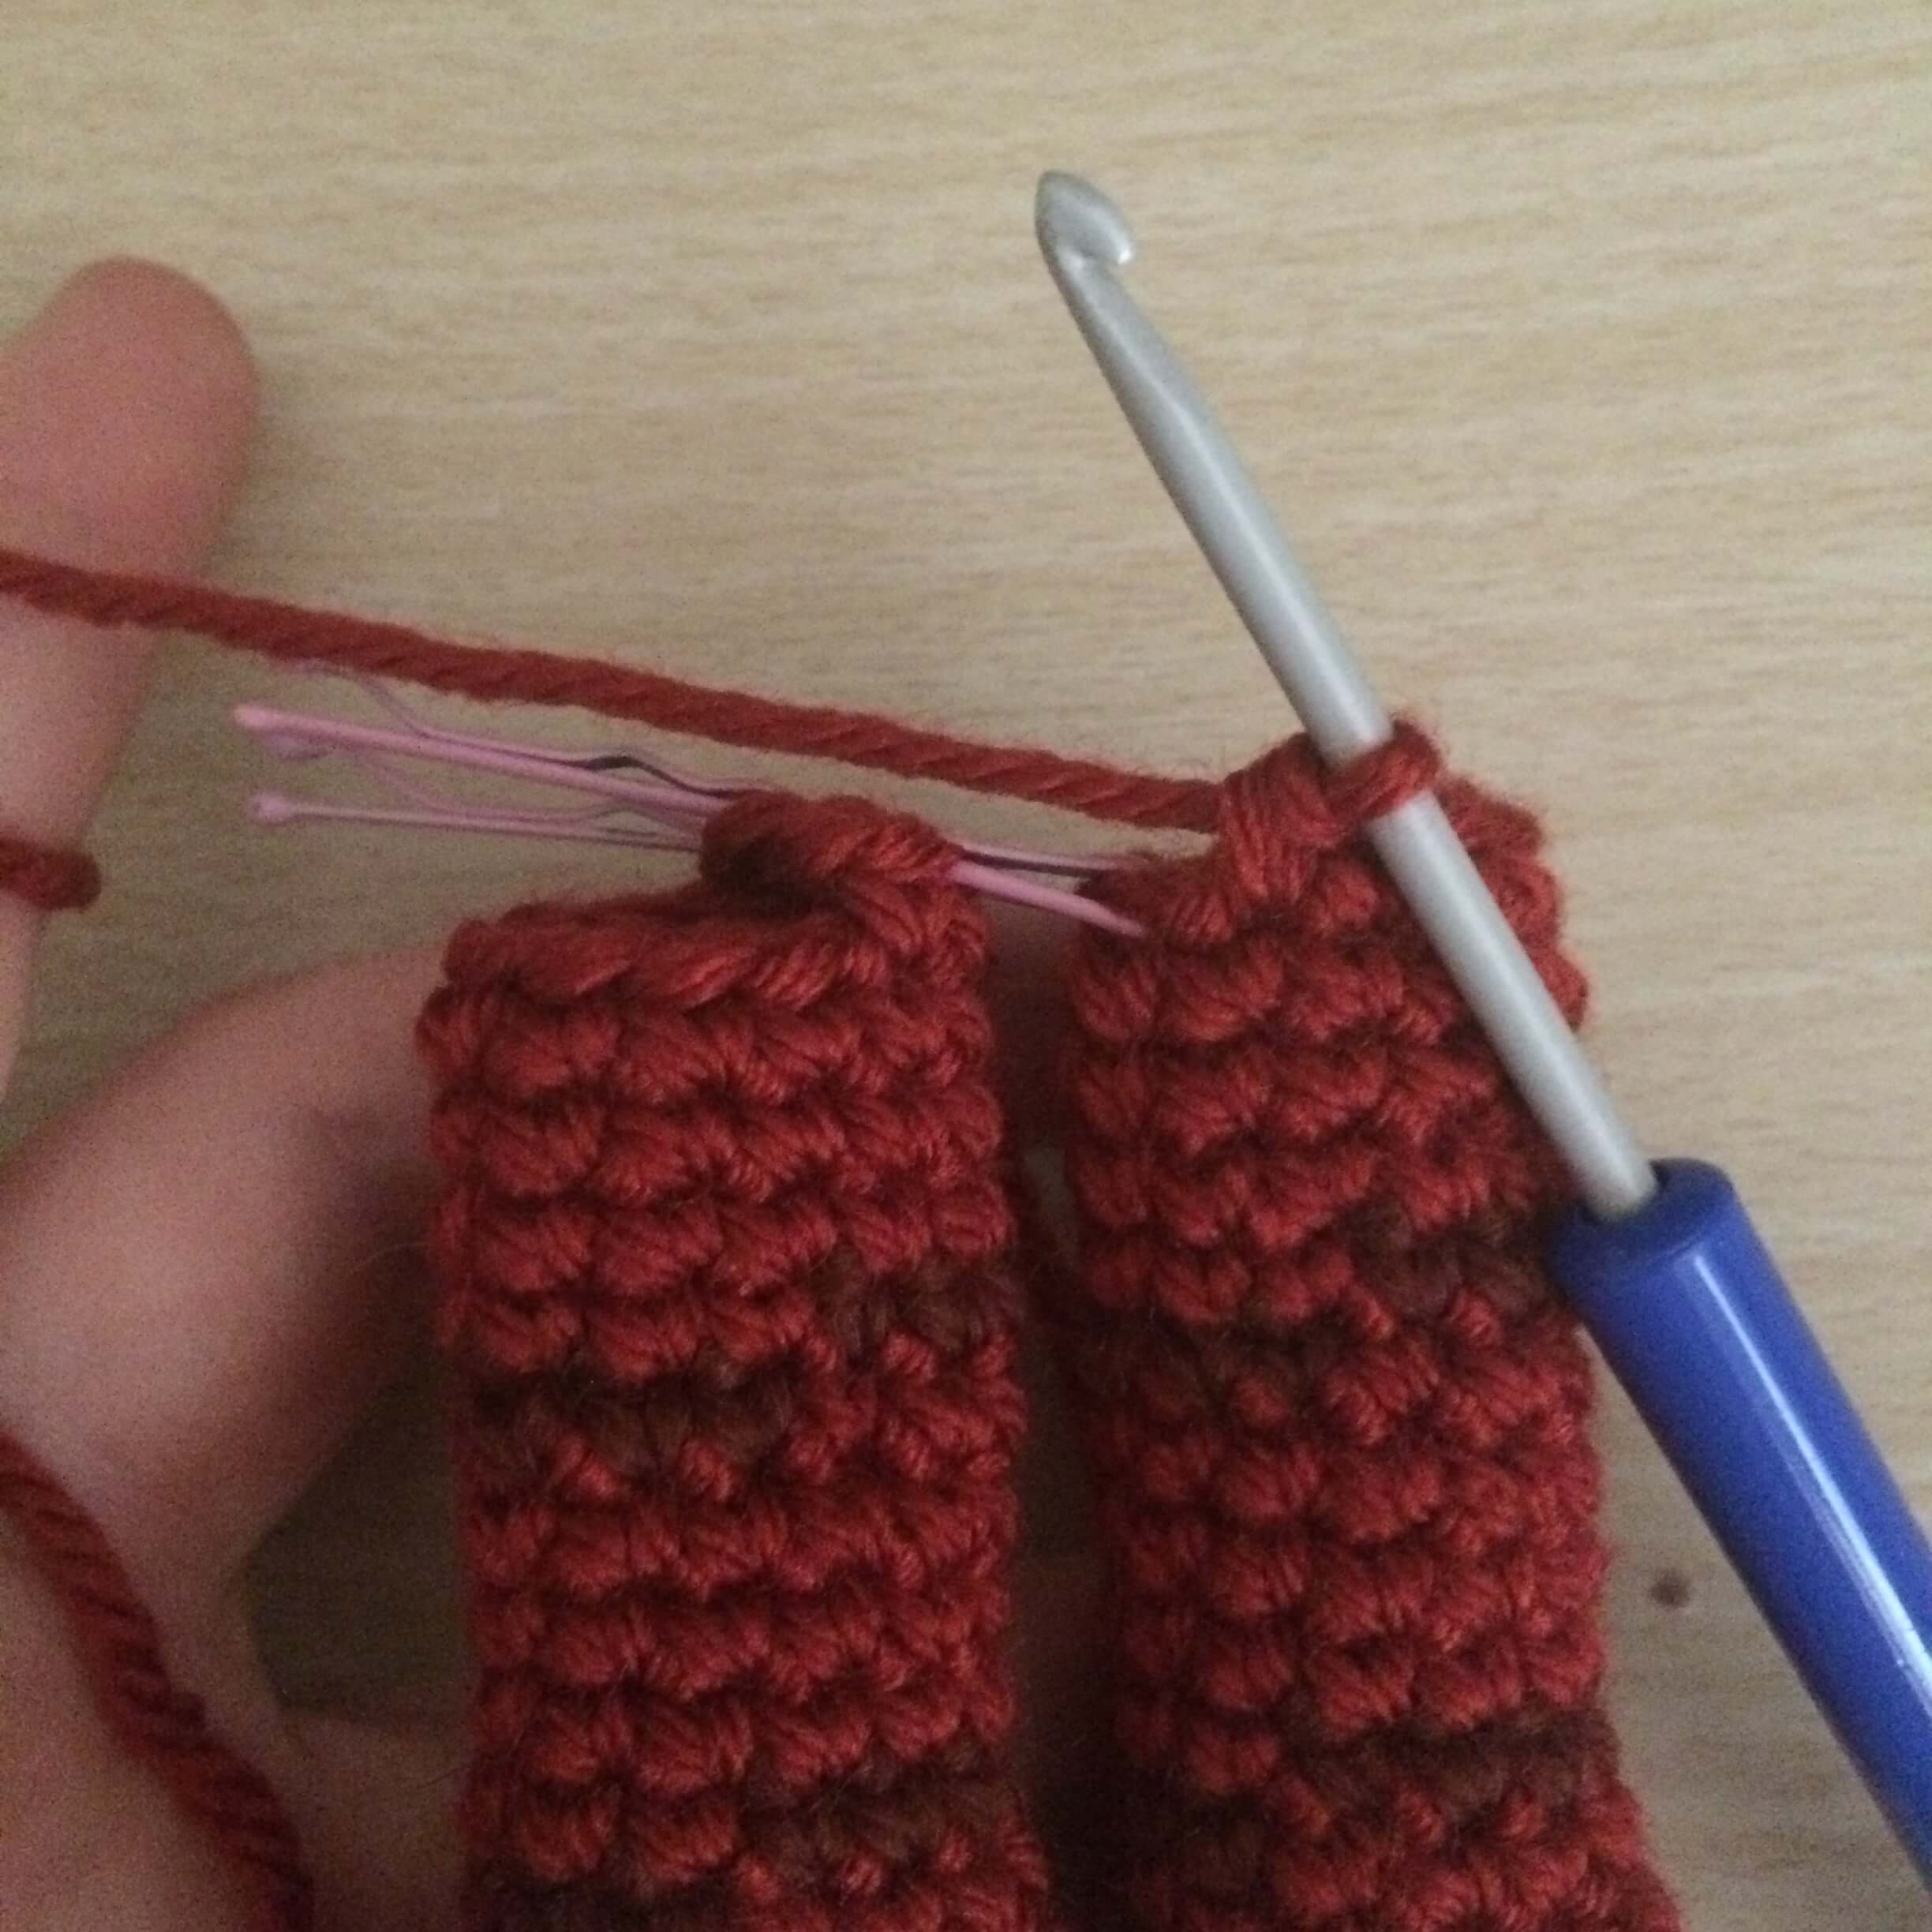
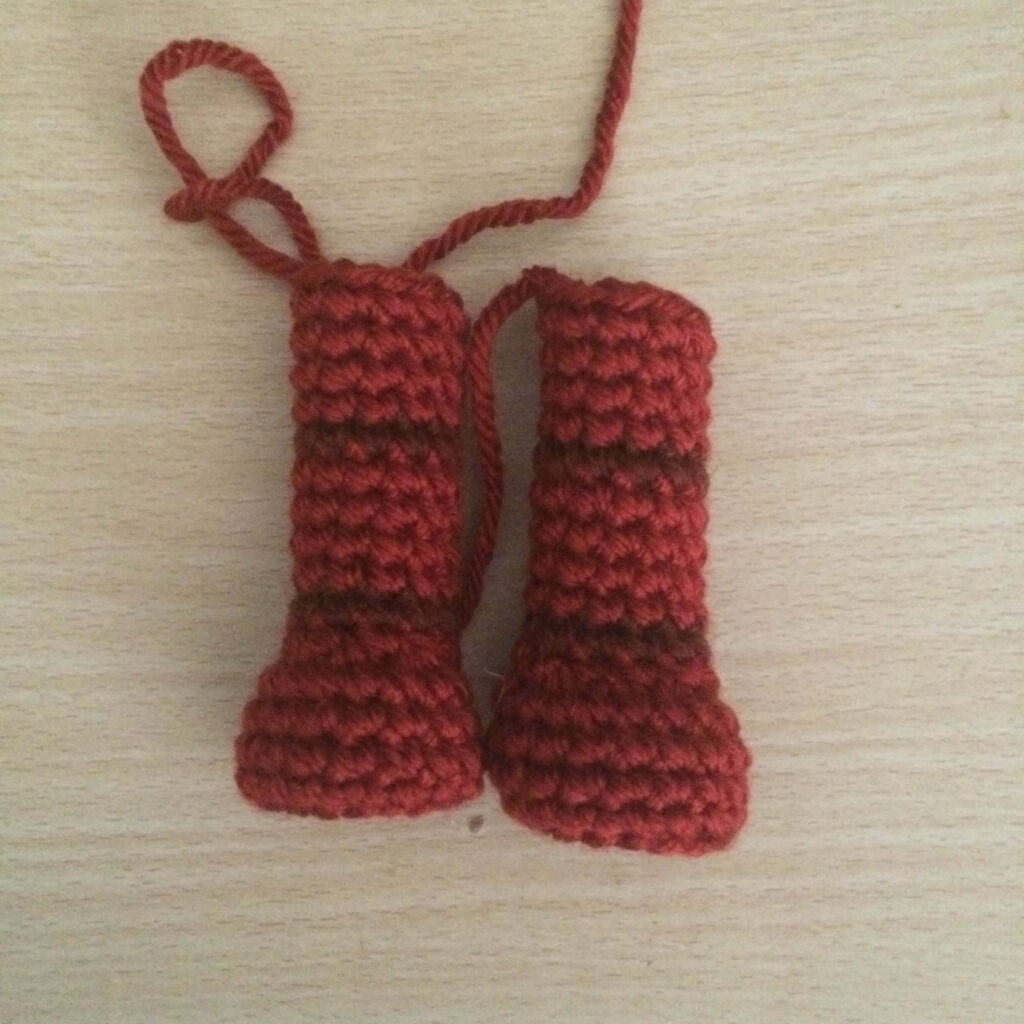
LEGS (make 2)
row 1: (in Red-brown) MR 6sc (6)
row 2: [ inc ]x 6 (12)
row 3: [ inc, sc ]x 6 (18)
row 4: BLO sc 18 (18)
rows 5-7: sc 18 (18)
row 8: sc 3, dec 6, sc 3 (12)
row 9: (in Brown) sc 12 (12)
rows 10-13: (in Red-brown) sc 12 (12)
row 14: (in Brown) sc 12 (12)
rows 15-18: (in Red-brown) sc 12 (12)
Finish off the first leg. Leave the second leg on the hook. This will make it easier to join.
Take the two legs and position them so that both feet are pointing correctly. I like to place two bobby pins or stitch markers across the stitches where the legs will join to make it a little easier to keep track of. Position both legs. Make sure the feet are pointing forwards, and the start of the round is at the back to avoid visible colour changes.

BODY
row 1: (in Red-brown) sc 24 (24)
row 2: (in Yellow) sc 24 (24)
rows 3-4: (in Orange) sc 24 (24)
rows 5-7: (in Yellow) sc 24 (24)
(stuff the legs before beginning decreases)
row 8: [ sc 3, dec, sc 3 ]x 4 (21)
row 9: [ dec, sc 5 ]x 3 (18)
row 10: [ sc 2, dec, sc 2 ]x 3 (15)
row 11: [ dec, sc 3 ]x 3 (12)
row 12: sc 12 (12)
row 13: (in Beige) [ sc, inc ]x 6 (18)
Do a slip stitch to finish off and stuff the rest of the body.
TIP Stuff the legs before beginning the decreases. Make sure they’re not too stuffed – you should be able to press the bottom of the feet in and have the doll stand.
PANTS (make 2)
row 1: (in Yellow) ch 8 (8)
row 2: ch 1, turn, sc 8 (8)
row 3: inc, sc 6, inc (10)
row 4: inc, sc 8, inc (12)
row 5: inc 2, sc 10, inc 2 (16)
row 6: inc 2, sc 14, inc 2 (20)
row 7: inc, sc 18, inc (22)
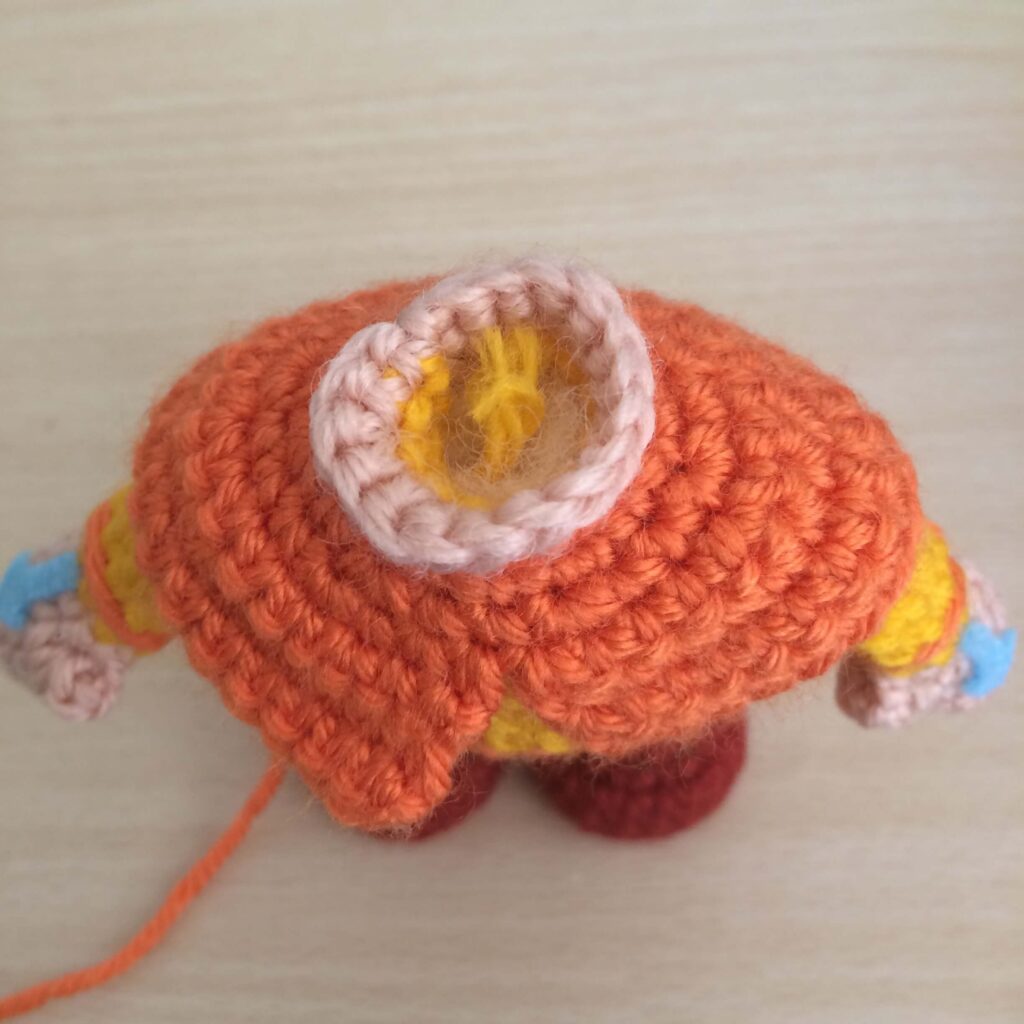
Putting your Avatar all together
Attach the arms. I like to pin them in place to get an idea of where they should be placed, then they are attached as a flattened piece using the tail. Once the arms are attached, you can slip the cape over his neck.
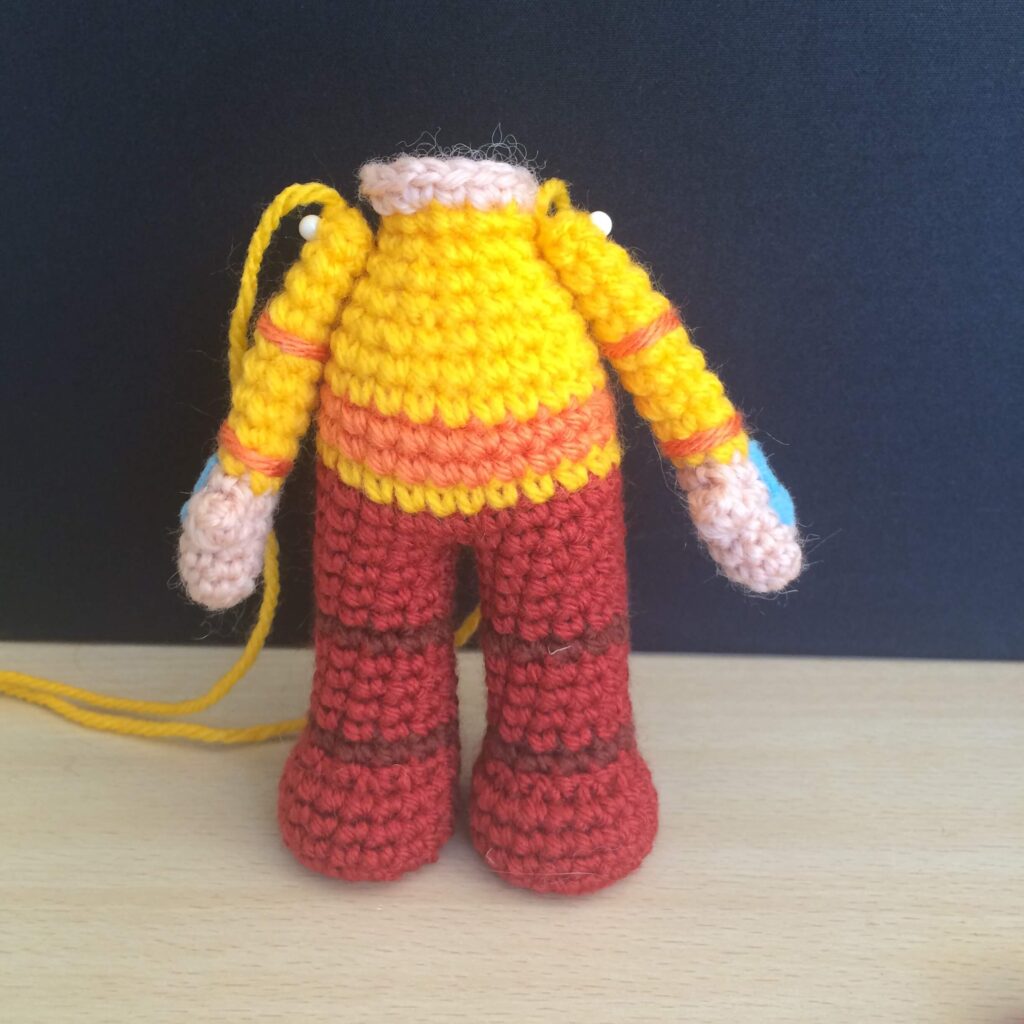
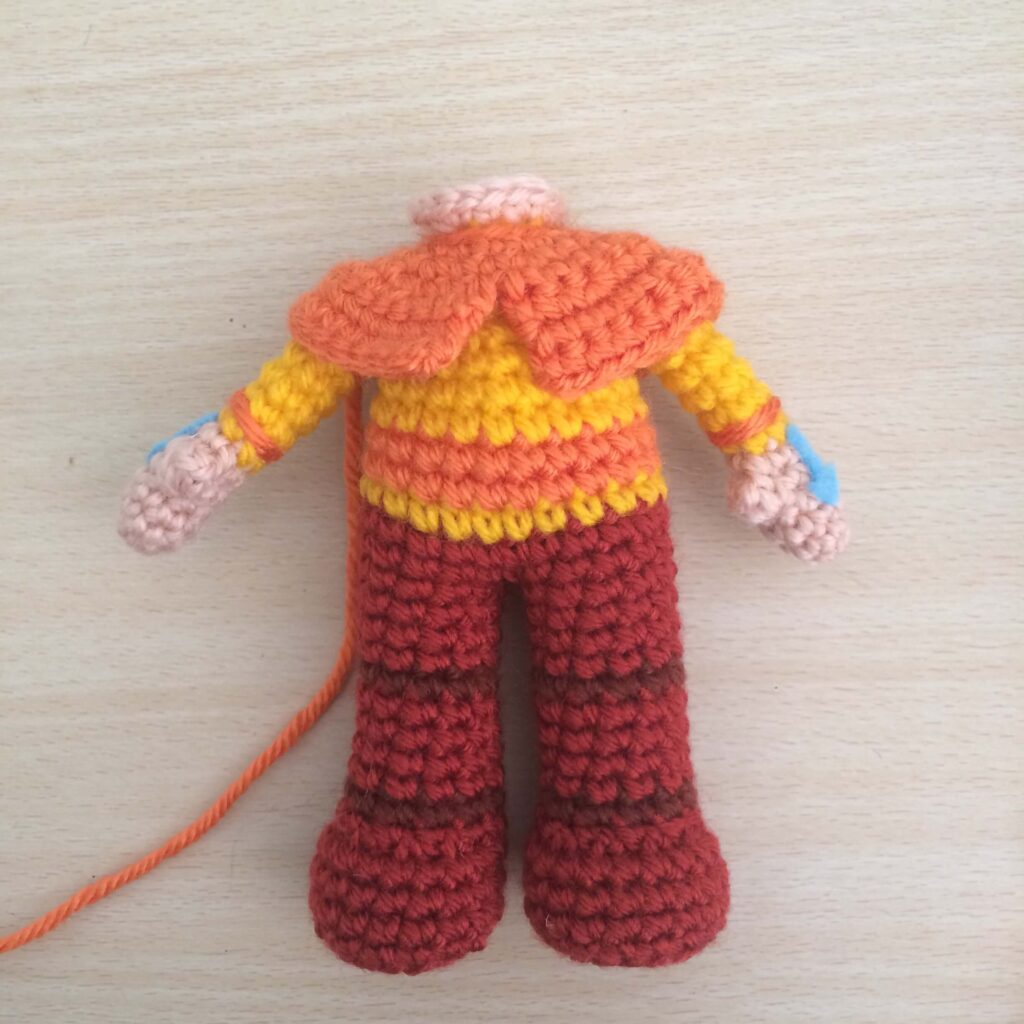
Next, attach the pants. I do the same thing, pinning the pants in place and then sewing them on one by one to make sure the placement is correct. There’s nothing tricky going on here, just using the tails to make sure they’re nice and secure.

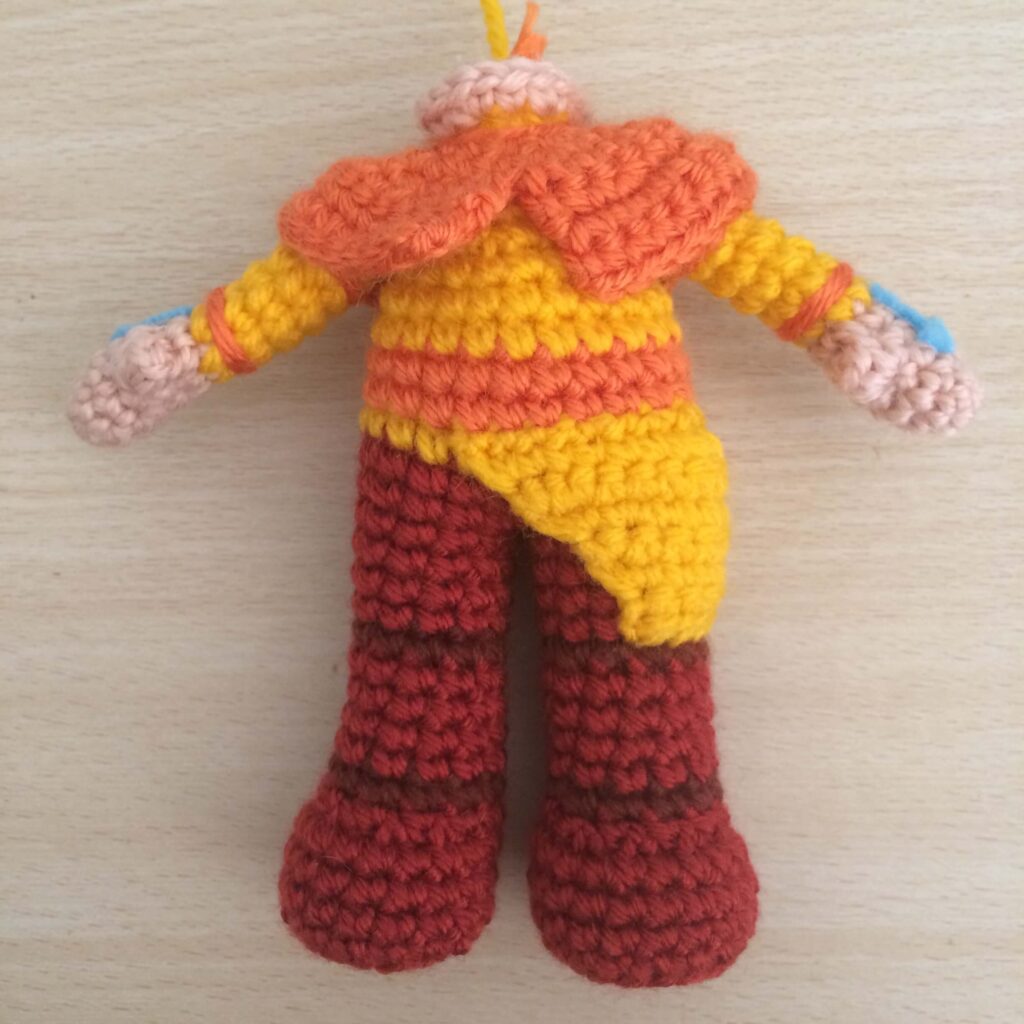
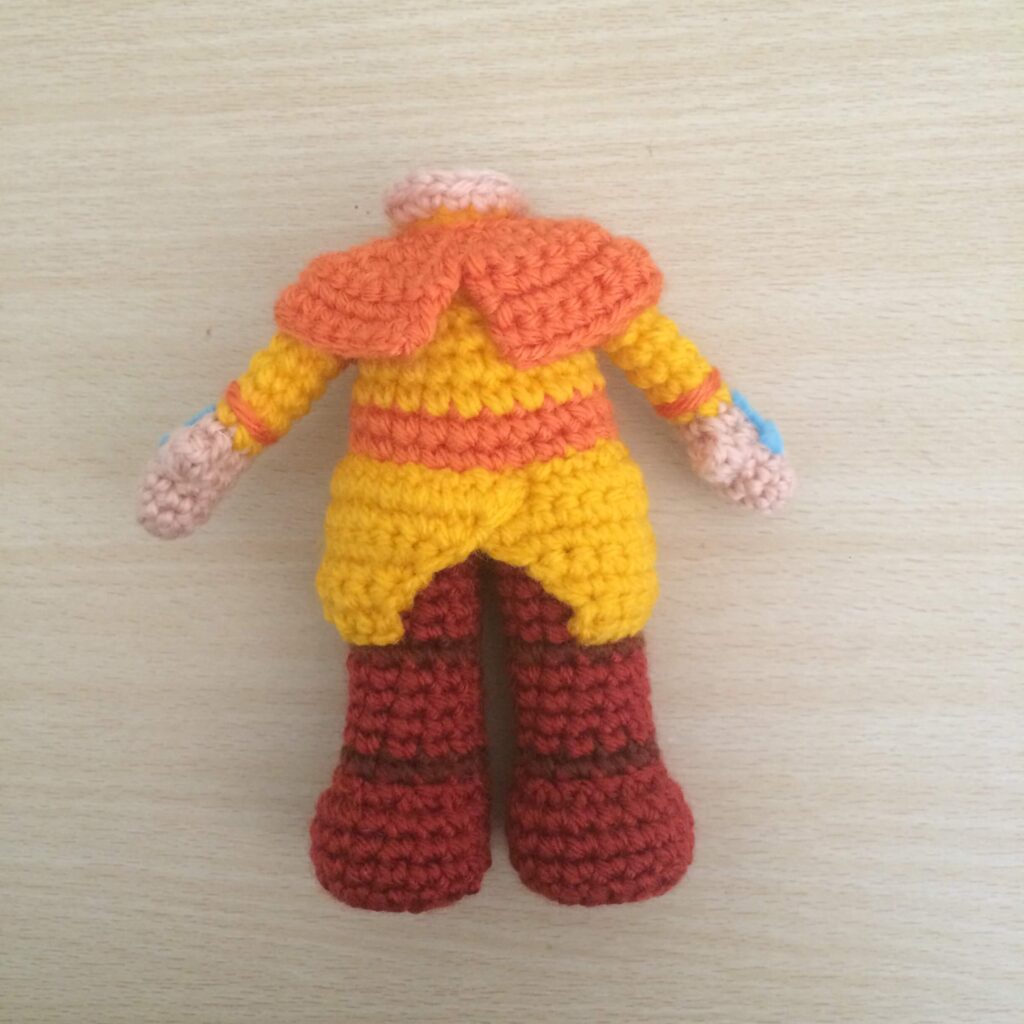
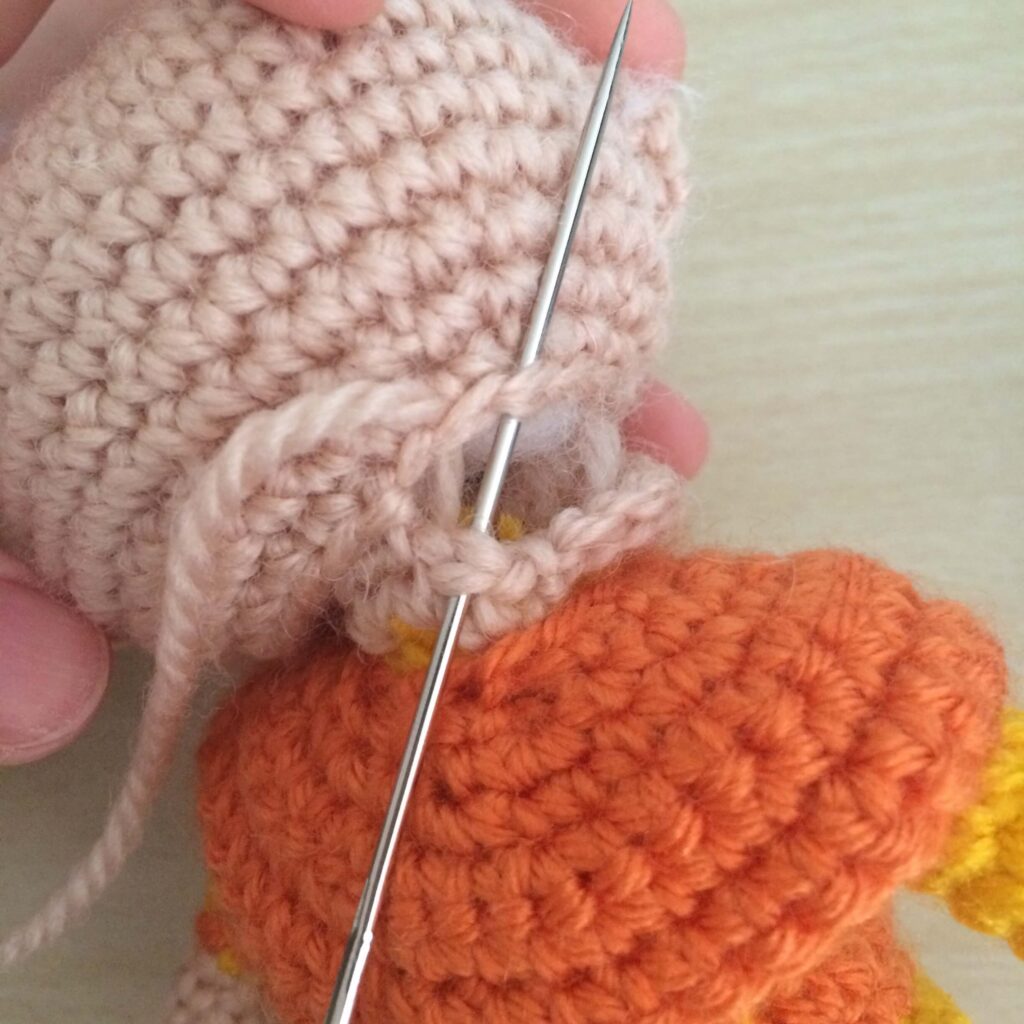
Attach the head. There should have been 18 stitches in the last round of the head and the body, so they match up evenly. Simply align the head, and whipstitch closed. Sometimes I get halfway and then realise the head is off-centre. That’s fine, just undo the stitches and move it right or left as needed.
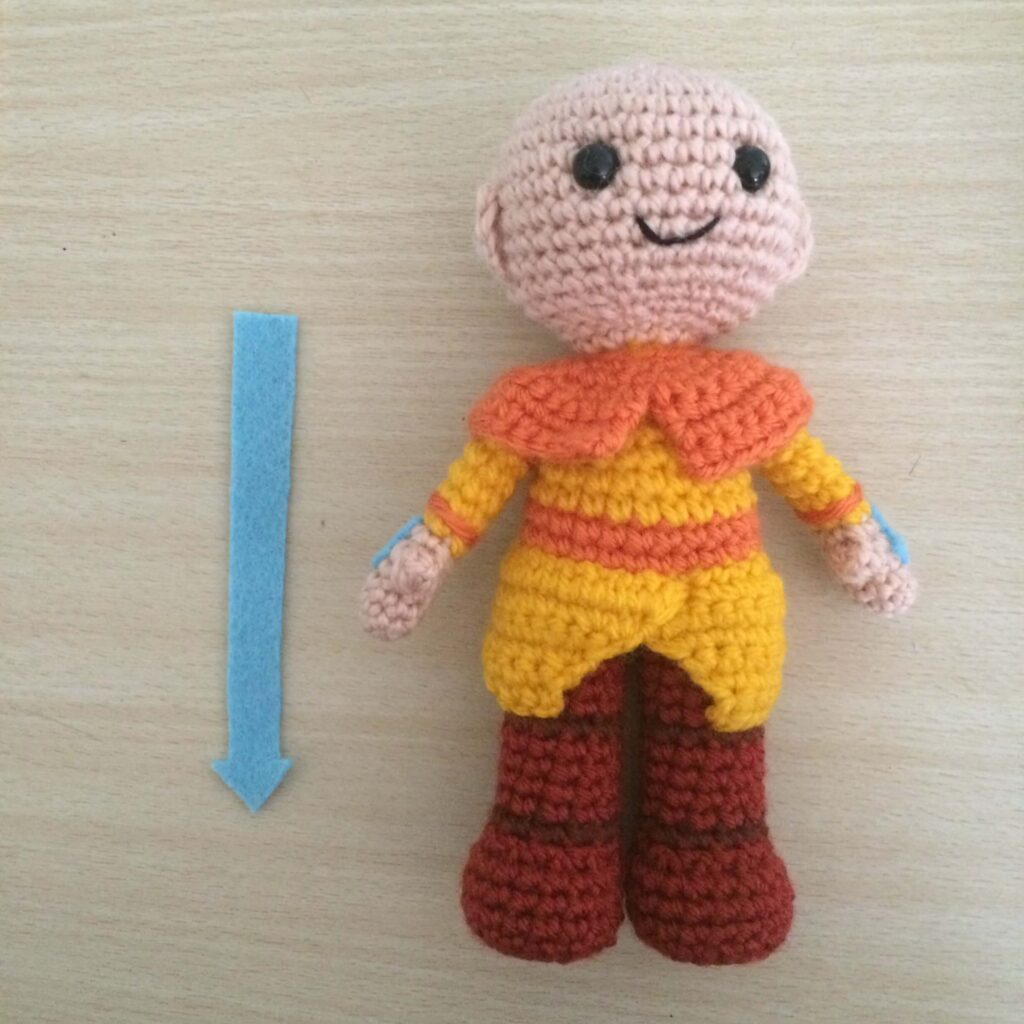
Next, cut another larger, longer arrow out of the blue felt, position, glue and you’re done!

Other free avatar crochet patterns in the series
What would our adorable Avatar be without his friends? There are avatar crochet patterns for the rest of team coming free to the blog shortly (if they’re not here already!). Check out the Avatar: The Last Airbender collections for more patterns from this series! Don’t forget to tag @53stitches on Instagram or Tumblr if you share your work online, I love to see your creations!