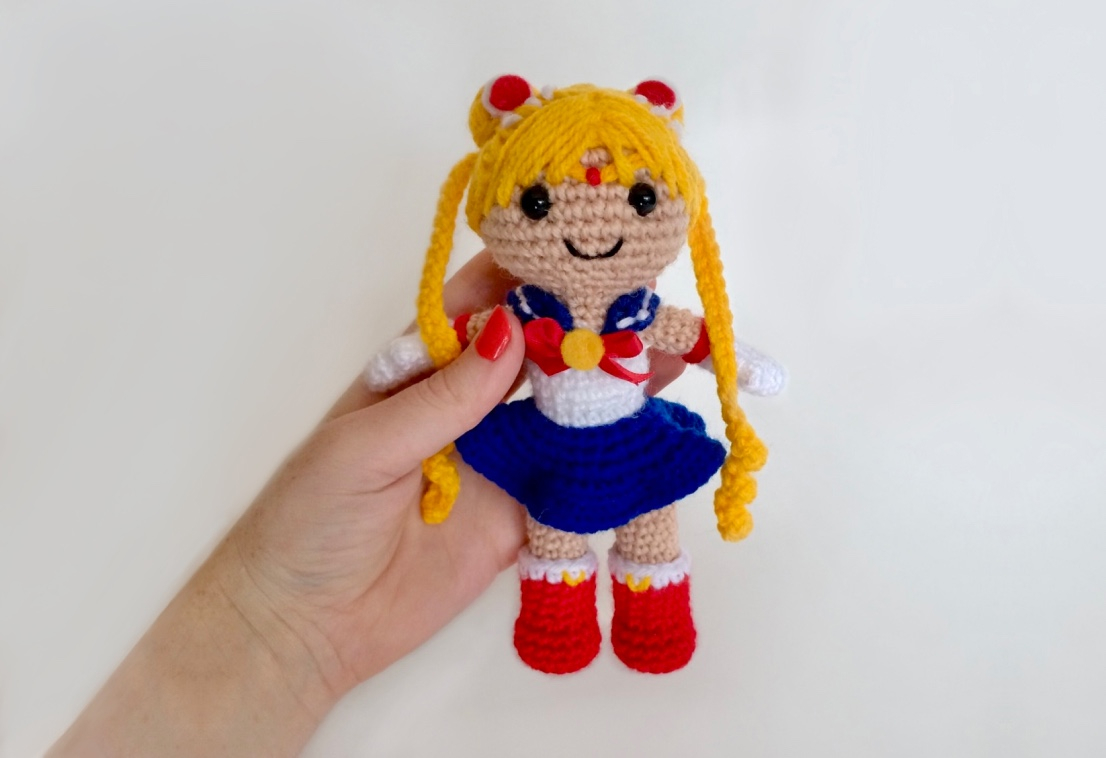
My absolute favourite show when I was a kid was, without a doubt, Sailor Moon. I very loosely interpreted the terms and conditions of book week and dressed up as her, I dyed my hair blonde (badly), my friends and I would run around the playground pretending to be Sailor Scouts. So when I started making crochet dolls of my favourite comic book characters, the next logical choice was to do the same for my favourite anime characters. This Sailor Moon crochet pattern is still one of my absolute favourites – it is just so dang cute. Although she’s a bit complicated and would be a tricky project for beginners, hopefully the explanations are nice and thorough, and you never know until you try!
You can purchase and ad-free PDF of this pattern over on my Ravelry or Etsy, and if you do a huge thank-you in advance for your wonderful support!
What materials will you need?
Note some of the links on this site are affiliate links. This means I get paid a small fee if you decide to purchase anything at no extra cost to you. I will only ever link products I happily use myself.
- 3.00 mm crochet hook
- 2 x 8.00mm safety eyes
- Yarn needle
- Scissors
- Stitch markers
- Polyester fiberfill or some other stuffing material
- Blue yarn (Stylecraft Special DK – 1831 Lapis)
- Yellow yarn (Stylecraft Special DK – 1263 Citron)
- Beige yarn (Stylecraft Special DK – 1710 Stone)
- White yarn (Stylecraft Special DK – 1001 White)
- Red yarn (Stylecraft Special DK – 1246 Lipstick)
- 9mm width Red ribbon
- Yellow felt
- White felt
- Red felt
- Fabric glue
There are affiliate links in the brackets next to the colours for the exact yarn I used in this project, but any DK weight yarn will do!
Quick reference for beginners
Check out some of the below tutorials if you get stuck on any of the stitches or techniques
- How to read patterns
- Magic ring
- Single crochet
- Increase
- Decrease
- How to change colours
- Attaching amigurumi limbs
- Chain
- Back loop only
- Front loop only
- Popcorn stitch
If you get stuck anywhere else, check out the FAQ or the tutorials page.
Sailor Moon free crochet pattern
Head
1. (in Beige) MR 6 (6)
2. [ inc ]x 6 (12)
3. [ inc, sc ]x 6 (18)
4. sc, inc, [ sc 2, inc ]x 5, sc (24)
5. [ inc, sc 3 ]x 6 (30)
6. sc 2, inc, [ sc 4, inc ]x 5, sc 2 (36)
7-12. sc 36 (36)
13. sc 2, dec, [ sc 4, dec ]x 5, sc 2 (30)
14. [ dec, sc 3 ]x 6 (24)
15. sc, dec, [ sc 2, dec ]x 5, sc (18)
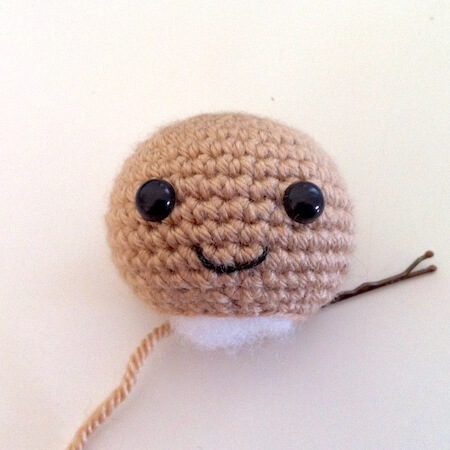
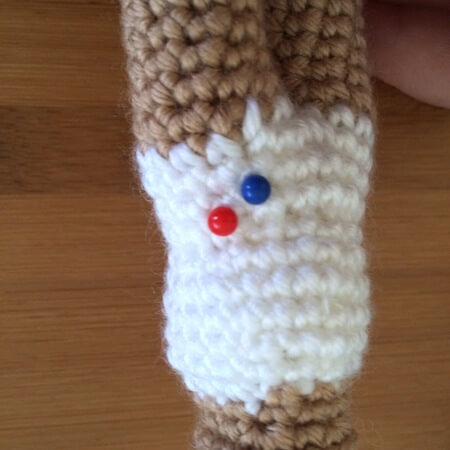
Insert safety eyes between rows 9 and 10, with approximately 5 stitches between them. Leave tail for sewing, finish off and stuff firmly. Stitch on the mouth using a few threads of black embroidery or cross-stitch thread. Yarn works as well but leaves the mouth a bit thick.
Hair
1. (in Yellow) MR 6 (6)
2. [ inc ]x 6 (12)
3. [ inc, sc ]x 6 (18)
4. sc, inc, [ sc 2, inc ]x 5, sc (24)
5. [ inc, sc 3 ]x 6 (30)
6. sc 2, inc, [ sc 4, inc ]x 5, sc 2 (36)
7-12. sc 36 (36)
Finish off, leaving a tail to attach to head.
Hair buns (make 2)
1. (in Yellow) MR 5 (5)
2. [ inc ]x 5 (10)
3-4. sc 10 (10)
Finish off, leaving a tail to attach to the wig cap.
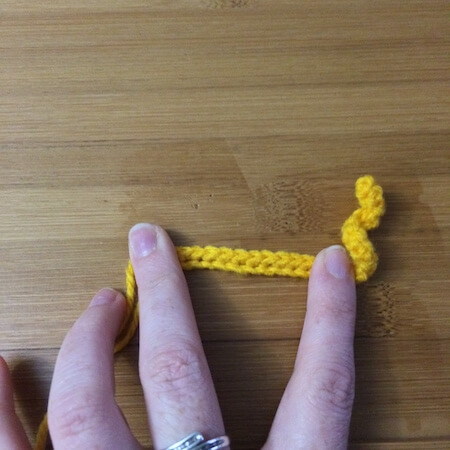
Hair curls (make 2)
1. (in Yellow) ch 37 (37)
2. (start second chain from hook) sc 36 (36)
Finish off, leaving a tail to attach to the hair. The hair will curl more than you want so I iron the top half of the curl (where the tails are) so that the only part that curls is the bottom.
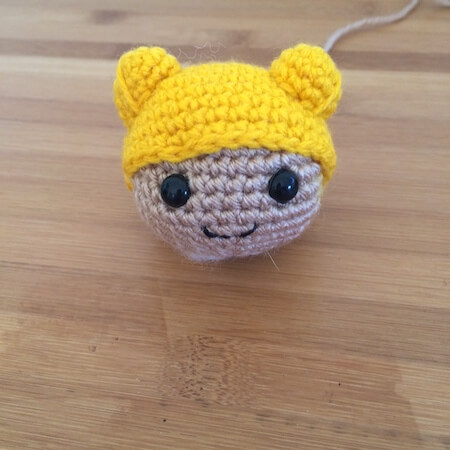
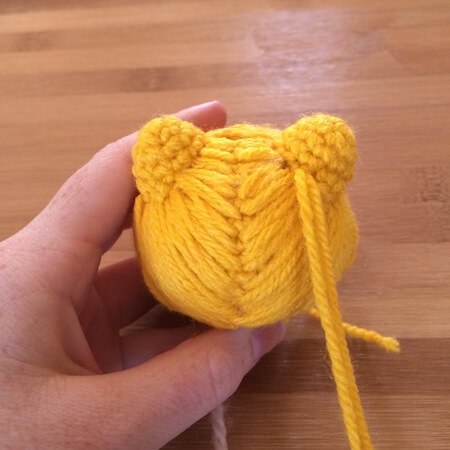
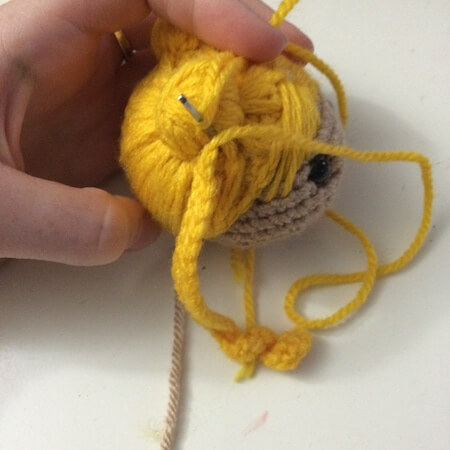
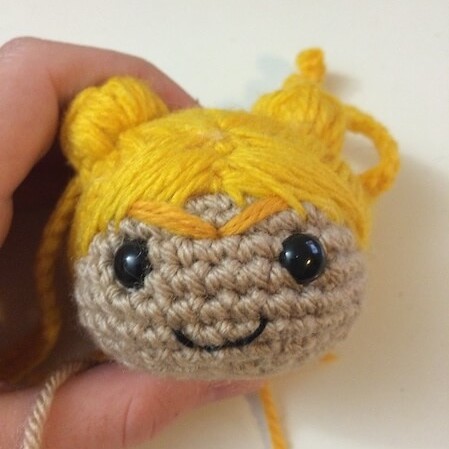
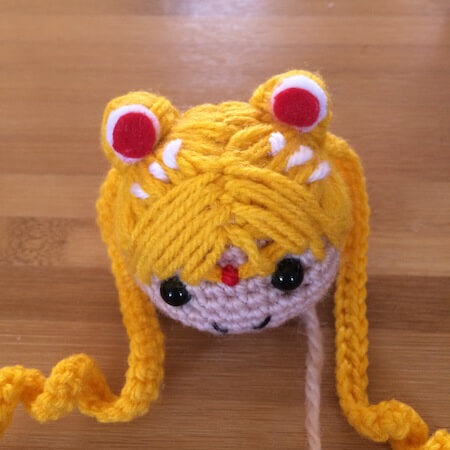
Attach the wig cap to the head using the tail. You only need to secure it in a few places for it to remain on. Position the two hair buns and attach them to the wig cap using the tails. The hair should look like the picture on the previous page at this point.
Next, embroider on the hair. The strands of hair on the buns go in a number of directions, and I finish these first. I also like to pull up a picture to use as a reference for her hair buns and fringe. Then, begin at the top of the head and work your way downwards. The hair should look like it’s being pulled into the bun from the centre of the head, the same way long hair would if put into pigtails.

Last thing to do is to attach the long hair curls to the outside base of the buns. It’s easy to secure them in place using the two tails. Make sure they’re facing the right direction, depending on how your particular ones turned out, so that the curls fall properly when on the doll.
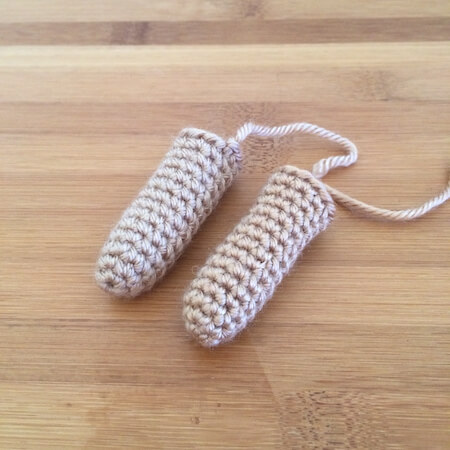
Arms (make 2)
1. (in White) MR 6 (6)
2. [ inc, sc 2 ]x 2 (8)
3-4. sc 8 (8)
5. sc 3, 4sc popcorn, sc 4 (8)
6-9. sc 8 (8)
10-15. (in Beige) sc 8 (8)
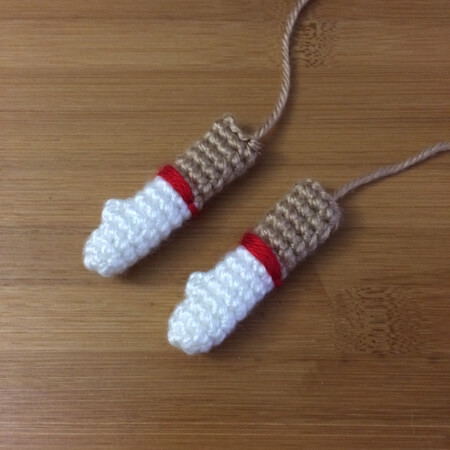
TIP The popcorn stitch in the arm is the thumb. If you prefer straight arms, just replace it with a sc.
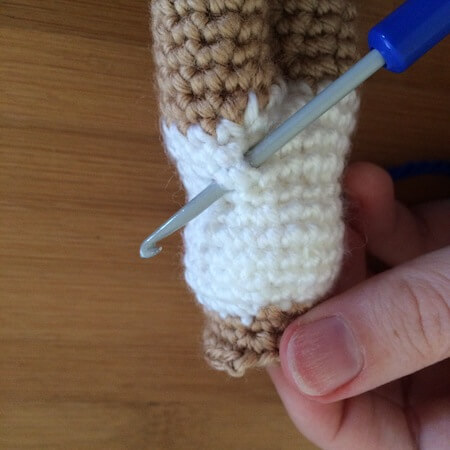
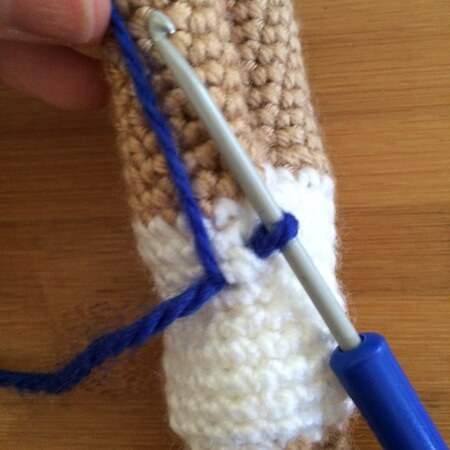
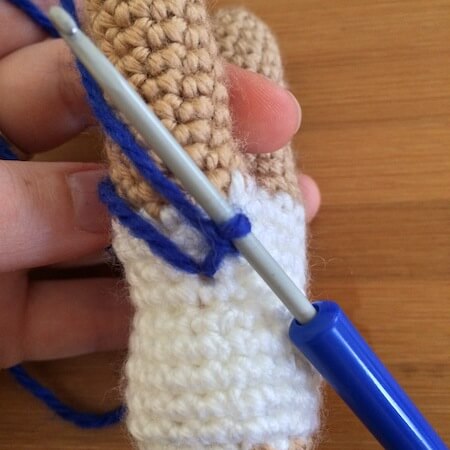
No need for stuffing, leave tail for sewing and finish off. Take a length of red yarn and embroider it so that it goes three times around where the colour changes from white to beige (between rows 9 and 10). See pictures further below.
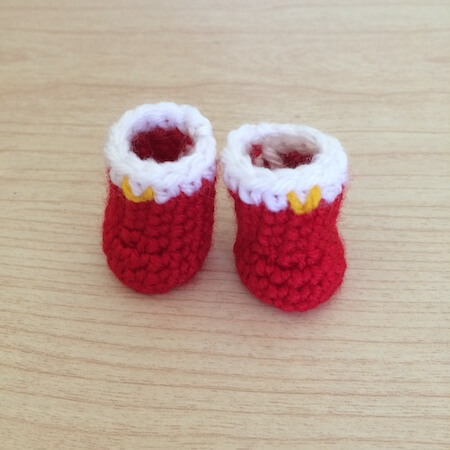
Boots (make 2)
1. (in Red) MR 6 (6)
2. [ inc ]x 6 (12)
3. [ sc, inc ]x 6 (18)
4. BLO sc 18 (18)
5-6. sc 18 (18)
7. sc 3, dec 6, sc 3 (12)
8-10. sc 12 (12)
11. (in White) sc (12)
Finish off. Take a piece of yellow yarn and embroider a small crescent moon at the front of the boot, on the white row.
Legs (make 2)
1. (in Beige) MR 5 (5)
2. [ inc ]x 5 (10)
3-13. sc 10 (10)
14. [ inc, sc 4 ]x 2 (12)
Finish off. No tail is necessary as they aren’t sewn onto anything.
Body
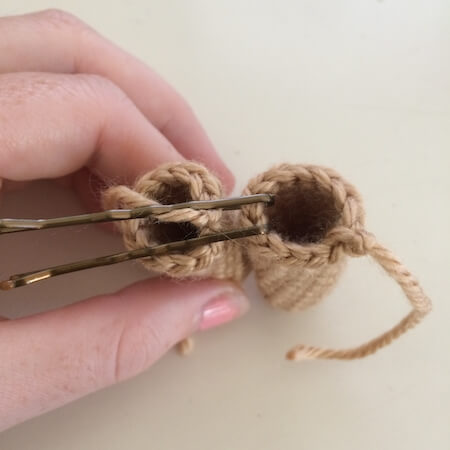
Take the two legs and position them so that the feet are pointing correctly, I like to place two bobby pins in the stitches where the legs will join to make it easier to manage. Make a slip knot, insert hook in the stitch you are going to begin the round with, make sure to begin the round at the back of the doll so that the colour changes are kept out of sight. Put the slip knot on the hook, and pull it through. The next stitch will be a regular single crochet and will begin the round.
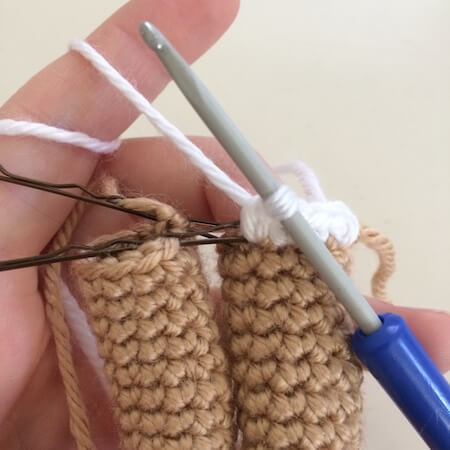
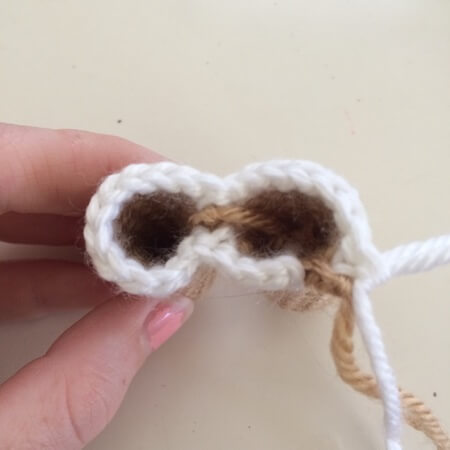
1-2. (in White) sc 24 (24)
3. sc 3, dec, [ sc 6, dec ]x 2, sc 3 (21)
(at this point stuff the legs – make sure the boots still fit)
4. [ dec, sc 5 ]x 3 (18)
5. FLO sc 18 (18)
6. [ inc, sc 2 ]x 6 (24)
7. sc 24 (24)
8. sc 3, dec [ sc 6, dec ]x 2, sc 3 (21)
9. [ dec, sc 5 ]x 3 (18)
10. sc 2, dec, [ sc 4, dec ]x 2, sc 2 (15)
11. (in Beige) [dec, sc 3 ]x 3 (12)
12. sc 12 (12)
13. [ sc, inc ]x 6 (18)
Stuff the rest of the body.
Skirt
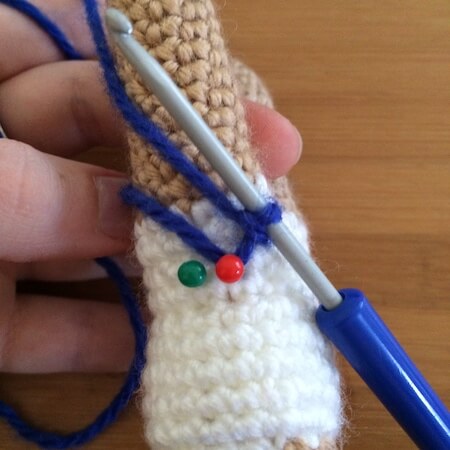
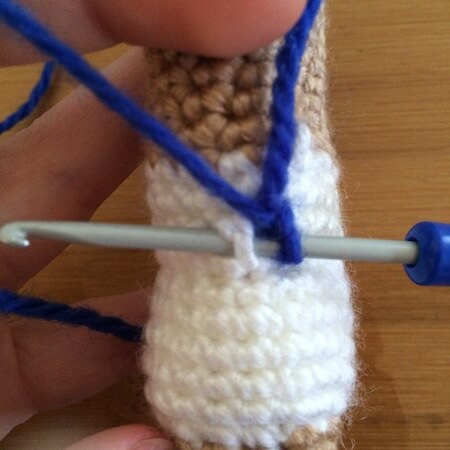
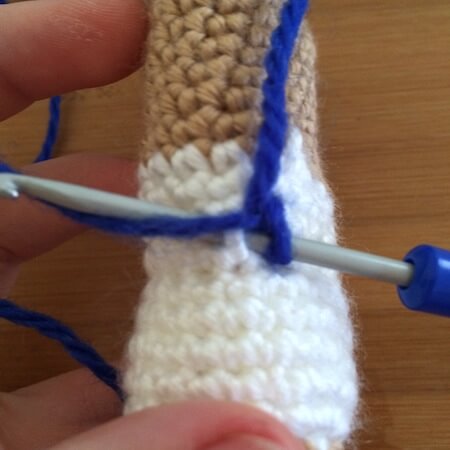
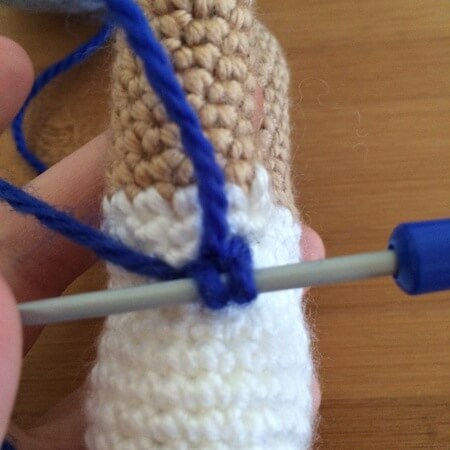
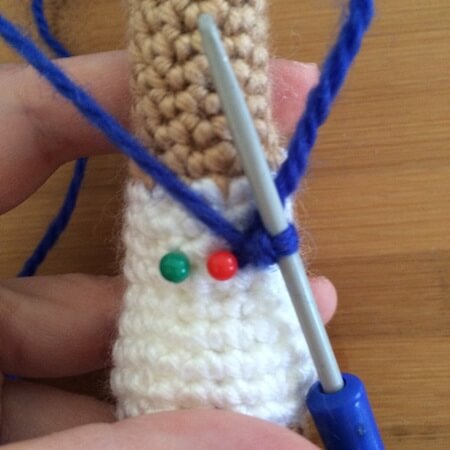
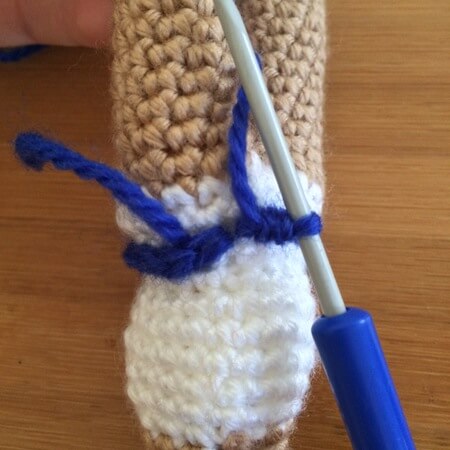
This part can be difficult. You want to pick up 21 stitches, in the third row of the white rows. In between rows 3-4 of the body. There will be one stitch you pick up which goes from one row to the one above it, I usually make this stitch the first one I pick up, and I try and position it so that it is at the back and lines up with the colour change unevenness. I’ve put this process below with pictures and a matching description. I’m right handed and so I find it easier to turn the doll upside down, inserting the hook from right to left to start.
1. (in Blue) Pick up 21 stitches
2. sc 21 (21)
3-5. [ sc, inc ] x (keep repeating all the way around. The exact number of stitches isn’t important, just mark the beginning of the round)
6. BLO sc all around ()
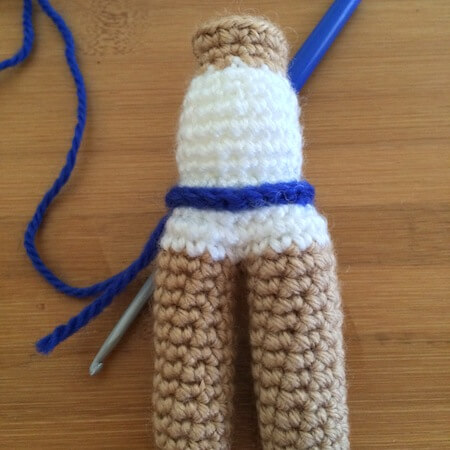
Finish off, leaving a tail. The skirt will seem too big and probably curve upwards. Taking the tail, p!in it to the legs at even spaces, making the skirt wavy.
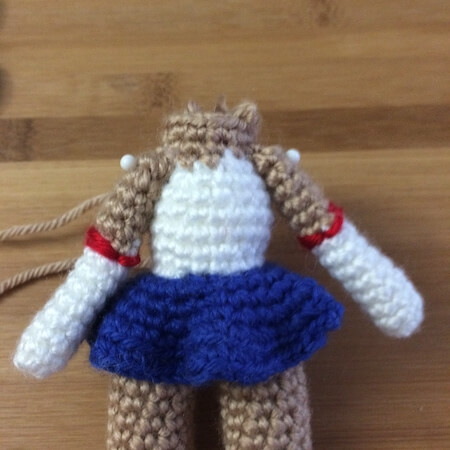
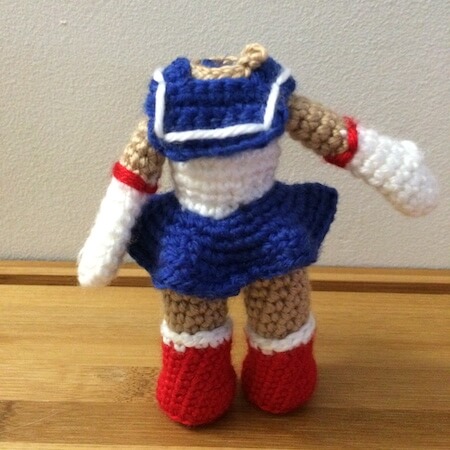
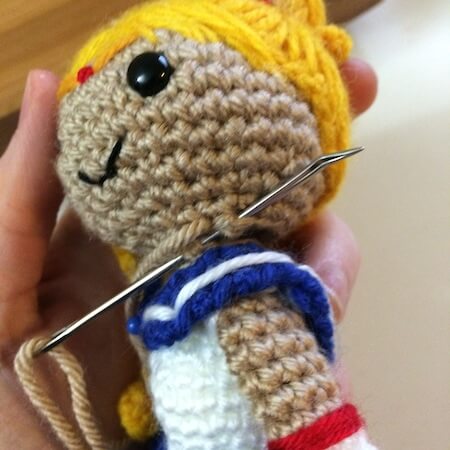
Attach the arms. I like to pin them in place to get an idea of where they should be placed, then they are attached as a flattened piece using the tail. After the arms are attached take a piece of white yarn, and coming out underneath the arm (in the armpit) wrap it around the shoulder three times, doing the same to the other side. This is the finished result:

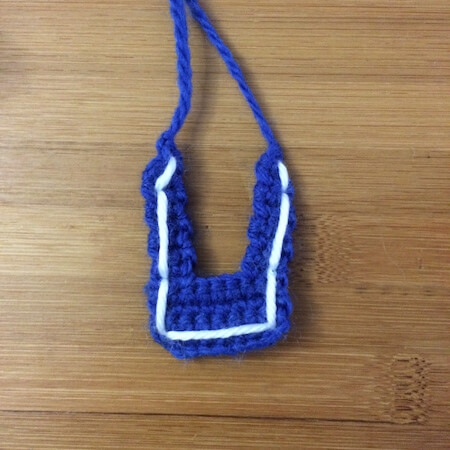
Collar
1. (in Blue) ch 9
2. (start in second chain from hook) sc 8 (8)
3-4. ch 1, turn, sc 8 (8)
5-9. ch 1, turn, sc 2 (2)
10. ch 1, turn, sc (1)
Finish off, leave a tail. Then repeat rows 5-10 on the other side of the collar, picking up stitches from the outer edge. Once finished, embroider on the white stripes.
You could also choose to make the collar out of felt or material.
Stitch the collar into place using the tails. I pull them both through a stitch in the centre of her chest and then use the end to pin down the back which tends to curve.
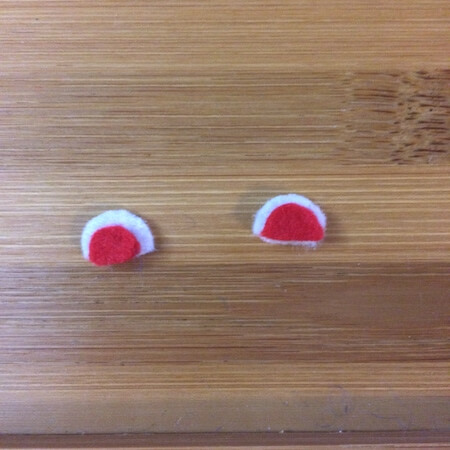
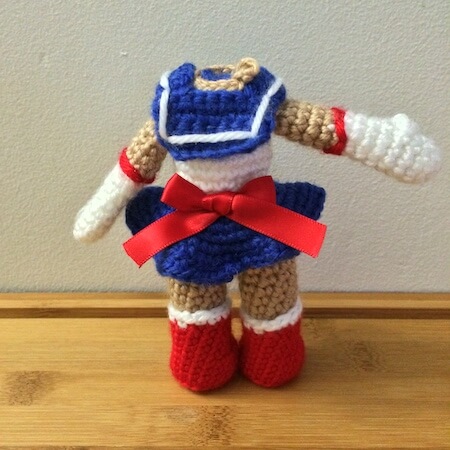
Cut 5 shapes out of felt: one small yellow circle, two white semicircles for the hair buns and two red semicircles to go inside the white ones. Next you want to take two lengths of ribbon about 9mm in width: one approximately 6 inches long (15-16cm) and the other approximately 8 inches (20-21cm). Both need to be tied into bows. The smaller one will be in the centre of the chest and the larger one the centre of her lower back, where the skirt begins.

Attach the bows so that they don’t move and don’t come undone when they are pulled. I do this using a combination of glue and thread. I then glue the yellow circle in the centre. Almost done!

Two last adjustments to the head. Taking a darker yarn than the hair (as close to dark gold as possible) stitch on her tiara. Then take a small length of red yarn and stitch on the gem at the centre point. The last thing for the hair is to take a length of white yarn and embroider three stripes on either side of her head for the white hair clips. In the original anime series, the first Sailor Moon transformation didn’t have these, but Super Sailor Moon did, the original manga did, and she does in the new anime series.
All that’s left is to attach the head. There should have been 18 stitches in the last round of the head and the body, so they match up evenly. Simple align the head properly, and whipstitch closed.
Well done, you’re finished! Sailor Moon is one of the more complicated patterns to complete but I love her so much. She was the first doll I made where I would walk past and stop to admire how cute the doll was.
Other patterns in this series
I’m in the process of converting my other Sailor Moon patterns into blog posts, but if you can’t wait, check out the bundle I have over on Etsy or Ravelry where you can get patterns for all of the Sailor Senshi and Tuxedo Mask! If you make your own and you share on Instagram or Tumblr, don’t forget to tag @53stitches so I can check it out ☺️