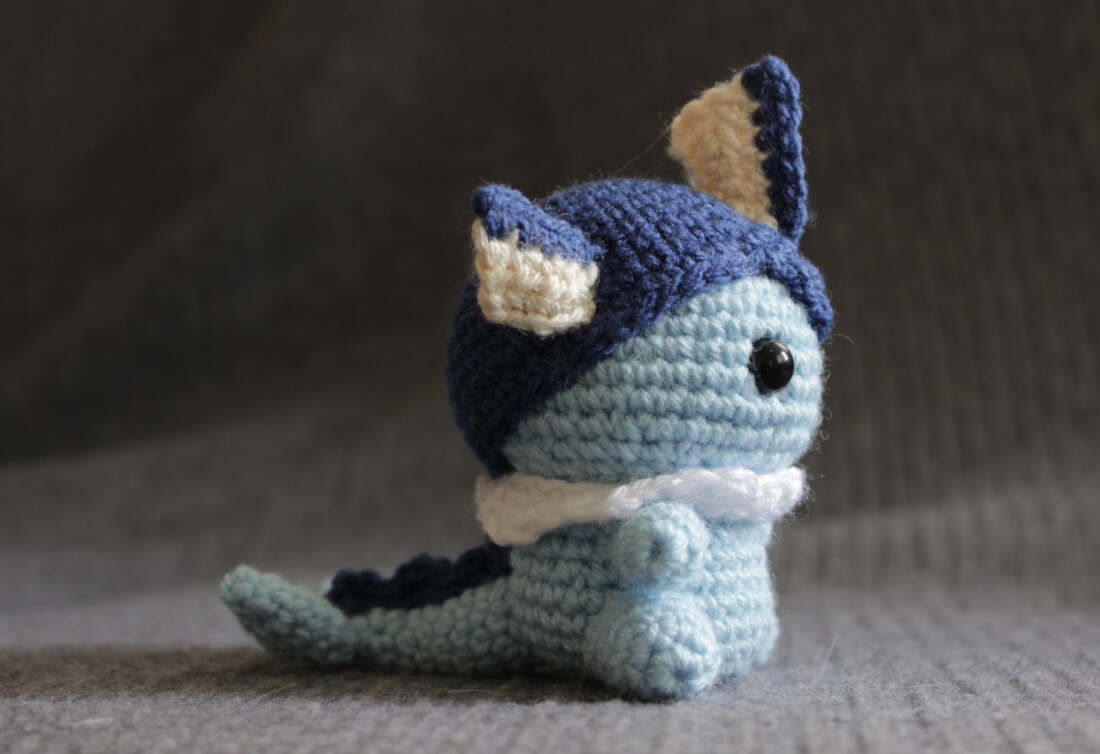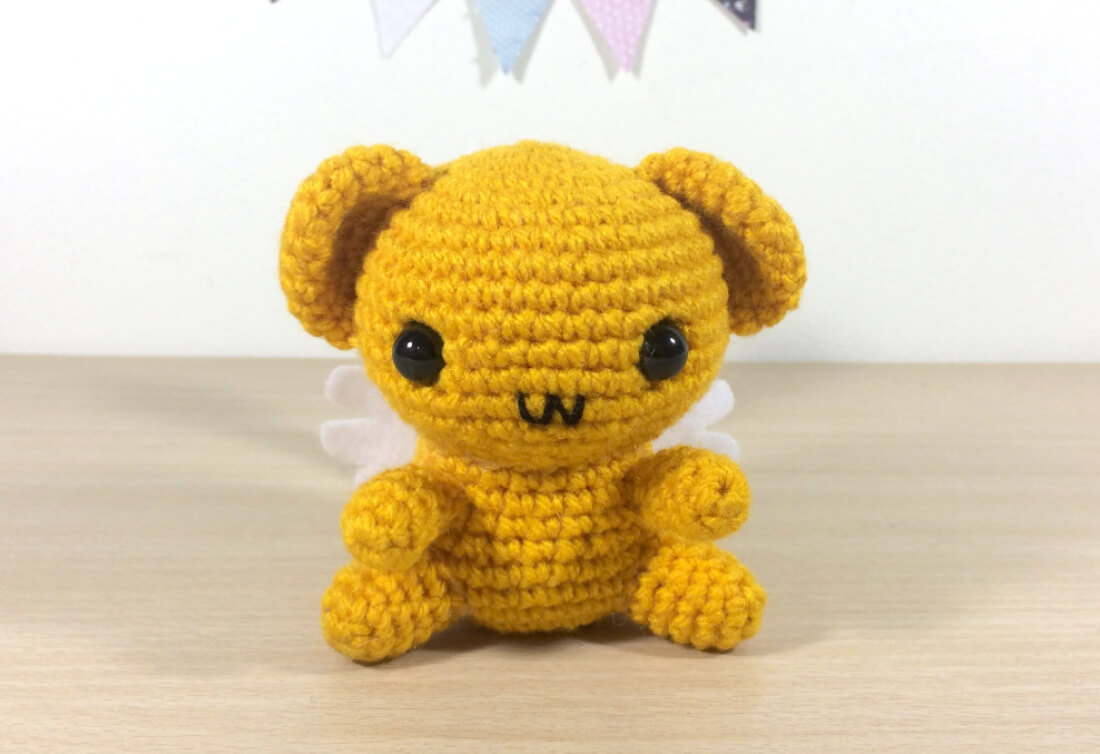
This weeks pattern is a Kero-chan amigurumi from the anime series Card Captors Sakura! This was another series I used to love watching on Nickelodeon when I was a kid. Sakura had so many great costumes, and I always wanted my own Clow key or cards, but I’ll settle for my very own Keroberos!
What materials will you need?
Note some of the links on this site are affiliate links. This means I get paid a small fee if you decide to purchase anything at no extra cost to you. I will only ever link products I happily use myself.
- 3.00mm crochet hook
- 2 x 10mm safety eyes
- yellow yarn
- white yarn
- white felt
- pet brush
- stuffing
Quick reference for beginners
Check out some of the below tutorials if you get stuck on any of the stitches or techniques
- How to read patterns
- Magic ring
- Single crochet
- Increase
- Decrease
- How to change colours
- Attaching amigurumi limbs
If you get stuck anywhere else, check out the FAQ.
Kero chan amigurumi pattern
HEAD
1. (in Yellow) MR 6 (6)
2. [ inc ]x 6 (12)
3. [ inc, sc ]x 6 (18)
4. sc, [ inc, sc 2 ]x 5, inc, sc (24)
5. [ inc, sc 3 ]x 6 (30)
6. sc 2, [ inc, sc 4 ]x 5, inc, sc 2 (36)
7. sc 36 (36)
8. [ inc, sc 5 ]x 6 (42)
9-13. sc 42 (42)
14. [ dec, sc 5 ]x 6 (36)
15. sc 2, [ dec, sc 4 ]x 5, dec, sc 2 (30)
16. [ dec, sc 3 ]x 6 (24)
Finish off, leaving a tail for sewing later.
BODY
1. (in Yellow) MR 6 (6)
2. [ inc ]x 6 (12)
3. [ inc, sc ]x 6 (18)
4. sc, [ inc, sc 2 ]x 5, inc, sc (24)
5. [ inc, sc 3 ]x 6 (30)
6-8. sc 30 (30)
9. [ dec, sc 3 ]x 6 (24)
10-12. sc 24 (24)
Finish off.
LEG (make 2)
1. (in Yellow) MR 6 (6)
2. [ inc, sc ]x 3 (9)
3-6. sc 9 (9)
Finish off, leaving a tail for sewing later.
ARM (make 2)
1. (in Yellow) MR 6 (6)
2. [ inc, sc 2 ]x 2 (8)
3-4. sc 8 (8)
5. dec, sc 6, (7)
Finish off, leaving a tail for sewing later.
EARS (make 2)
1. (in Yellow) MR 6 (6)
2. [ inc ]x 6 (12)
3. [ inc, sc ]x 6 (18)
4-6. sc 18 (18)
Finish off, leaving a tail for sewing later.
TAIL
1. (in Yellow) MR 6 (6)
2. inc, sc 6 (7)
3-16. sc 7 (7)
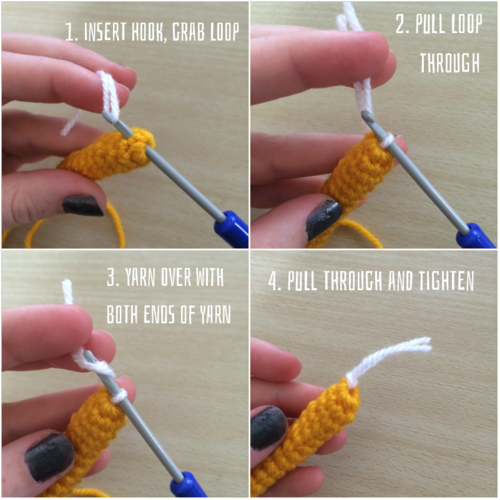
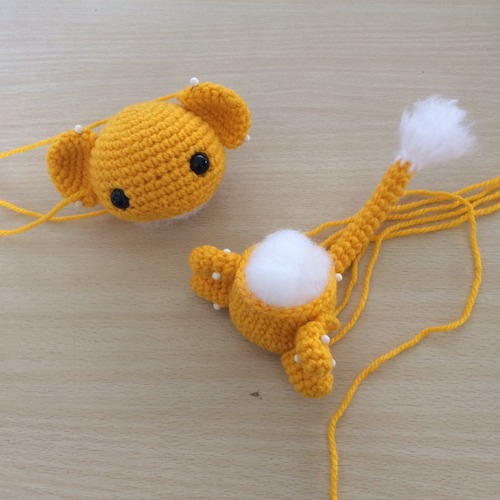
Finish off, leaving a tail for sewing later. For the tail we’re going to do the same thing we did with Charmander’s tail, this time attaching pieces of white yarn to the end and brushing it out to give it a fluffy appearance.
So you’ll need some short scrap pieces of white yarn and the crocheted tail. Take your crochet hook, and insert into the hole at the end of the tail, coming back out through of one the hole’s in between the first and second rounds of the tail. Fold one of the pieces of scrap yarn in half, put it on the hook, and pull it out the end of the tail. Then grab the tails with your hook, pull them through the loop and pull the yarn tightly to make sure it’s firmly attached.
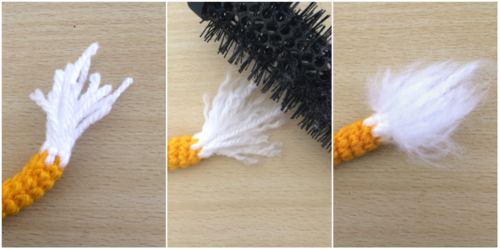
Do this around all around the end of the tail. Then take a brush (I’m using a styling curl brush here, but a pet brush works even better. Something with thin, closely packed bristles.), and brush out the yarn until it’s nice and fluffy. You’ll lose a bit of the yarn in the brush but that’s okay. Then trim the tail as necessary to give it a nice shape.
Putting it all together
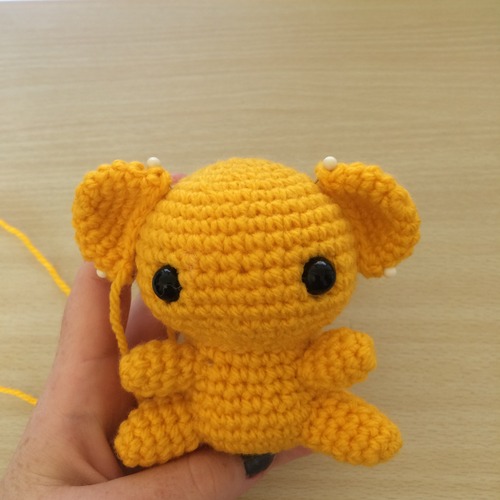
That’s it for the crocheting part. Now to put it all together. Insert your safety eyes in between rows 11 and 12 of the head, with about 8 stitches between them.
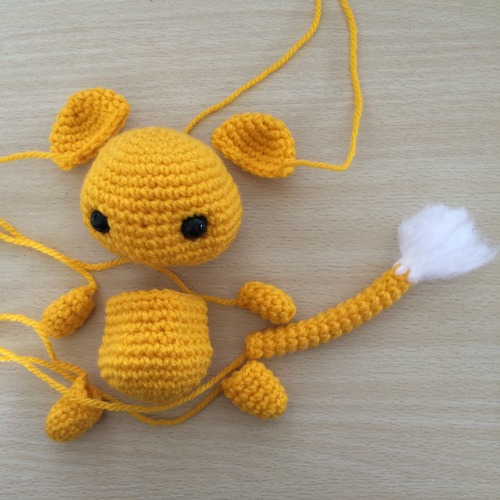
Stuff the head, legs and body. The ears should be pressed flat and shaped a bit to give them a curve, but shouldn’t have any stuffing, and the arms and tail are too small for it. I like to pin all of the pieces in place to make sure they’re sitting properly before attaching them.
Then I use the tails to attach them! I attach the legs, tail and then the arms. Then I attach the head, putting the ears on last so that it’s easier to make them symmetrical.
Sew on his mouth using some black thread or yarn.
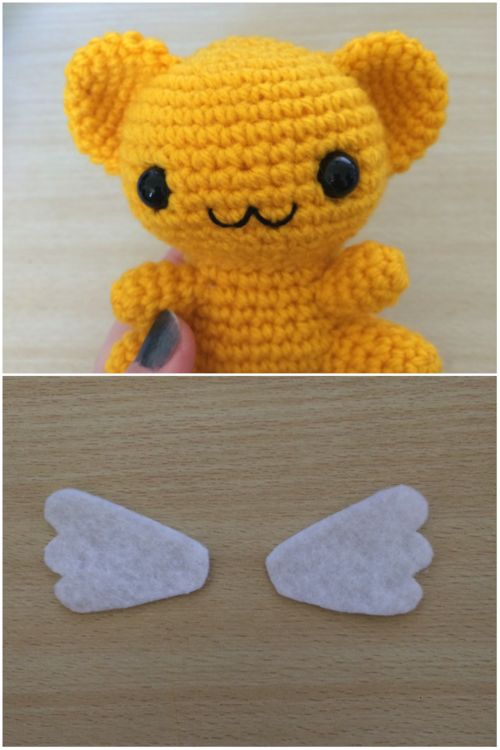
Last thing left to do is give him some little white wings, like Happy last week. Take a piece of white felt and cut two small wings out. The exact shape and size of these is up to you, and will always be different depending on the doll you’ve ended up with. Now to stitch on the wings. Take a length of white yarn. I usually make three small stitches, each going from a single point towards the edge of each of the “feathers”. See pictures below.

And that’s your Kero chan amigurumi plush done!
He’s nice and simple without any colours changes so he always works up pretty quickly. If you make one yourself don’t forget to tag your creations @53stitches on Tumblr or Instagram so I can check them out!