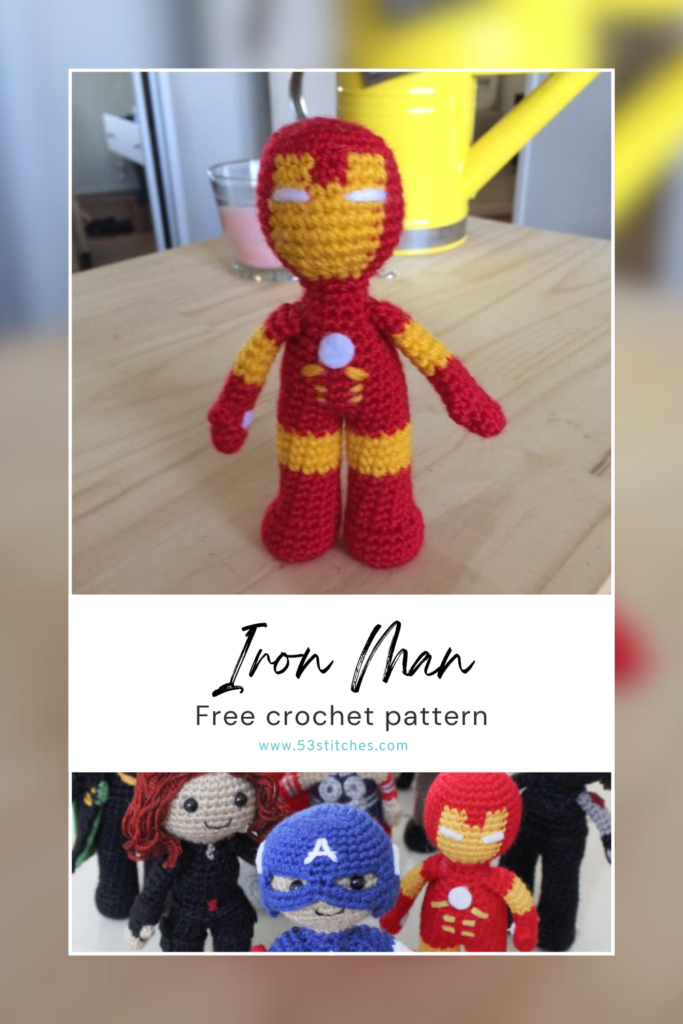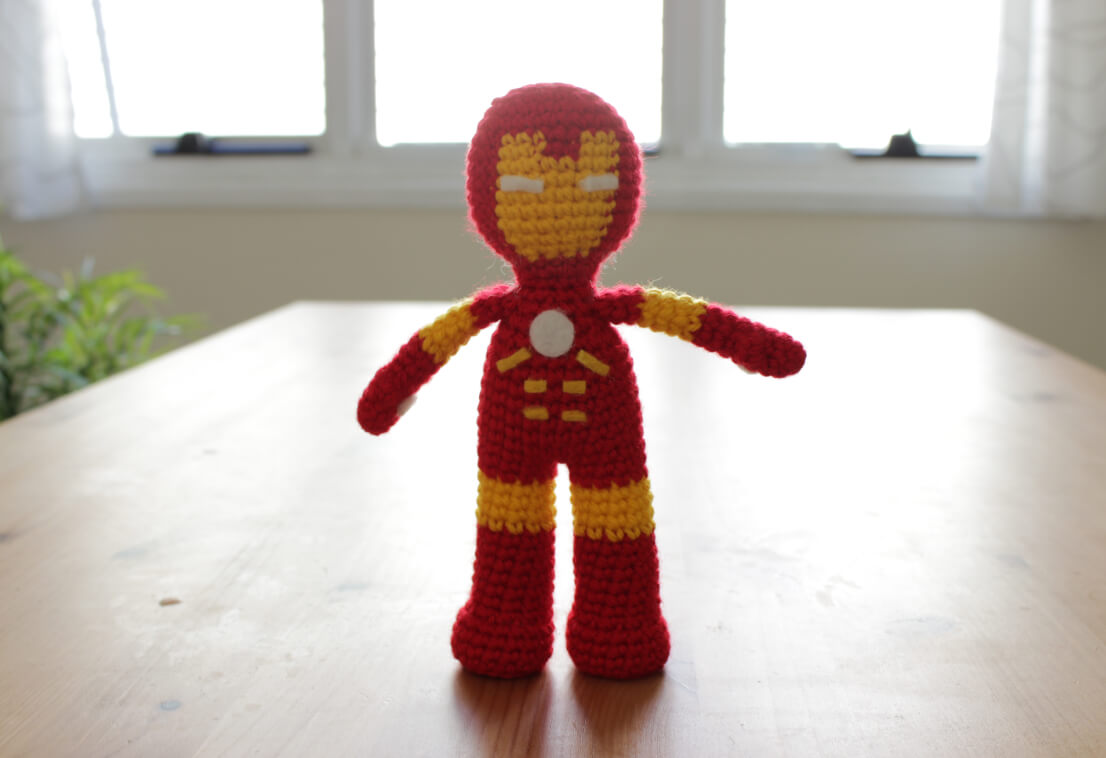
This Iron Man amigurumi doll is one of the first Marvel characters I turned into crochet, and is still one of the trickiest to work out! He’s still my favourite Avengers to this day, but I’ll admit that his look doesn’t convert quite as well to yarn as some of the others. I tried a couple of different methods to get the look of his face right, and eventually settled on this version with colour changes. Fair warning, trying to get these stitches straight can be a little bit of a frustrating experience, but it’s also great practise for colour changes! Read ahead for this free Iron Man amigurumi crochet pattern.
As usual, you can purchase and ad-free PDF of this pattern over on my Ravelry, and if you do a huge thank-you in advance for your wonderful support!
What materials will you need?
Note some of the links on this site are affiliate links. This means I get paid a small fee if you decide to purchase anything at no extra cost to you. I will only ever link products I happily use myself.
- 3.00mm crochet hook
- Yarn needle
- Scissors
- Stitch markers
- Stuffing
- Yellow yarn (Stylecraft Special DK – 1856 Dandelion)
- Red yarn (Stylecraft Special DK – 1246 Lipstick)
- White yarn (Stylecraft Special DK – 1001 White)
- White felt
- (optional) Glow in the dark paint
- Fabric glue
There are affiliate links in brackets next to the colours for some suggestions! But any DK weight yarn you prefer will do.
Quick reference for beginners
Check out some of the below tutorials if you get stuck on any of the stitches or techniques
- How to read patterns
- Magic ring
- Single crochet
- Increase
- Decrease
- How to change colours
- Half double crochet
- Back loop only
- Popcorn stitch
If you get stuck anywhere else, check out the FAQ or the tutorials page.
Iron Man free crochet pattern
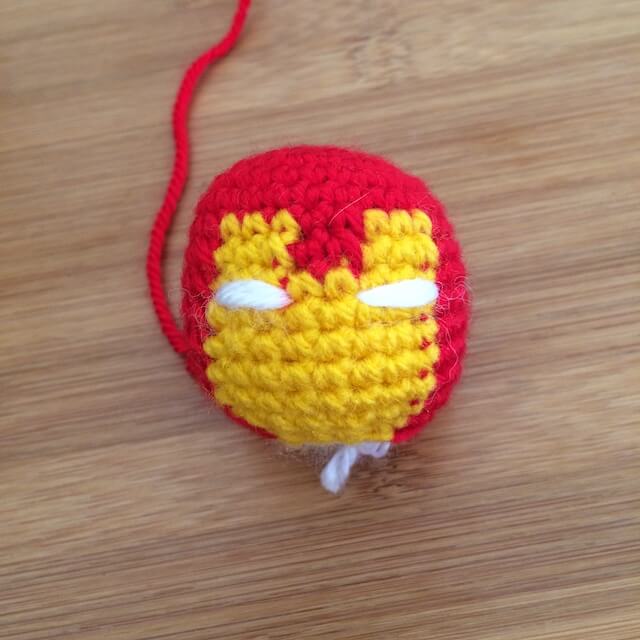
Head
We’re starting with the trickiest part of this pattern! Almost all of my patterns are worked in continuous rounds – which means you just keep going into the next stitch each round. I also use yarn over yarn over stitches. This generally causes a bit of a tilt to each stitch. If you find that you’re struggling to get these stitches to stay straight and as clean as you want, you can work the head in joined rounds instead, and also trying yarn under yarn over stitches.
The second most important part is to make sure you’re doing your colour changes correctly – check out my colour change tutorial to see how I’m doing them – specifically vertical colour changes for the head!
row 1: (in Red) MR 6 (6)
row 2: [ inc ]x 6 (12)
row 3: [ inc, sc ]x 6 (18)
row 4: sc, inc, [ sc 2, inc ]x 5, sc (24)
row 5: [ inc, sc 3 ]x 6 (30)
row 6: sc 30 (30)
rows 7-8: (continue in Red) sc 11 (change to Yellow) sc 3 (change to Red) sc 2 (change to Yellow) sc 3 (change to Red) sc 11 (30)
rows 9-13: (continue in Red) sc 11 (change to Yellow) sc 8 (change to Red) sc 11 (30)
row 14: (continue in Red) [ dec, sc 3 ]x 2, dec (change to Yellow) sc 3, dec, sc 2, (change to Red) sc, [ dec, sc 3 ]x 2 (24)
row 15: (continue in Red) sc, [ dec, sc 2 ]x 2, (change to Yellow) dec, sc 2, dec, (change to Red) [ sc 2, dec ]x 2, sc (18)
Finish off and leave a long tail for attaching to the body later and stuff firmly. You can choose to cut the small rectangular eyes out of white felt, or embroider them on using white yarn. I also paint mine with non-toxic glow-in-the-dark paint from my local craft store! The paint dries clear and glows blue.
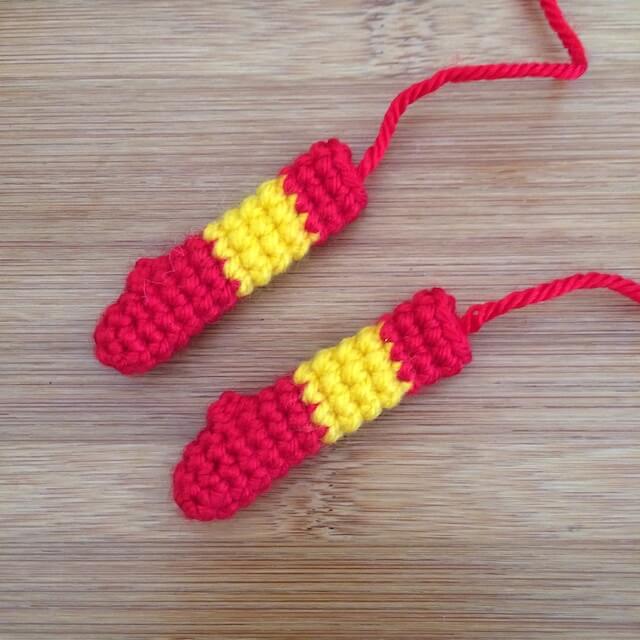
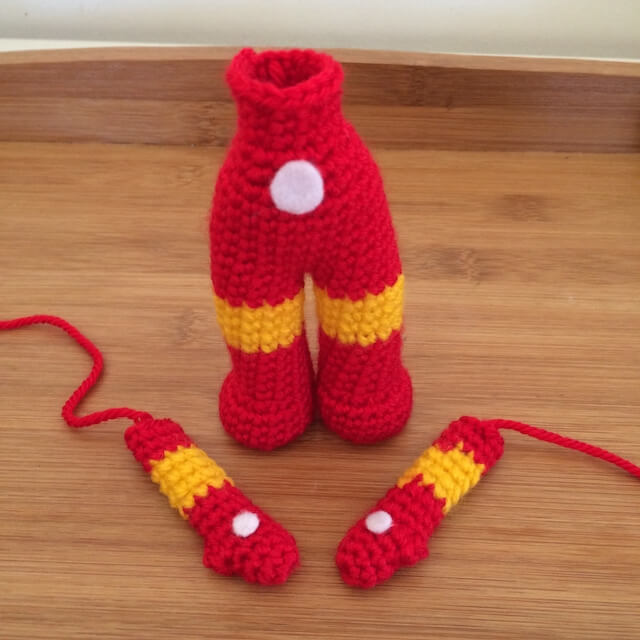
Arm (make 2)
row 1: (in Red) MR 6 (6)
row 2: [ inc, sc 2 ]x 2 (8)
rows 3-4: sc 8 (8)
row 5: sc 3, 4sc popcorn, sc 4 (8)
rows 6-8: sc 8 (8)
rows 9-12: (change to Yellow) sc 8 (8)
rows 13-15: (change to Red) sc 8 (8)
No need for stuffing, leave tail for sewing and finish off!
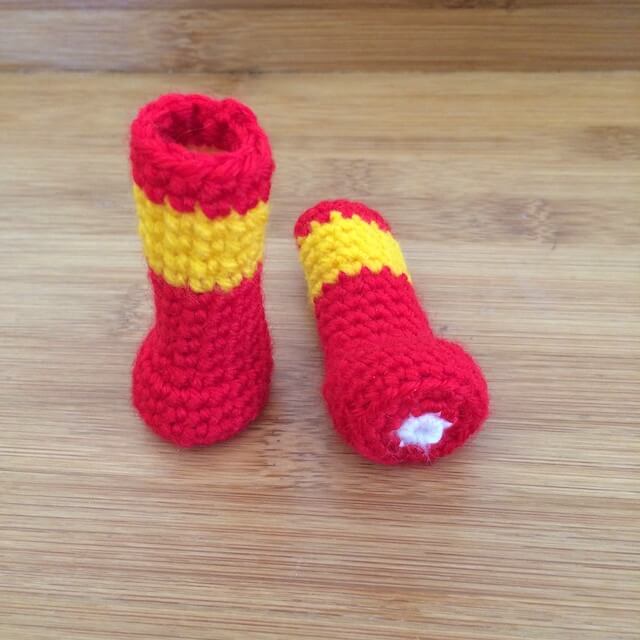
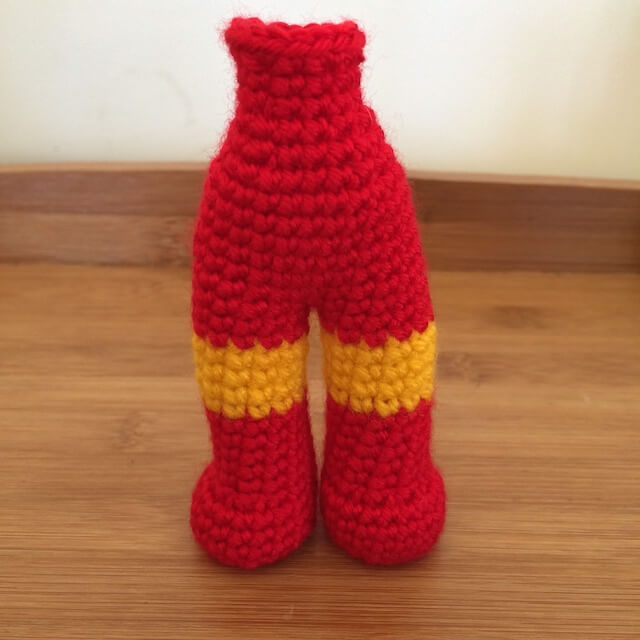
Leg (make 2)
row 1: (in White) MR 6 (6)
row 2: (change to Red) [ inc ]x 6 (12)
row 3: [ sc, inc ]x 6 (18)
row 4: BLO sc 18 (18)
rows 5-7: sc 18 (18)
row 8: sc 3, dec 6, sc 3 (12)
row 9: sc 12 (12)
rows 10-14: sc 12 (12)
rows 15-18: (change to Yellow) sc 12 (12)
rows 19-20: (change to Red) sc 12 (12)
Finish off the first leg with a slip stitch and cut the yarn with about 4cm or so – no long tail necessary. For the second leg, don’t cut the thread, we’ll continue crocheting and join the two legs together for the body.
TIP Crocheting one round in the back loop only makes it easier to give the foot it’s shape, as it helps the row curve and make the base flat.
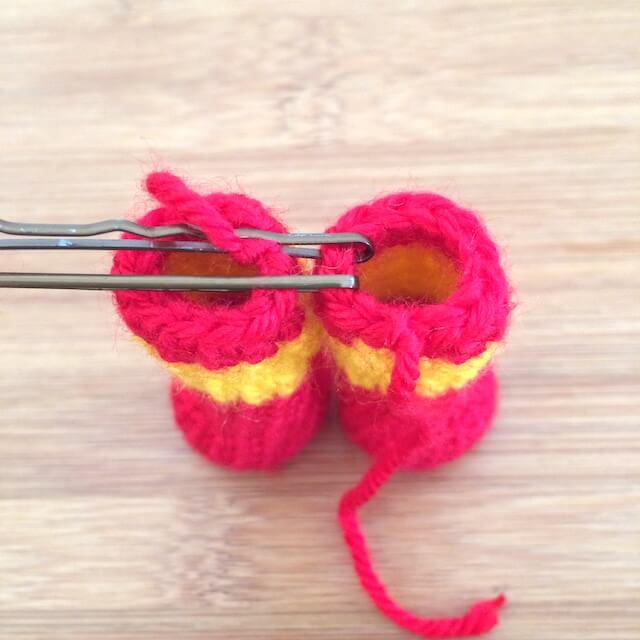
Body
Take the two legs and position them so that the feet are pointing correctly, I like to place two bobby pins in the stitches where the legs will join to make it easier to manage. Make a slip knot, insert hook in the stitch you are going to begin the round with, make sure to begin the round at the back of the doll so that the colour changes are kept out of sight. Put the slip knot on the hook, and pull it through. The next stitch will be a regular single crochet and will begin the round.

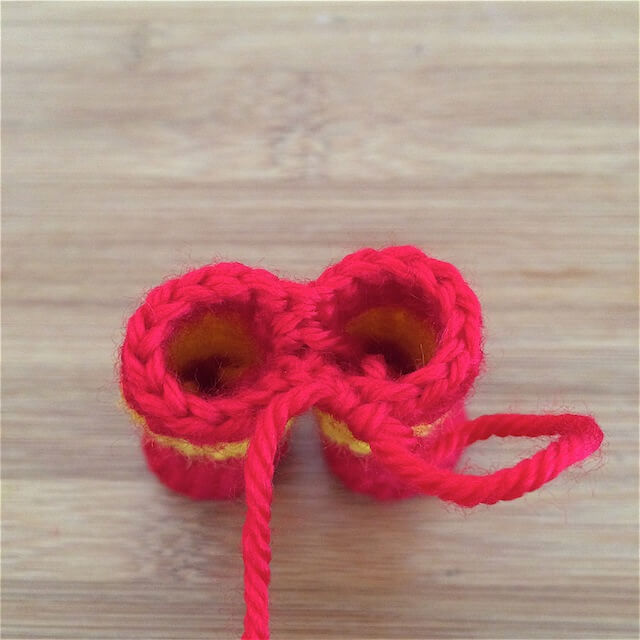
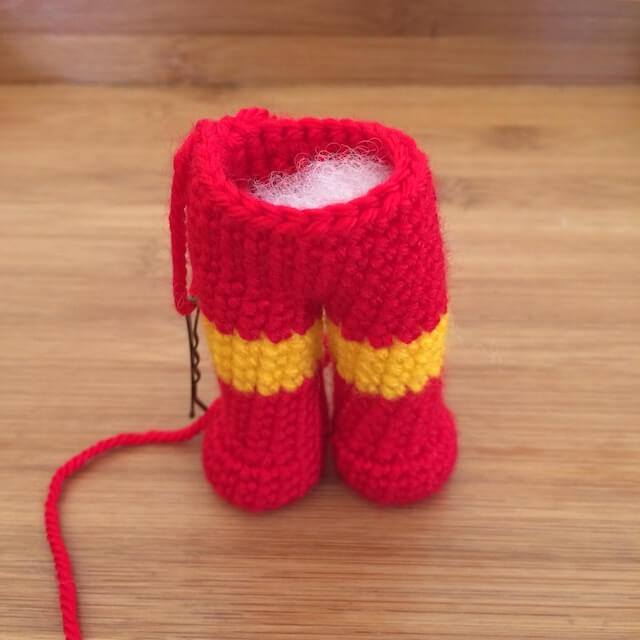
rows 1-8: (continue in Red) sc 24 (24)
(at this point stuff the legs)
row 9: sc 3, dec, [ sc 6, dec ]x 2, sc 3 (21)
row 10: [ dec, sc 5 ]x 3 (18)
row 11: sc 2, dec [ sc 4, dec ]x 2, sc 2 (15)
row 12: [ dec, sc 3 ]x 3 (12)
row 13: sc 12 (12)
row 14: [ sc, inc ]x 6 (18)
Finish off by doing a slip stitch in the next stitch.
Assembling (pun intended) your Iron Man amigurumi
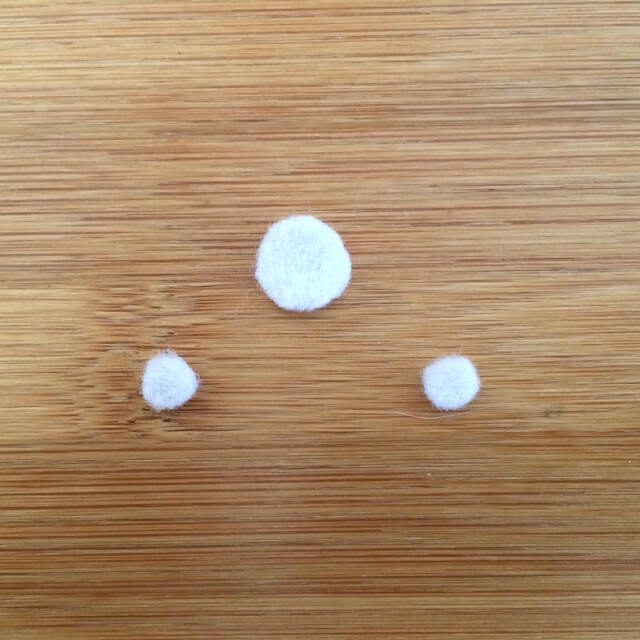
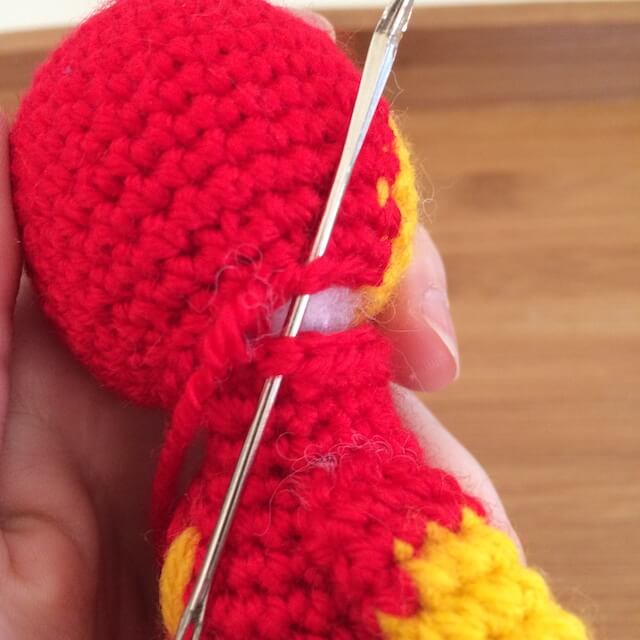
Cut out the three circles: a large one for the small centre arc reactor, and 2 smaller ones for the palms. Paint these felt circles with glow in the dark paint, which dries clear and glows blue. Also paint the white circles on the soles of the feet.
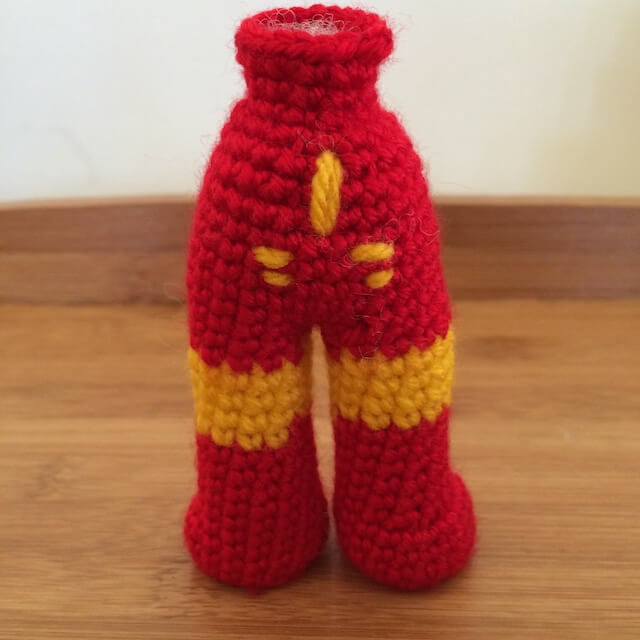
After gluing the felt on I like to add little details to the chest and back using a length of yellow yarn, and embroidering on some stripes. On the front I do some angled lines under the arc reactor. On the back I do a vertical line down the middle and then horizontal lines that match the front. I usually pull up a reference image when deciding where to place these, so you can do whatever detailing you prefer as well!

Attach the arms next. I pin them in place first so that I can get an idea of positioning, and then attach them as a flattened piece.
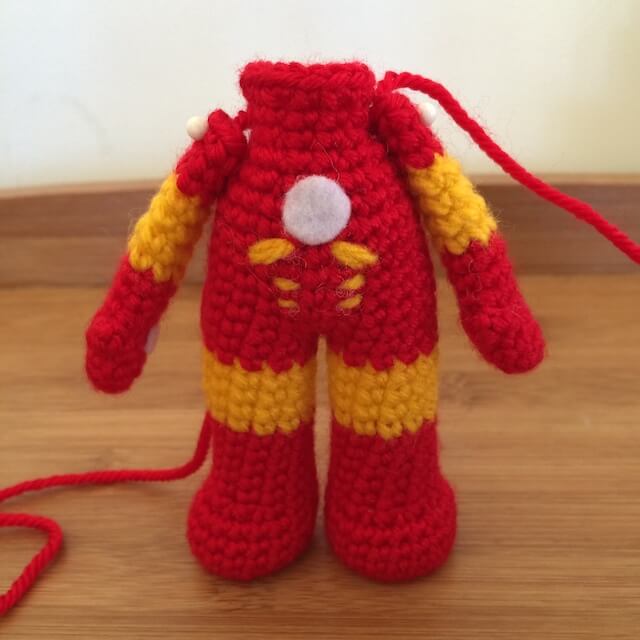

Attach the head. There should have been 18 stitches in the last round of the head and the body, so they match up evenly. Simply align the head and whipstitch closed! If you don’t get the position right the first time, you can undo it and try again.

Congratulations you’re done!
Other patterns in the series
I hope you enjoyed making your Iron Man crochet doll with this free pattern! Check out the Marvel and DC Comics collections for more superhero patterns and don’t forge to tag @53stitches on Instagram or Tumblr if you share your work online so I can check it out!
And keep an eye out for more Avengers on their way!