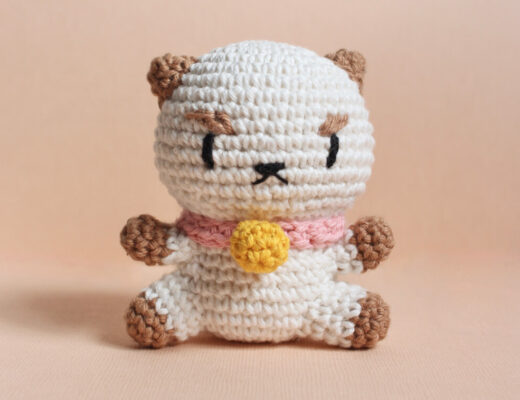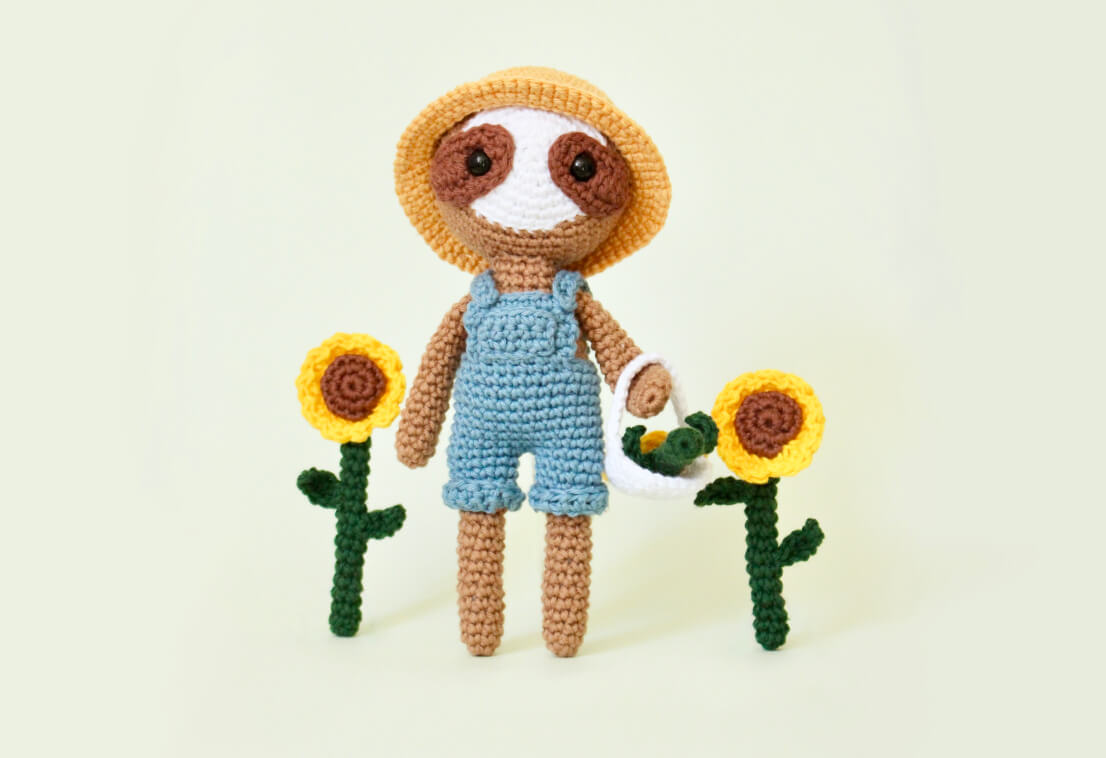
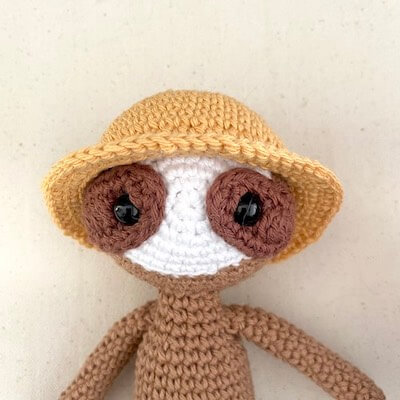
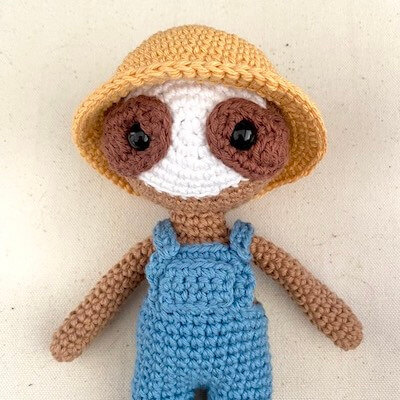
Say hello to Charlotte! Charlotte is the first in what I hope will be a new animal crochet collection. I wanted to add a bit of a twist to it and give each of the animals a hobby! Charlotte is an avid gardener and loves sunflowers in particular. This free sloth crochet pattern has heaps of photos to help you crochet a little plush of your own. There are some techniques that may be tricky for new beginners, but there are plenty of pictures and descriptions along the way.
You can purchase and ad-free PDF of this pattern over on my Ravelry or Etsy, and if you do a huge thank-you in advance for your wonderful support!
What materials will you need?
Note some of the links on this site are affiliate links. This means I get paid a small fee if you decide to purchase anything at no extra cost to you. I will only ever link products I happily use myself.
- 3.00 mm crochet hook
- Yarn needle
- Scissors
- 2 x 10mm safety eyes
- Stitch markers
- Polyester fiberfill or some other stuffing material
- White yarn (Paintbox 401 Paper White)
- Brown yarn (Paintbox 410 Soft Fudge)
- Dark brown yarn (Paintbox 411 Coffee Bean)
- Bright yellow yarn (Paintbox 423 Buttercup Yellow)
- Sandy yellow yarn (I used Paintbox 417 but it doesn’t seem to be available anymore 🙁 try 422 Daffodil Yellow – it will be brighter)
- Blue yarn (Paintbox 437 Dolphin Blue)
There are affiliate links in the brackets next to the colours for the exact yarn I used in this project, but any DK weight yarn will do!
Quick reference for beginners
Check out some of the below tutorials if you get stuck on any of the stitches or techniques
- How to read patterns
- Magic ring
- Single crochet
- Increase
- Decrease
- How to change colours
- Attaching amigurumi limbs
- Half double crochet
- Chain
- Back loop only
- Front loop only
If you get stuck anywhere else, check out the FAQ or the tutorials page.
Charlotte the Sloth free crochet pattern
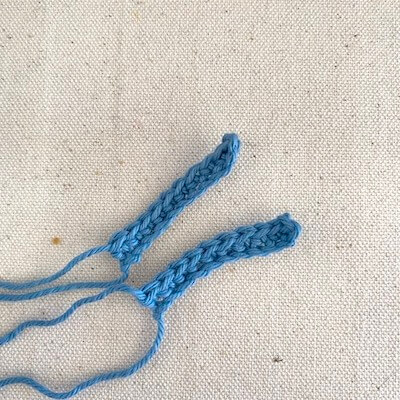
Eyes (make 2)
row 1: (in Dark Brown) ch 9 (9)
row 2: turn, start in 3rd ch from hook, dc 7 (7)
row 3: sc in each stitch around the entire piece (see notes below)

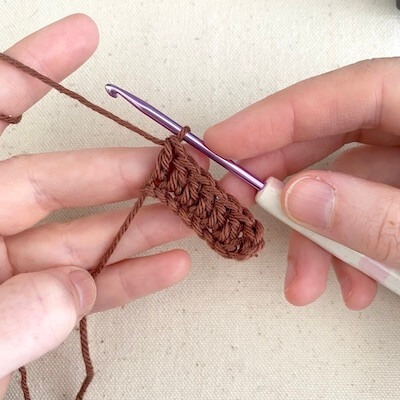
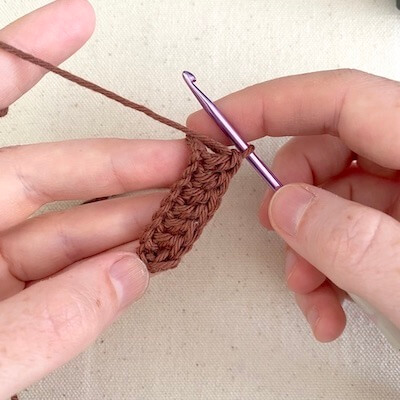
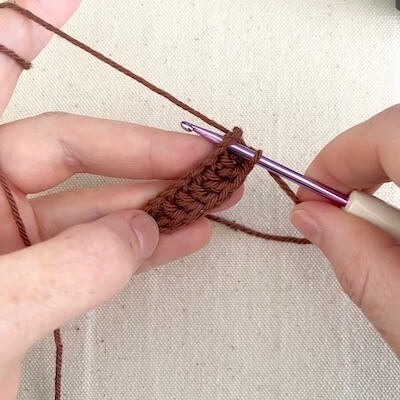
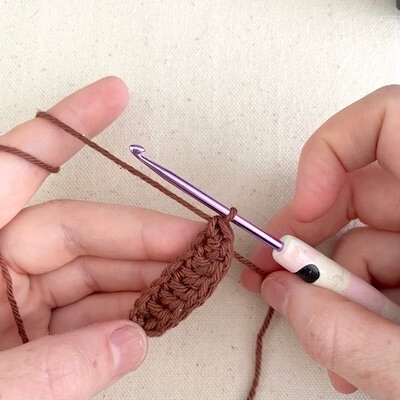
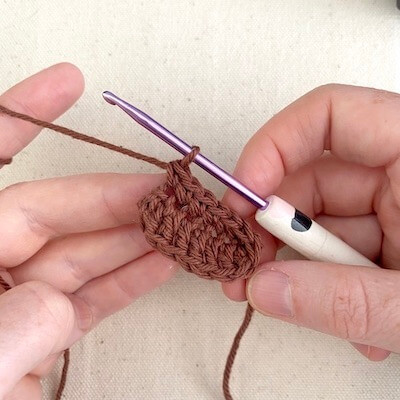
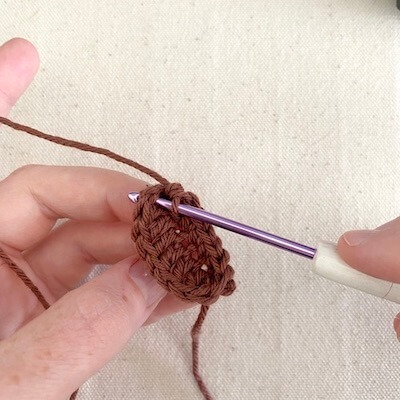
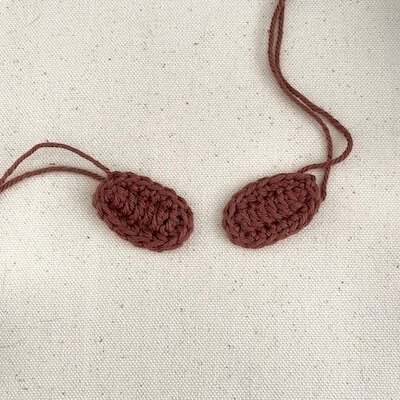
Leave a tail about 10cm or 4 inches – long enough to use to sew the eyes in place later.
Head
row 1: (in White) MR 6 (6)
row 2: [ inc ]x 6 (12)
row 3: [ inc, sc ]x 6 (18)
row4: [ inc 3, sc 6 ]x 2 (24)
row 5: [ inc, sc ]x 3, sc 6, [ inc, sc ] x3, sc 6 (30)
row 6: [ inc, sc 2 ]x 3, sc 6, [ inc, sc 2 ]x 3, sc 6 (36)
row 7: (change to Brown) [ inc, sc 5 ]x 6 (42)
row 8-15: sc 42 (42)
row 16: [ dec, sc 5 ]x 6 (36)
row 17: [ sc 2, dec, sc 2 ]x 6 (30)
row 18: [ dec, sc 3 ]x 6 (24)
(at this point, position the eyes and start to stuff the head – see note below)
row 19: [ sc, dec, sc ]x 6 (18)
row 20: [ dec, sc ]x 6 (12)
row 21: [ dec ]x 6 (6)
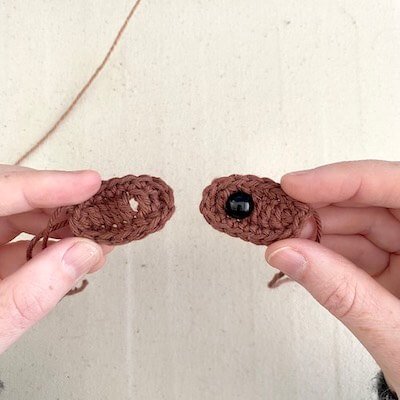
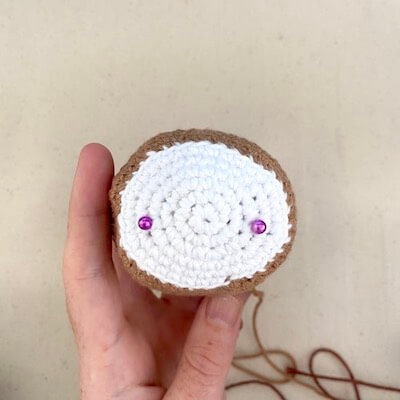
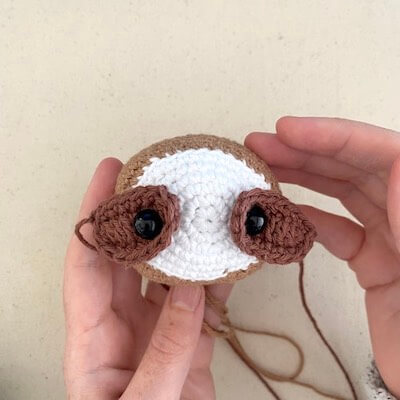
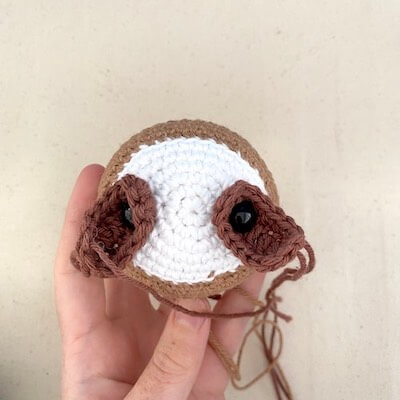
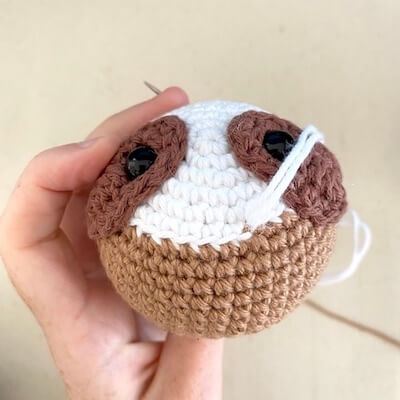
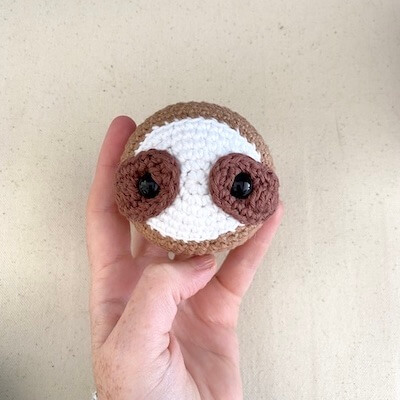
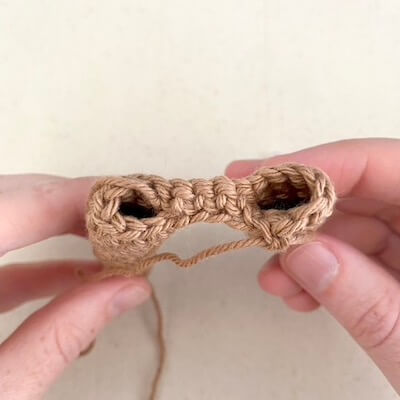
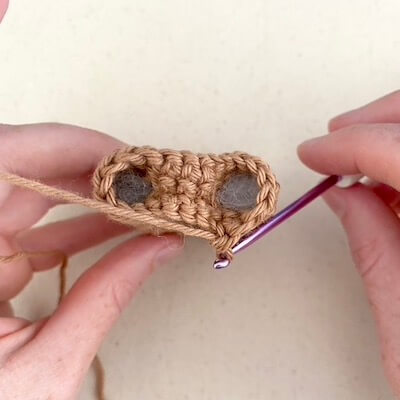
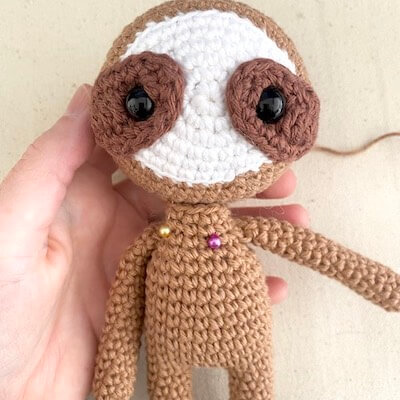
Before closing the piece we want to insert the eyes and stuff the head. I do this after row 18. The 10mm safety eyes first go between the 2nd and 3rd dc posts in the eyes (where the gap is in the picture below). From there they go roughly between rows 4 and 5 of the head (as indicated by the purple dots). I also place them slightly below the centre.
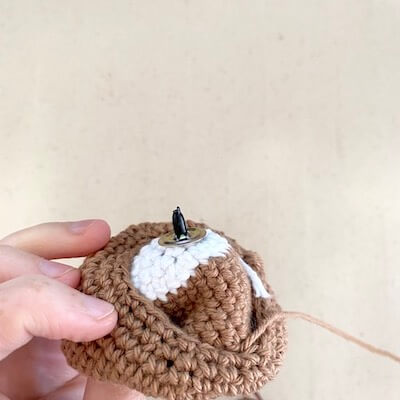
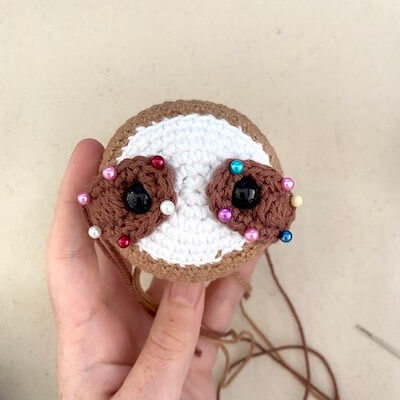
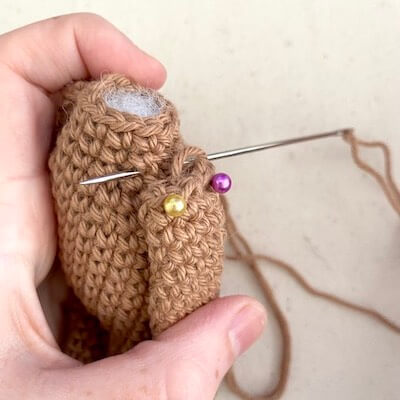
Once the safety eyes have their washers securely fastened, you can take a bunch of sewing pins and use them to pin the eyes back, while you use the tails to sew them in place permanently.
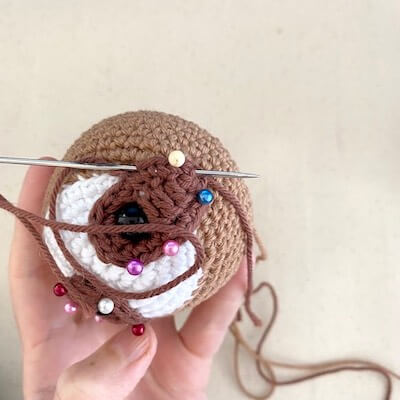
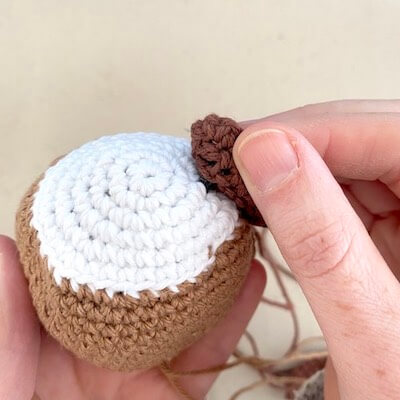
I also take a length of white yarn and use it to tidy up the colour change from white to brown, so there’s less of a noticeable jump. Then you can finish stuffing and close up the hole! Check out our video on Youtube on how to close pieces.
Arms and Legs (make 4)
row 1: (in Brown) MR 6 (6)
row 2: [ inc, sc 2 ]x 2 (8)
row 3-18: sc 8 (8)
Finish off by doing a slip stitch in the last stitch. For the 2 arms, cut the yarn, leaving enough of a tail to attach to the body later (about 10cm or 4 inches will be plenty). For the first leg, no tail is necessary. Keep your second leg on your crochet hook, we’ll keep crocheting and join the two legs for the body. Stuff all of your pieces lightly. I find it easier to partially stuff the legs at this point, and then finish stuffing after row 2 of the body, when they’ve been fully joined.
Body
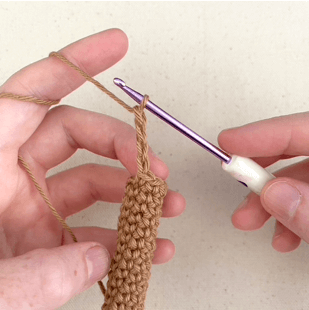
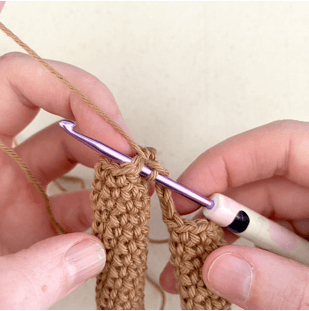
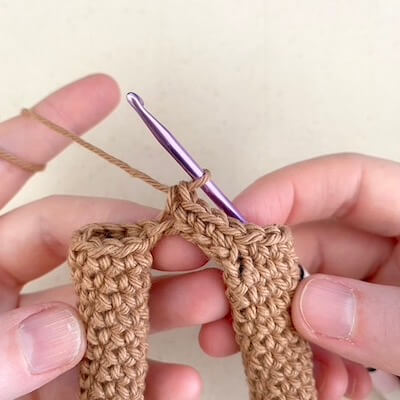
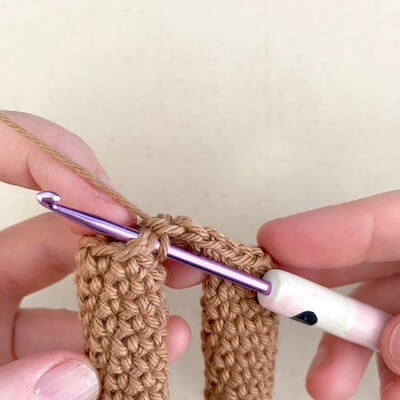
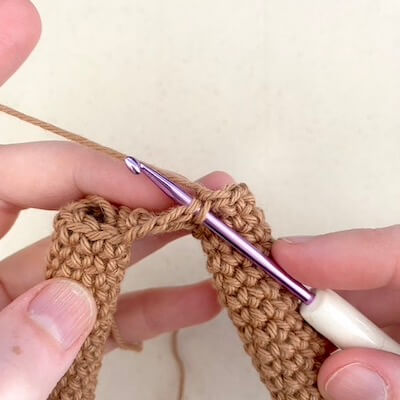
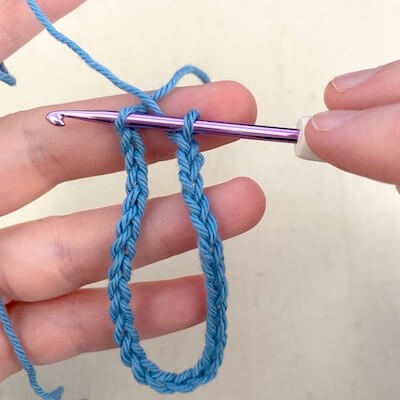
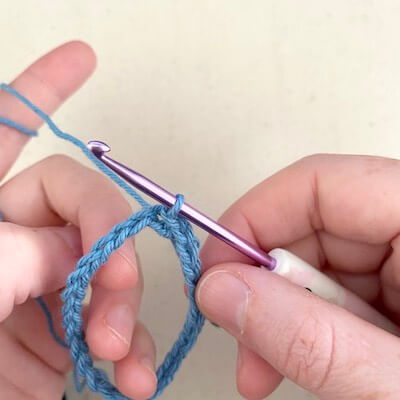
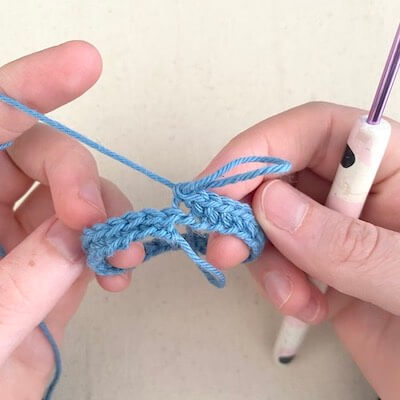
There are more pictures below illustrating the first few rows of the body.
row 1: (in Brown) ch 4, sc 8 in opposite leg, sc 4 in chain, sc 8 in first leg (24) – see notes below
row 3-10: sc 24 (24)
(start stuffing the body)
row 11: [ sc 3, dec, sc 3 ]x 3 (21)
row 12: [ dec, sc 5]x 3 (18)
row 13: [ sc 2, dec, sc 2 ]x 3 (15)
row 14: [ dec, sc 3 ]x 3 (12)
row 15: sc 12 (12)
Finish off, leaving a tail long enough to sew the head in place, and stuff the rest of the body.

Putting the sloth plush together
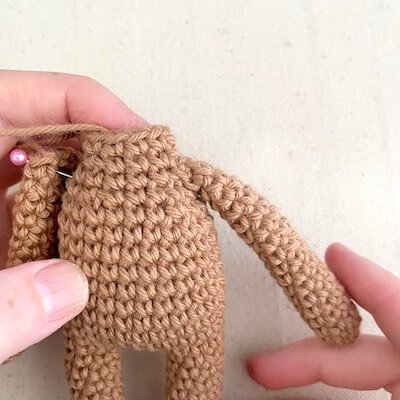
Your head, body and arms are now stuffed and finished. That’s all of the crocheting of the sloth for the moment. Next we’re going to attach the arms and head.
I like to pin them in place to get an idea of where they should be placed, then they are sewn in place. I attach theses as a flattened pieces, so pressed against the body and sewn in place like that using the tail.

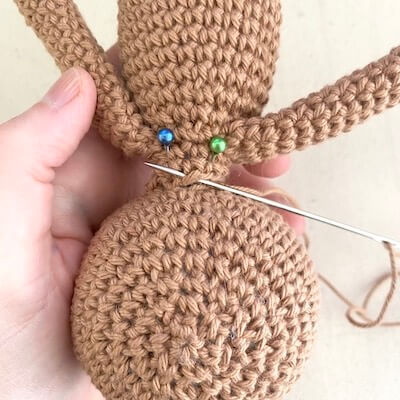
Finally, attach the head. I use pins here to make sure I have placement correct as well. Then we can use the tail from the body to attach the head in place. This process is described in the attaching limbs tutorial page.

If you wanted, you could stop following the free pattern here and have an adorable sloth crochet plush, but I personally love seeing little animal softies showing off personalities through different hobbies. Charlotte’s hobby is gardening! And to show off the labour of her efforts we’ve got a cute little gardening outfit, as well as some beautiful sunflowers from her garden.
Let’s accessorise!
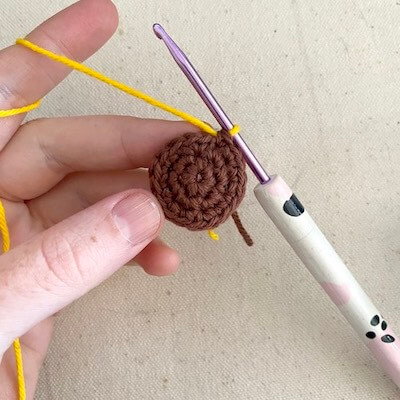
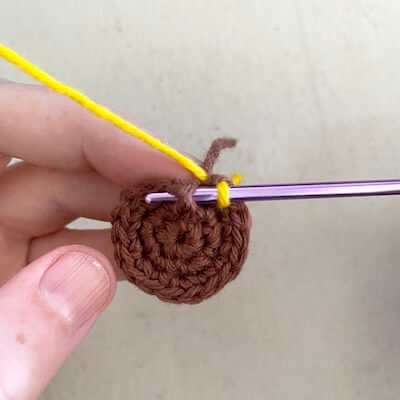
Hat
row 1: (in Sandy yellow) MR 6 (6)
row 2: inc 6 (12)
row 3: [ inc, sc ]x 6 (18)
row 4: [ sc, inc, sc ]x 6 (24)
row 5: [ inc, sc 3 ]x 6 (30)
row 6: [ sc 2, inc, sc 2 ]x 6 (36)
row 7: [ inc, sc 5 ]x 6 (42)
row 8: [ inc, sc 13 ]x 3 (45)
row 9-12: sc 45 (45)
row 13: (all in FLO) sc 45 (45)
row 14: sc 3, [ inc, sc 6 ]x 6 (51)
row 15: [ inc, sc 7 ]x 6, sc 3 (57)
row 16: sc 3, [ inc, sc 8 ]x 6 (63)
row 17: (all in BLO) sc 69 (69)
Finish off and hide the tail.

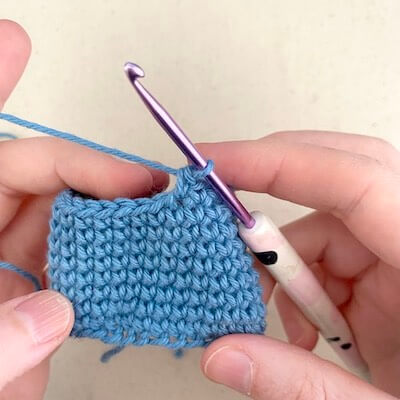
Overalls
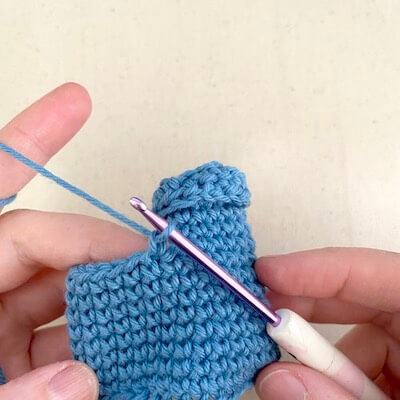
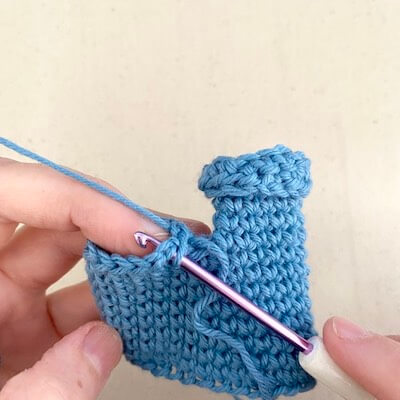
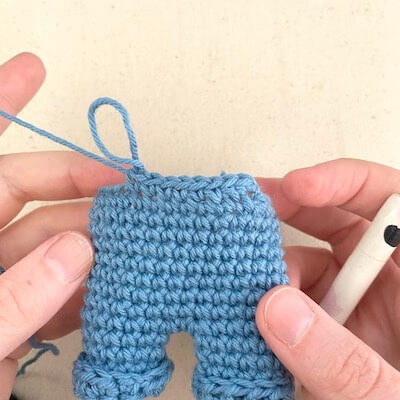
row 1: (in Blue) ch 28, slip stitch into the first chain to join. Take care at this point that the chain is not twisted
row 2-8: sc 28 (28)
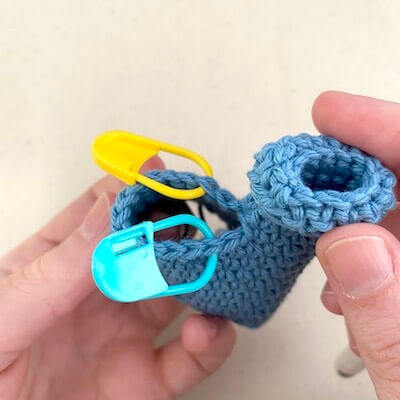
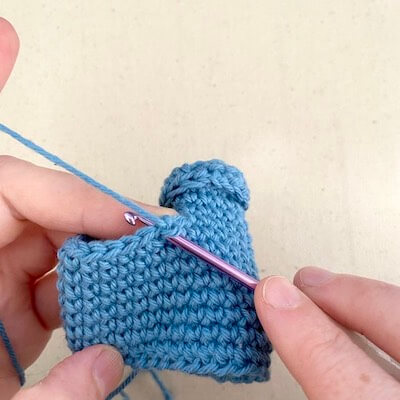
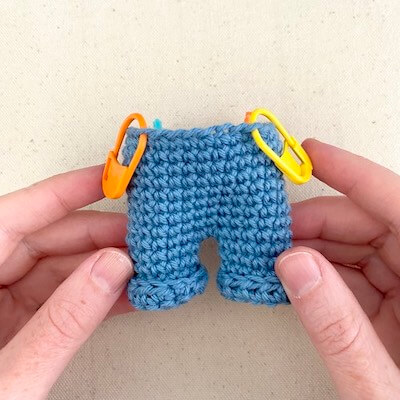
row 9: sc 13, skip 15 (13) – see pictures below
row 10-13: sc 13 (13)
row 14: FLO sc 13 (13)
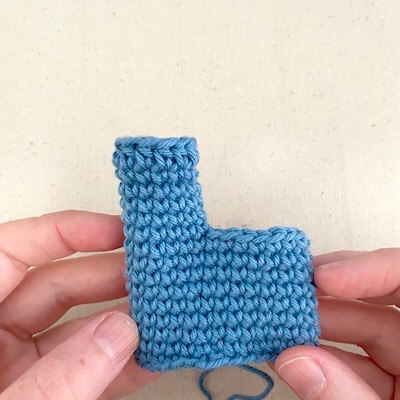
row 15: hdc 11, sc, slip stitch to finish (13)
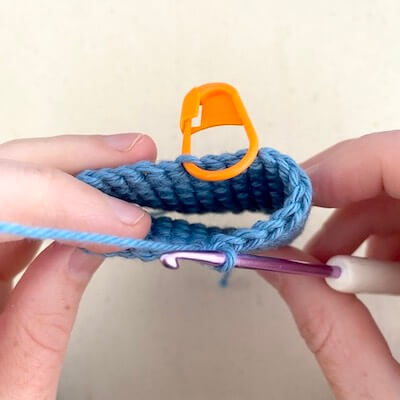


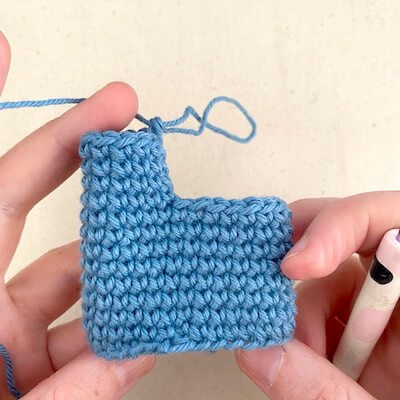
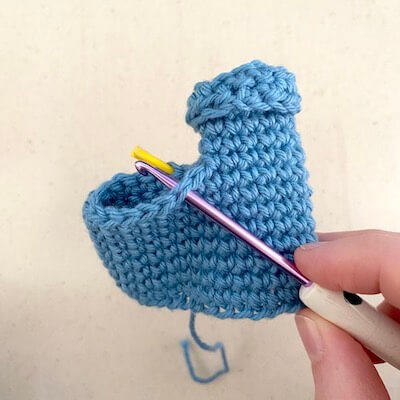
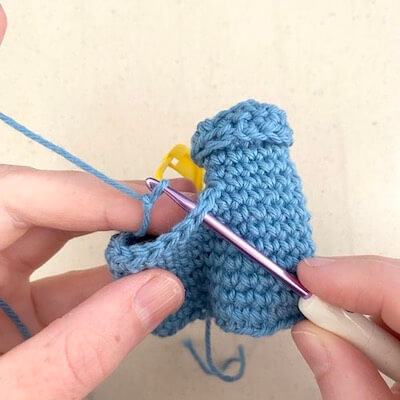
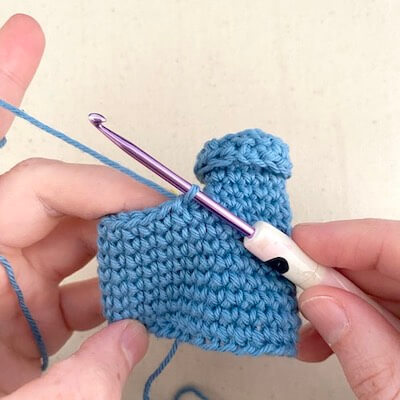
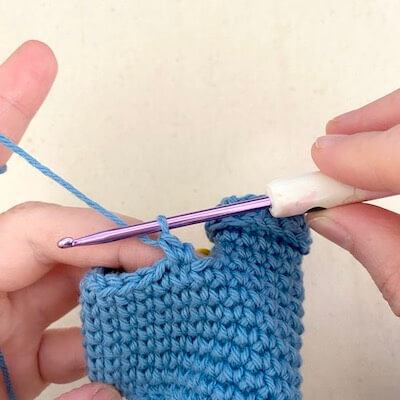
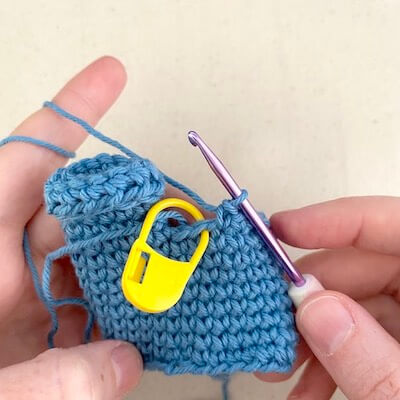
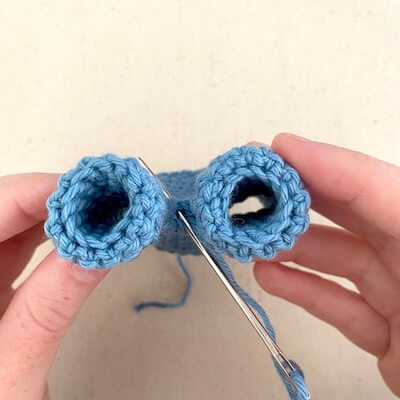
Now that you’ve completed one leg, we’re going to go back and complete the second one. Each leg has 13 stitches in it, which leaves 2 stitches not a part of the pant legs (since our overalls had 28 stitches in them). In the picture below I’ve marked the stitches that will make our second leg hole. Starting in this stitch, we’re going to pick up the 13 stitches that make our second leg hole.

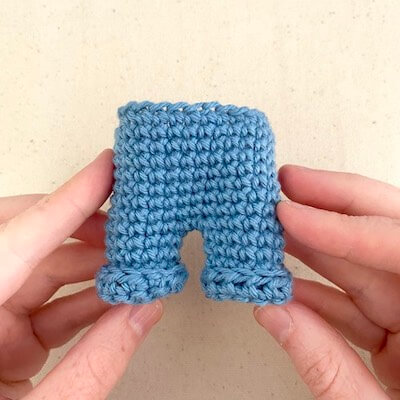
If you don’t want a cuff, just finish off at row 14. If you want your cuff to be in a different colour, change colours for row 15 and onwards.
Front panel
Next we’re going to mark and pick up more stitches to create the front and back panels of the overalls.
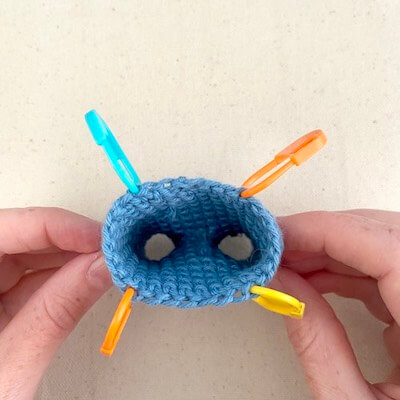
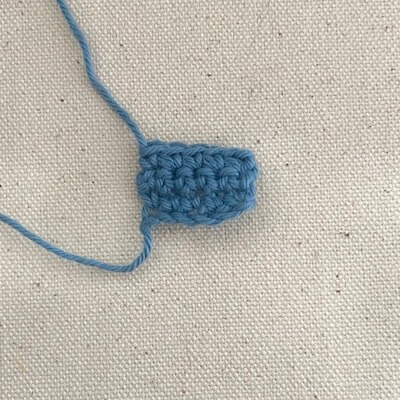
row 1: pick up 8 stitches (8)
row 2-5: ch 1, turn, sc 8 (8)
Repeat the above instructions for the back panel. Hide and trim the tails.
row 1: ch 5 (5)
row 2: ch 1, turn, starting in 2nd chain from hook, sc 5 (5)
row 3-4: ch 1, turn, sc 5 (5)
Finish off. Leave a tail for sewing onto the overalls

Straps
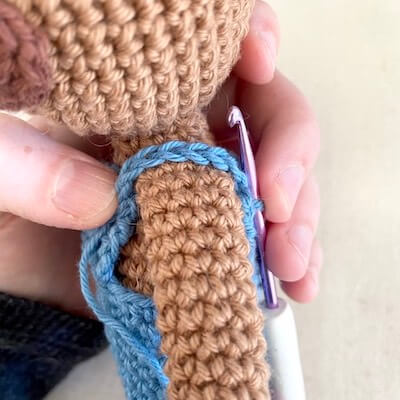
At this point, I like to put the overalls on Charlotte before finishing the straps, since often the fit can be different depending on how you stuffed the doll, how tightly you crochet your stitches and other factors. For my doll, 10 chains looked like enough to overlap both sides of the overalls so they could easily be sewn on.
row 1: ch 10 (10)
row 2: ch 1, turn, starting in 2nd chain from hook, sc 10 (10)
Finish off. Leave a tail for sewing onto the overalls, and then sew the straps on. If you want to make it look like little buttons you can do this in a contrasting colour.
Don’t forget the garden 🌻
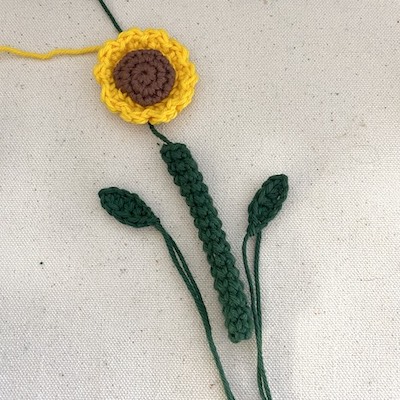
Sunflowers
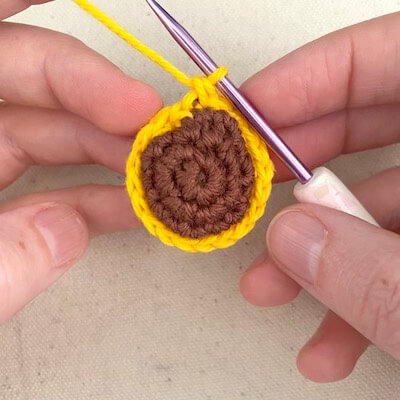
row 1: (in Brown) MR 7 (7)
row 2: inc 7 (14)
row 3: [ inc, sc ]x 7 (21)
row 4: (in Bright Yellow) front post sc (21) – see notes below
row 5: 2 dc in the next stitch, followed by a sl st in the following stitch. Repeat this pattern all the way around
A front post single crochet is similar to a regular single crochet, except for the way you insert your crochet hook at the start. Go under both loops of the current stitch, like you would to start an increase. But instead of yarning over, insert your crochet hook from back to front under the next stitch. This way we’re insert the crochet hook behind the “post” of the stitch, as illustrated in the middle picture below. If you prefer seeing stitches in action, check out this video: https://www.youtube.com/watch?v=2jrl0e78wwg
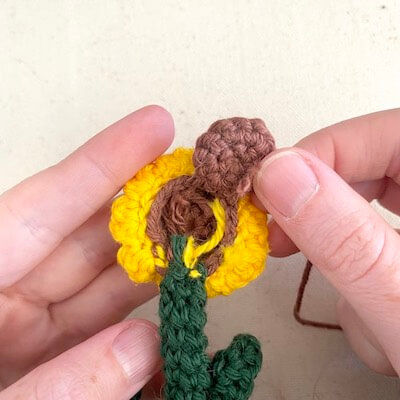
If you like the back of the sunflower to be tidier, you can make another circle (a repeat of rows 1-2 above) and sew it onto the back to tidy it up.
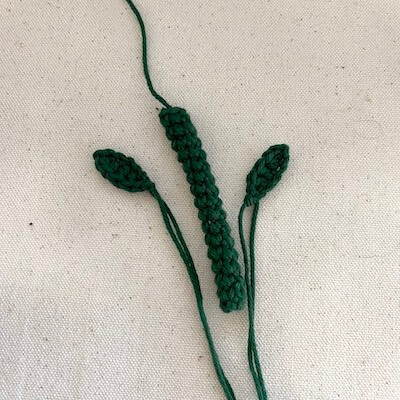
Stem
row 1: (in Green) MR 6 (6)
row 2-16: sc 6 (6)
Don’t forget to turn your work early so the right side is facing out. See this blog post for more info on the right vs wrong side of amigurumi.
Leaf (make 2)
row 1: (in Green) ch 5 (5)
row 2: ch 1, turn, starting in 2nd chain from hook, sc, hdc, dc 2, sl st (5)
Finish off.
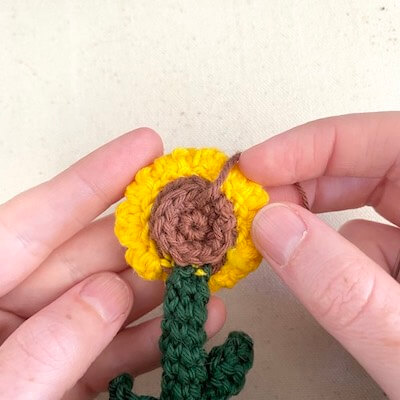
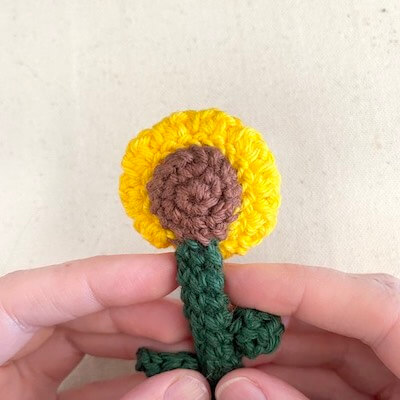
You’ve got all of the pieces for your sunflower now! You can make as many of these as you like, but I like making 3 sunflowers to go in her little basket. Sew the stem to the flower head and then the leafs to the stem and you’re done!
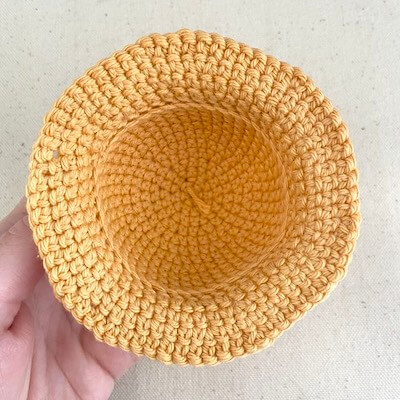
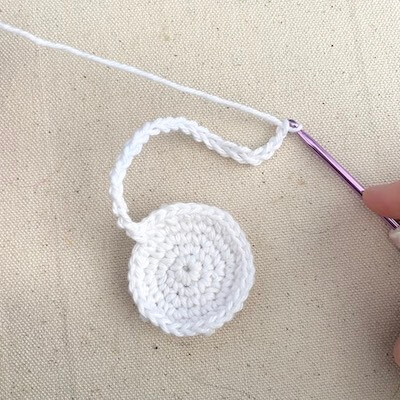
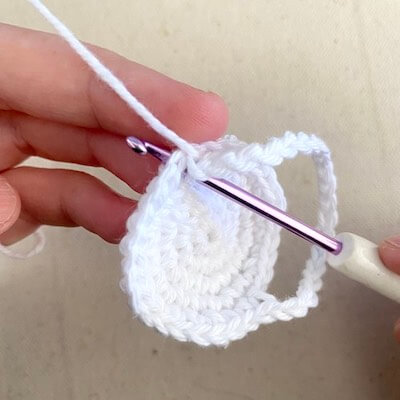
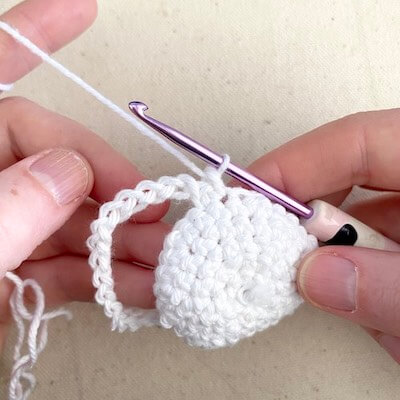
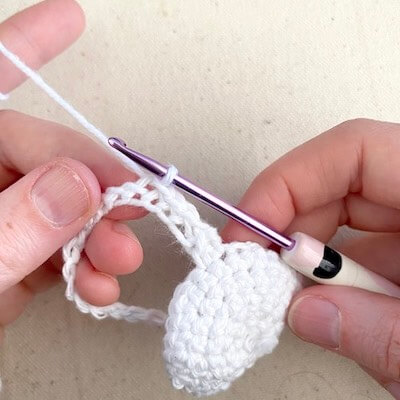
Basket
row 1: (in White) MR 6 (6)
row 2: [ inc ]x 6 (12)
row 3: [ inc, sc ]x 6 (18)
row4: [ sc, inc, sc ]x 6 (24)
row 5: [ inc, sc 3 ]x 6 (30)
row 6: ch 20, skip 13, sc 2, turn and sl st in each stitch of the chain. sl st to finish on the other side – see note below

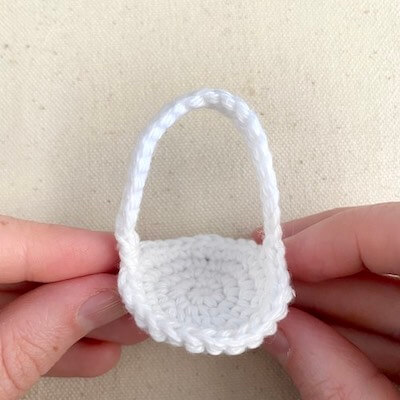
Well done, you’re finished! The last thing left to do is dress Charlotte and put her in amongst her favourite flowers! I hope you’ve enjoyed this free crochet sloth pattern and had fun. If you make your own and you share on Instagram or Tumblr, don’t forget to tag @53stitches so I can check it out ☺️