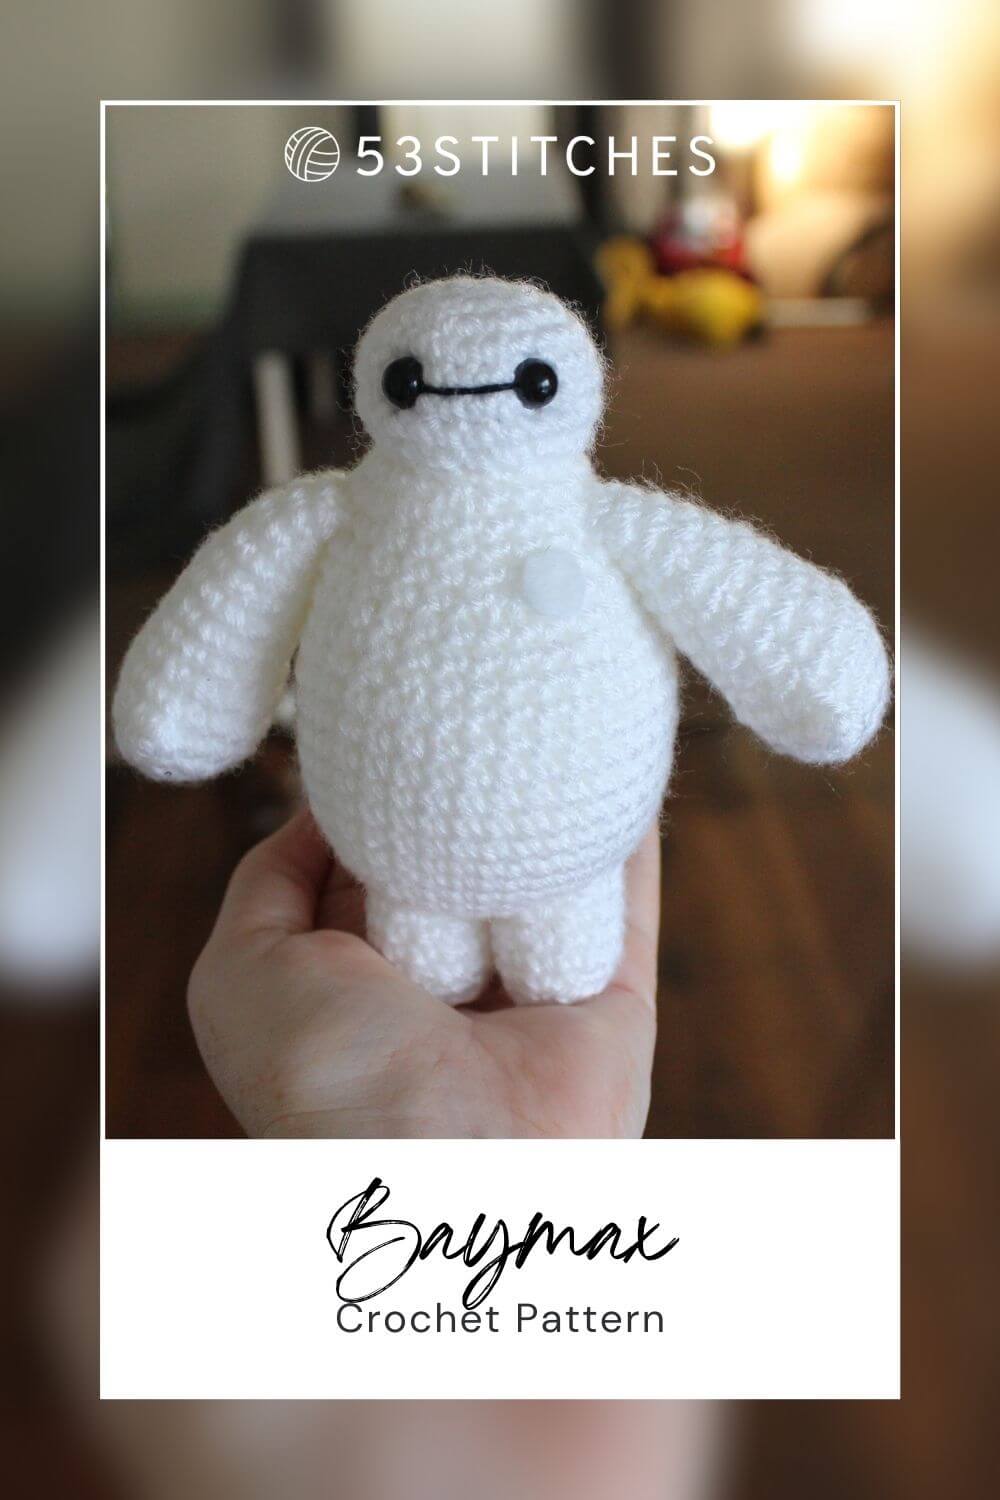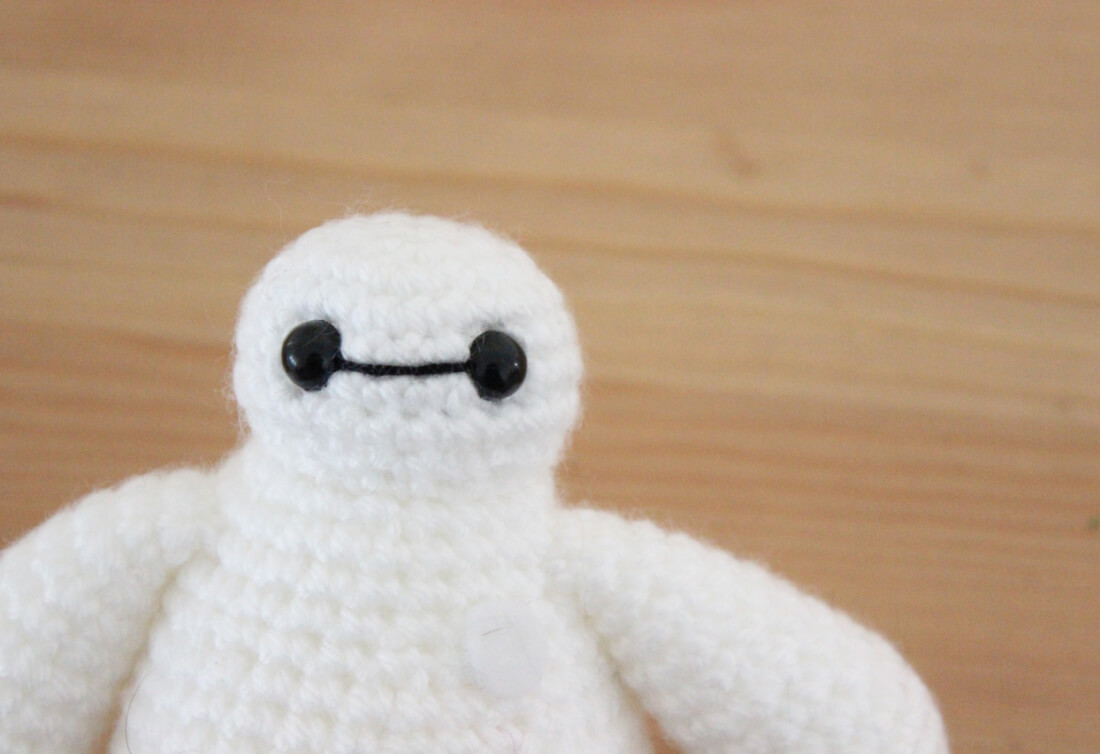
I’m not ashamed to admit that some of my favourite movies are kids movies. I really enjoyed Big Hero 6 and Baymax was definitely my favourite character. This Baymax crochet pattern is so simple to make! He’s a perfect beginner project and a lot of fun.
What materials will you need?
Note some of the links on this site are affiliate links. This means I get paid a small fee if you decide to purchase anything at no extra cost to you. I will only ever link products I happily use myself.
I use DK weight yarn.
- White yarn
- Polyester filling
- White felt
- Yarn needle
- Fabric glue
- 2 x 8.00 mm safety eyes
- Black thread
Quick reference for beginners
Check out some of the below tutorials if you get stuck on any of the stitches or techniques
If you get stuck anywhere else, check out the FAQ.
Baymax crochet pattern
HEAD
1. (in White) MR 8 (8)
2. inc 8 (16)
3. [ inc, sc ]x 8 (24)
4-7. sc 24 (24)
8. [ dec, sc ]x 8 (16)
Finish off, leaving a tail to attach to the body later. Before you put in the safety eyes, take a length of black thread and embroider a line between the two eyes. The safety eyes go between rows 5 and 6, with 4 stitches between. Stuff firmly.

BODY
1. (in White) MR 6 (6)
2. inc 6 (12)
3. [ inc, sc ]x 6 (18)
4. sc, [ inc, sc 2 ]x 5, inc, sc (24)
5. [ inc, sc 3 ]x 6 (30)
6. sc 2, [ inc, sc 4 ]x 5, inc, sc 2 (36)
7-15. sc 36 (36)
16. sc 2, [ dec, sc 4 ]x 5, dec, sc 2 (30)
17-18. sc 30 (30)
19. [ dec, sc 3 ]x 6 (24)
20-22. sc 24 (24)
23. (stuff at this point) sc, [ dec, sc 2 ]x 5, dec, sc (18)
24. [ dec, sc ]x 6 (12)
25. dec 6 (6)
Finish off, threading your needle through each stitch and then pulling tightly to close the circle. See more about closing an amigurumi piece here: https://www.planetjune.com/blog/the-ultimate-finish-for-amigurumi/
LEG (make 2)
1. (in White) MR 6 (6)
2. inc 6 (12)
3. BLO sc 12 (12)
4-7. sc 12 (12)
8. sl st 6, sc 6 (12)
Finish off, leaving a tail for attaching to the body later. Stuff firmly.
ARM (make 2)
1. (in White) MR 6 (6)
2. inc 6 (12)
3. [ inc, sc ]x 6 (18)
4. sc 18 (18)
5. popcorn sc4, sc 17 (18)
6. sc 18 (18)
7. [ dec, sc ]x 6 (12)
8-10. sc 12 (12)
11. [ dec, sc 4 ]x 2 (10)
12. (stuff at this point) sc 10 (10)
13. [ dec, sc 3 ]x 2 (8)
14-15. sc 8 (8)
Finish off, leaving a tail long enough to attach to the body later.
Putting it all together
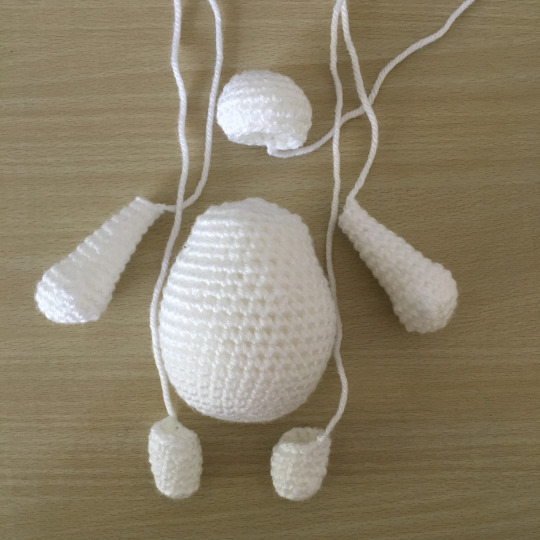
That’s all of the crocheted pieces finished. He’s looking nice and round already. Now to put him together. I like to pin all of the pieces to the body to get an idea of placement and to help hold the head and limbs steady when I attach them. For the legs, they’ll have a slight angle to them, caused by the slip stitches. The shorter sides should face each other, to help his feet stay flat and to match the angle of the curved body.

Now you’re ready to sew all of the pieces onto the body! For help with this part, check out PlanetJunes attaching amigurumi limbs tutorial: https://www.planetjune.com/blog/joining-amigurumi/
The last step is to take a piece of white felt and cut out a circle shape, to go over his heart for the area where his chip goes in. I’ve also seen some people do a small red heart, it’s up to you!
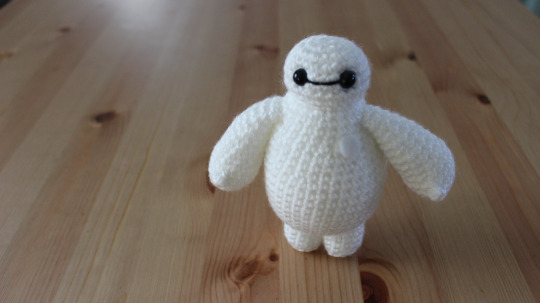
And that’s Baymax done! Super simple. Hope you guys liked him.
Tag your finished work on Instagram or Tumblr, don’t forget to tag @53stitches so I can check it out!