The explosion of no-sew and low-sew patterns in the last couple of years has also grabbed my interest and taught me so much about how to create silhouettes with just a few stitches. Although I don’t mind sewing pieces together, when preparing for conventions, artist shows or markets, it’s easy to see the appeal of these easy and quick crochet projects. I wanted to challenge myself to make some no-sew versions of some of my Pokemon patterns, and although I couldn’t quite cut the sewing out completely, this little free Bulbasaur crochet pattern is so adorable and works up so quickly – with only one thing needing sewing!
This free Bulbasaur low-sew pattern is pretty simple and uses just a few stitches, so it’s a great project for beginners and they work up for me in less than an hour! Everyone crochets at a different pace so your timing may be different. I’ve also been really enjoying playing around with chunky yarns, which are just so soft and squishable. There are two material lists – so you can choose to make a mini one or a squishy one!

Materials
Note some of the links on this site are affiliate links. This means I get paid a small fee if you decide to purchase anything at no extra cost to you! I will only ever link products I happily use myself.
This pattern can be made mini, with DK weight yarn and a smaller crochet hook, or chunky with a bulky weight yarn and larger hook. There are two material lists below for each version with the colours listed from the photos!
Mini DK weight version
- 3.00mm crochet hook
- 8mm safety eyes
- Stuffing
- Yarn needle
- Turquoise yarn (Stylecraft Special DK 1725 – Sage)
- Green yarn (Stylecraft Special DK 1826 – Kelly Green)
- Teal yarn (Stylecraft Special DK 1062 – Teal)
Chunky bulky weight version
- 5.00mm crochet hook
- 15mm safety eyes
- Stuffing
- Yarn needle
- Turquoise yarn (Hobbii Baby Snuggle 06 – Aquamarine)
- Green yarn (Hobbii Baby Snuggle 35 Grass)
- Teal yarn (Hobbii Baby Snuggle 18 Wintergreen)
Tips for beginners and abbreviations
If you’re comfortable crocheting and reading my patterns, feel free to skip to the pattern, but for those of you new to my patterns here are some links to help where you might get stuck!
- reading patterns
- magic ring (MR 8 sc)
- single crochet (sc)
- increase (inc)
- double crochet (dc)
- front loop only (FLO sc)
- popcorn stitch (e.g. 3dc popcorn)
- invisible decrease (dec)
- stuffing
- closing amigurumi pieces
- repeats: e.g. [ sc, inc, sc ]x 2 -> becomes -> sc, inc, sc, sc, inc, sc
Popcorn stitch
I use double crochet popcorn stitches to create the ears, arms and legs for Bulbasaur. My original popcorn stitch tutorial uses single crochets as an example – so it can’t be followed exactly. I’m working on a double crochet popcorn stitch video, but in the meantime, where a single crochet happens in the original version, simply replace it with a double crochet. Besides that, the steps to create the popcorn are the same. Each popcorn stitch will say how many stitches are worked into it. i.e. 3dc popcorn – a popcorn stitch with 3 double crochets worked into it.
Starting with a magic ring / tips for working with chunky yarn
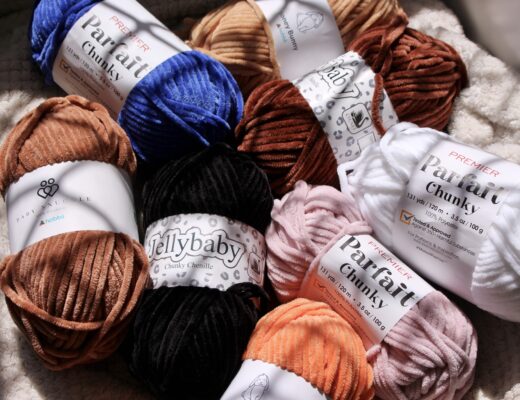
I start most of my amigurumi with a magic ring, but if I’m using chunky yarn I start pieces using the “ch 2” method instead because it’s a lot easier. Check out the working with chenille tips page to learn more! You can always use the chain 2 method as an alternative to the magic circle if you want!
Free low-sew Bulbasaur crochet pattern
Main body
row 1: (in Sage) MR 8 sc (8)
row 2: inc 8 (16)
row 3: [ inc, sc ]x 8 (24)
row 4: sc 5, 3dc popcorn, sc 11, 3dc popcorn, sc 6 (24)
rows 5-6: sc 24 (24)
row 7: [ sc, inc, sc ]x 8 (24)
row 8: sc 32 (32)
row 9: [ sc, dec, sc ]x 8 (24)
row 10: [ dec, sc ]x 8 (16)
row 11: [ FLO sc, FLO inc ]x 8 (24)
row 12: sc 7, 5dc popcorn, sc 8, 5dc popcorn, sc 7 (24)
(at this point, insert your safety eyes between rows 7 and 8, lined up with the ears. Start stuffing the head)
row 13: sc 24 (24)
row 14: sc 7, 6dc popcorn, sc 8, 5dc popcorn, sc 7 (24)
(at this point, stuffing the doll more)
row 15: [ dec, sc ]x 8 (16)
row 16: dec 8 (8)
Finish stuffing the doll and then close the circle by threading the tail of your yarn through the front loop only of each stitch – check out this video for an example.


Bulb
And now for the only part we sew on, the bulb! For those of you familiar with my other Bulbasaur pattern, this bulb follows a very similar structure where we crochet it and then shape it.
row 1: (in Green) MR 8 sc (8)
row 2: inc 8 (16)
rows 3-4: sc 16 (16)
row 5: dec 8 (8)
(stuff the bulb – but not too full. We’ll use yarn to shape it later and it’ll need some give for that)
row 6: dec 4 (4)
row 7: inc 4 (8)
Do a slip stitch in the next stitch to finish off, and then cut the yarn. Take another length of yarn on a yarn needle – we’re going to use it to shape the bulb.


Finally, take a length of teal yarn and embroider on the forehead spots.


Other patterns in the series
Congratulations you’re finished! I hope you had a lot of fun. You can finish off the first gen starter Pokemon with Squirtle (coming soon) and Charmander (coming soon) in this series, with more on their way!
In the meantime, check out our other Pokemon patterns for your next project. If you make these, I’d love to see what you create! Tag @53stitches on Instagram or Tumblr.


