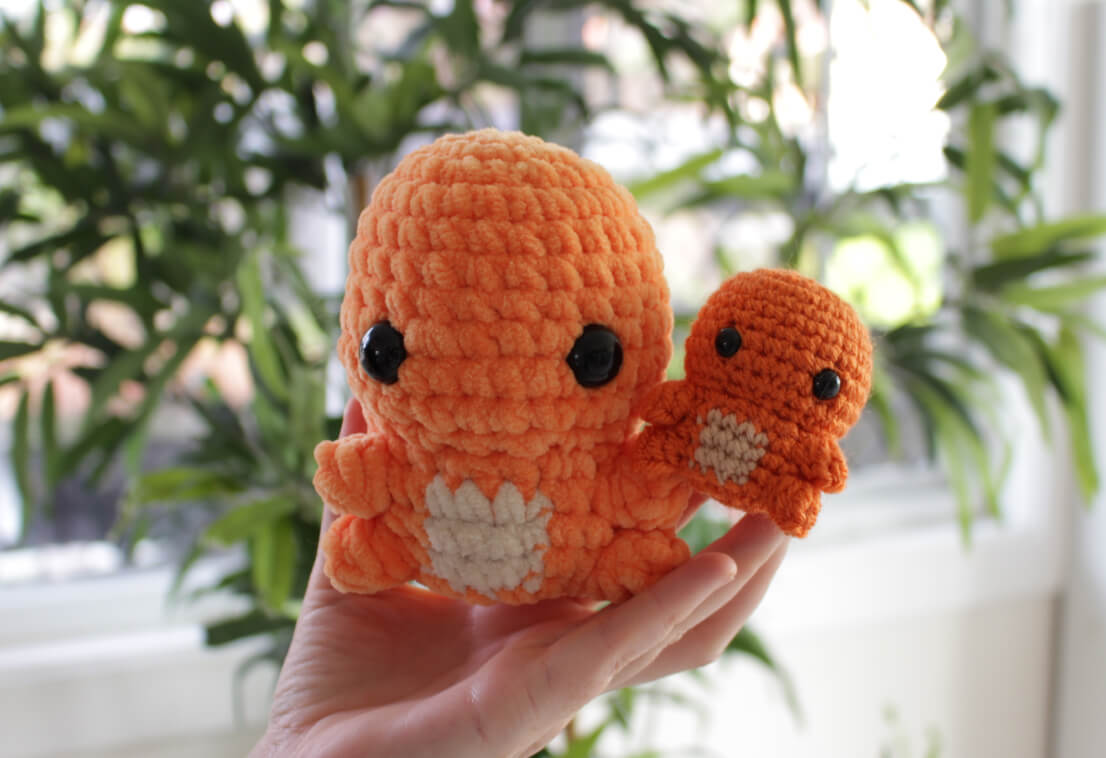
Next in our low sew starter Pokemon series is the cute and cranky Charmander! Honestly picking a favourite starter is like choosing a favourite child sometimes, I love them all. Charmander does hold a special place in my hard because I’m always partial to the fire starters, but also that episode where he gets rained on is a core childhood memory. Like Bulbasaur, this pattern only has one piece to sew on – the tail! Everything else is worked in a single piece, meaning this free Charmander crochet pattern works up really quickly and makes a perfect quick and easy project.
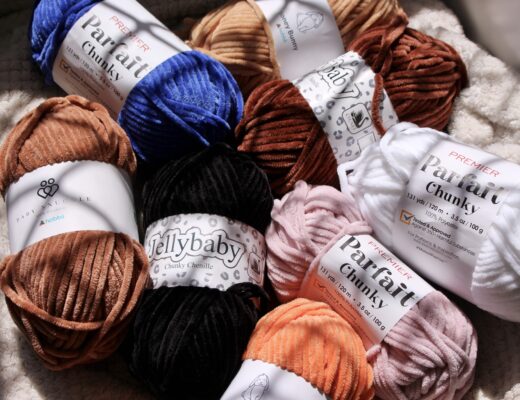
Likewise, I love to make this guy in a chunky chenille yarn for that extra squish factor, and I have some colour recommendations below – orange tends to be a very neon colour in chenille yarns, which I’ve just decided to embrace.

Materials
Note some of the links on this site are affiliate links. This means I get paid a small fee if you decide to purchase anything at no extra cost to you! I will only ever link products I happily use myself.
This pattern can be made mini, with DK weight yarn and a smaller crochet hook, or chunky with a bulky weight yarn and larger hook. There are two material lists below for each version with the colours listed from the photos!
Mini DK weight version
- 3.00mm crochet hook
- 8mm safety eyes
- Stuffing
- Yarn needle
- A comb or pet brush to create the fluffy fire
- Orange yarn (Stylecraft Special DK 1711 – Spice)
- Beige yarn (Stylecraft Special DK 1710 – Stone)
- Yarn scraps for the tail:
- Red (Stylecraft Special DK 1010 – Matador)
- Yellow (Stylecraft Special DK 1114 – Sunshine, or 1263 – Citron)
- Pale yellow (Stylecraft Special DK 1020 – Lemon)
Chunky bulky weight version
- 5.00mm crochet hook
- 15mm safety eyes
- Stuffing
- Yarn needle
- A comb or pet brush to create the fluffy fire
- Orange yarn (Hobbii Honey Bunny 33 Peach or Premier Parfait Chunky in 1150-15 Tangerine)
- Beige yarn (Honey Bunny 05 Beige)
- Yarn scraps (I use acrylic or wool as it brushes out better – chenille would fall apart and cotton doesn’t fluff)
- Red (Stylecraft Special DK 1010 – Matador)
- Yellow (Stylecraft Special DK 1114 – Sunshine, or 1263 – Citron)
- Pale yellow (Stylecraft Special DK 1020 – Lemon)
Tips for beginners and abbreviations
If you’re comfortable crocheting and reading my patterns, feel free to skip to the pattern, but for those of you new to my patterns here are some links to help where you might get stuck!
- reading patterns
- magic ring (MR 8 sc)
- single crochet (sc)
- increase (inc)
- double crochet (dc)
- front loop only (FLO sc)
- popcorn stitch (e.g. 3dc popcorn)
- changing colours
- invisible decrease (dec)
- stuffing
- closing amigurumi pieces
- repeats: e.g. [ sc, inc, sc ]x 2 -> becomes -> sc, inc, sc, sc, inc, sc
Popcorn stitch
I use double crochet popcorn stitches to create the arms and legs for Charmander. My original popcorn stitch tutorial uses single crochets as an example – so it can’t be followed exactly. I’m working on a double crochet popcorn stitch video, but in the meantime, where a single crochet happens in the original version, simply replace it with a double crochet. Besides that, the steps to create the popcorn are the same. Each popcorn stitch will say how many stitches are worked into it. i.e. 5dc popcorn – a popcorn stitch with 5 double crochets worked into it.
Starting with a magic ring / tips for working with chunky yarn
I start most of my amigurumi with a magic ring, but if I’m using chunky yarn I start pieces using the “ch 2” method instead because it’s a lot easier. Check out the working with chenille tips page to learn more! You can always use the chain 2 method as an alternative to the magic circle if you want!
Free low-sew Charmander crochet pattern
Main body
row 1: (in Sage) MR 8 sc (8)
row 2: inc 8 (16)
row 3: [ inc, sc ]x 8 (24)
rows 4-7 sc 24 (24)
row 8: [ sc, inc, sc ]x 8 (24)
row 9: sc 32 (32)
row 10: [ sc, dec, sc ]x 8 (24)
row 11: [ dec, sc ]x 8 (16)
row 12: [ FLO sc, FLO inc ]x 8 (24)
row 13: sc 7, 5dc popcorn, sc 2, (change to Beige) sc 4, (change back to Orange) sc 2, 5dc popcorn, sc 7 (24)
(at this point, insert your safety eyes between rows 8 and 9, lined up with the ears. Start stuffing the head)
row 14: sc 10, (change to Beige) sc 4, (change back to Orange) sc 10 (24)
row 15: sc 7, 6dc popcorn, sc 2, (change to Beige) sc 4, (change back to Orange) sc 2, 5dc popcorn, sc 7 (24)
(at this point, stuffing the doll more)
row 16: [ dec, sc ]x 8 (16)
row 17: dec 8 (8)
Finish stuffing the doll and then close the circle by threading the tail of your yarn through the front loop only of each stitch – check out this video for an example.


Tail
And now for the only part we sew on, the bulb! For those of you familiar with my other Charmander pattern, this tail is just a smaller version with the same method of creating the flaming tip.
row 1: (in Orange) MR 6 sc (6)
rows 2-3: sc 6 (6)
rows 4: inc, sc 5 (7)
row 5: sc 7 (7)
row 6: inc, sc 6 (8)
row 7: sc 8 (8)
Do a slip stitch in the next stitch to finish off, and then cut the yarn, leaving enough of a tail to sew onto the body!
Now it’s time to attach the strands of scrap yarn to make our fire tail and brush it out. Regardless of whether I’m making charmander with chunky yarn or Dk yarn, I always use DK weight acrylic or wool for the tail because it’s the only yarn that fluffs out like this when brushed. If I’m making a chunky Charmander amigurumi then I attach two strands of different colours at the same time – two strands to make it thicker and different colours to give it that cool fire variation.


Other patterns in the series
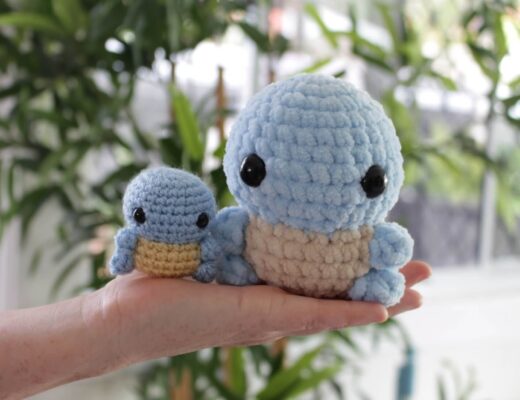
Congratulations you’re finished your adorable crochet Charmander low sew pattern! I hope you had a lot of fun. You can finish off the first gen starter Pokemon with Bulbasaur and Squirtle (coming soon) in this series, with more on their way!
In the meantime, check out our other Pokemon patterns for your next project. If you make these, I’d love to see what you create! Tag @53stitches on Instagram or Tumblr.


