
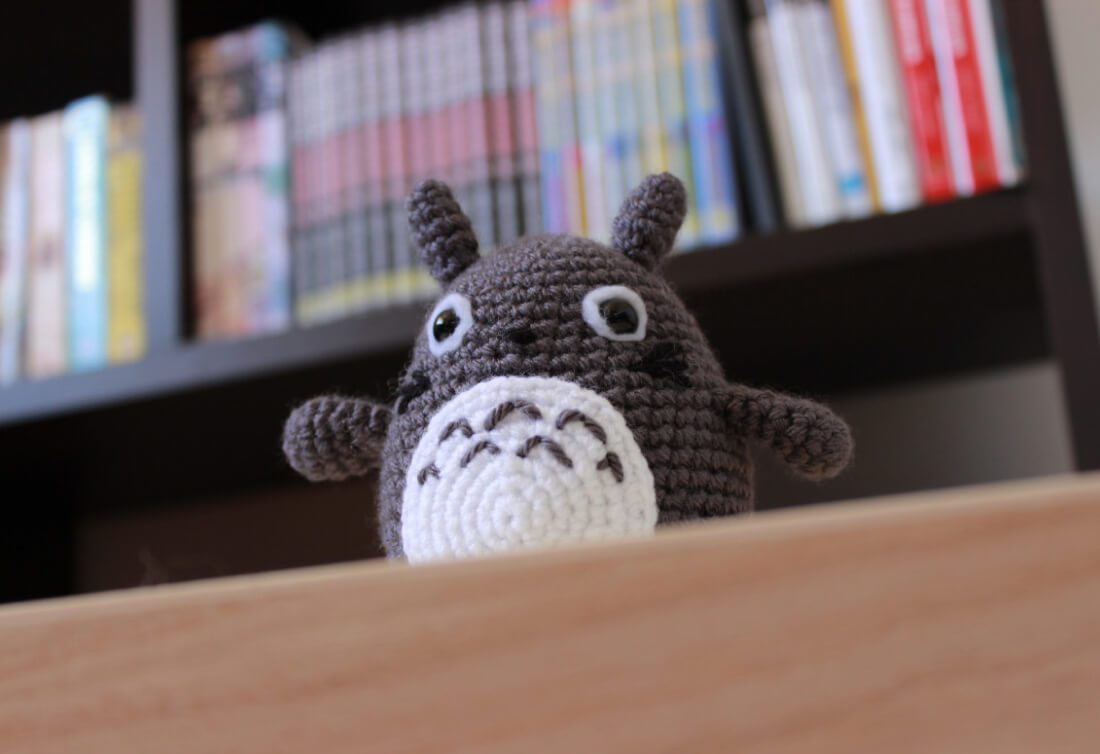
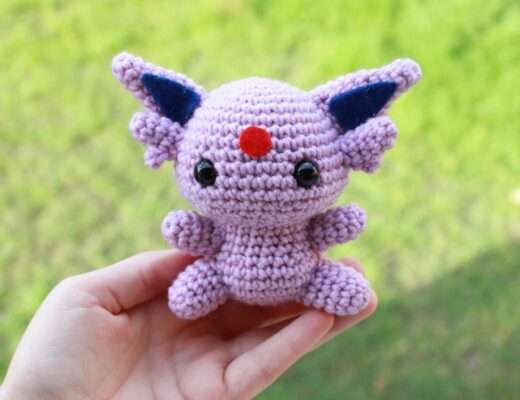
I’ve been a long time fan of Studio Ghibli films since I was first introduced to them in my Japanese language classes at school. Totoro is such an adorable and recognisable character, and he’s the perfect project for amigurumi! This Totoro crochet pattern is built up of simple shapes so he’s a great beginner project. To see how I made the entire Totoro family, check out my post on resizing amigurumi patterns.
What materials will you need?
Note some of the links on this site are affiliate links. This means I get paid a small fee if you decide to purchase anything at no extra cost to you. I will only ever link products I happily use myself.
All yarn I use is DK weight.
- 3.00mm crochet hook
- 2 x 10mm black safety eyes
- white felt
- white yarn
- grey yarn
- black yarn
- polyester fiberfil, or some other kind of stuffing
Quick reference for beginners
Check out some of the below tutorials if you get stuck on any of the stitches or techniques
If you get stuck anywhere else, check out the FAQ.
Prepping the eyes
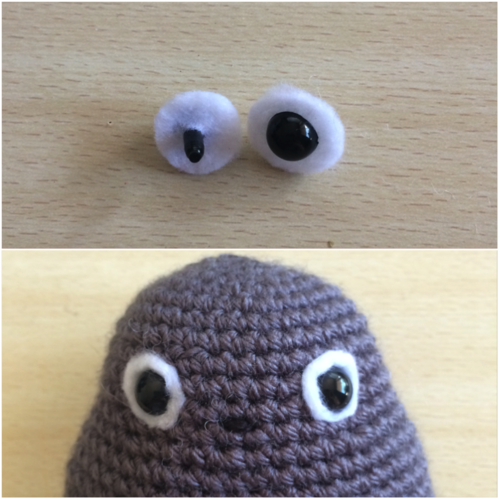
Before starting the head/body, get your eyes ready. I’m using 10mm black safety eyes, with two circles cut out of white felt as the whites of his eyes. Once you’ve cut the circles, make small gap in the centre for the safety eye to go through, then insert the eyes between rows 10 and 11 when the head/body is about halfway completed. I like to stitch on the nose at the same time so that I can make sure the eyes are evenly spaced (there are usually about 6 or 7 stitches between them).
Crocheting the Totoro pieces
BODY/HEAD
1. (in Grey) MR 6 (6)
2. [ inc ]x 6 (12)
3. [ inc, sc ]x 6 (18)
4. sc, [ inc, sc 2 ]x 5, inc, sc (24)
5. [ inc, sc 3 ]x 6 (30)
6. [ inc, sc 6, inc, sc 7 ]x 2 (34)
7-12. sc 34 (34)
13. inc, sc 4, [ inc, sc 3 ]x 3, inc, sc 4, [ inc, sc 3 ]x 3 (42)
Insert safety eyes between rows 10 and 11.
14-25. sc 42 (42)
26. [ dec, sc 5 ]x 6 (36)
27. sc 2, [ dec, sc 4 ]x 5, dec, sc 2 (30)
28. [ dec, sc 3 ]x 6 (24)
At this point, stuff most of the doll. Continue stuffing as the gap gets smaller until he’s done!
29. sc, [ dec, sc 2 ]x 5, dec, sc (18)
30. [ dec, sc ]x 6 (12)
31. [ dec ]x 6 (6)
Finish off.
ARMS (make 2)
1. (in Grey) MR 6 (6)
2. [ inc ]x 6 (12)
3-5. sc 12 (12)
6. [ dec, sc 4 ]x 2 (10)
7. sc 10 (10)
Finish off, leaving a tail for sewing later.
EARS (make 2)
1. (in Grey) MR 6 (6)
2. sc 6 (6)
3. [ inc, sc 2 ]x 2 (8)
4-5. sc 8 (8)
6. [ dec, sc 2 ]x 2 (6)
Finish off, leaving a tail for sewing later.
CHEST
1. (in White) MR 6 (6)
2. [ inc ]x 6 (12)
3. [ inc, sc ]x 6 (18)
4. sc, [ inc, sc 2 ]x 5, inc, sc (24)
5. [ inc, sc 3 ]x 6 (30)
6. sc 2, [ inc, sc 4 ]x 5, inc, sc 2 (36)
7. [ inc, sc 5 ]x 6 (42)
Finish off, leaving a tail for sewing later. You could probably even go one round larger on the stomach if you wanted to. If you did, round 8 would look like this:
8. sc 3, [ inc, sc 6 ]x 6, inc, sc 3 (48)
TAIL
1. (in Grey) MR 6 (6)
2. [ inc ]x 6 (12)
3. [ inc, sc 3 ]x 3 (15)
4-9. sc 15 (15)
Finish off, leaving a tail for sewing later.
That’s all of the crocheting done! The body is a little time-consuming since we want him to be nice and round, but this is one of my favourite patterns so far because he’s so simple!
Putting it all together
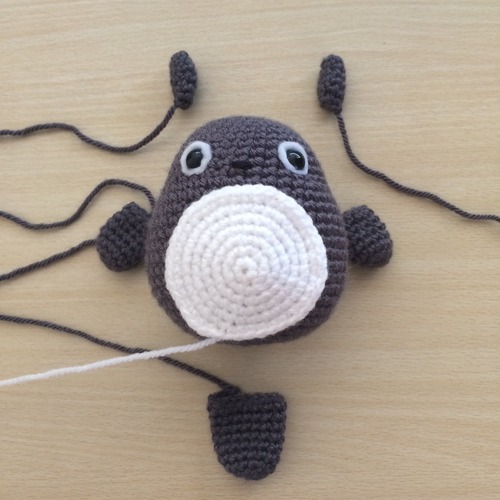
As always, I pin all of the pieces to the body before attaching them to make sure that they’re positioned correctly. Then it’s just a simple matter of using the tails to attach all of the pieces.
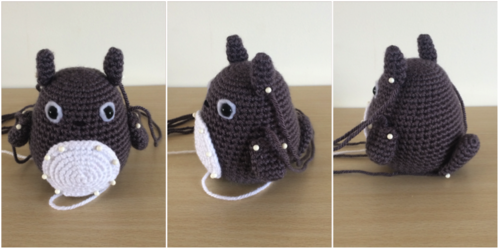
Once he’s put together the very last thing to do is embroider some details. He already has his nose, but take another length of black yarn and embroider three whiskers on either side of his face. Then take a length of grey yarn and embroider three upwards pointing chevrons at the top of his white belly, and then four underneath that row. I usually use pins or something similar to mark where the chevrons will go before starting, otherwise I end up with uneven ones or not enough room!
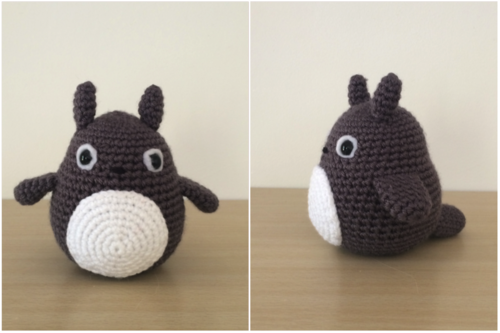

And we’re done with our crochet Totoro! He’s so perfectly squishy and huggable, and one of my favourite projects to make. I hope he’s one of yours too! If you share on Instagram or Tumblr, don’t forget to tag @53stitches so I can check it out.
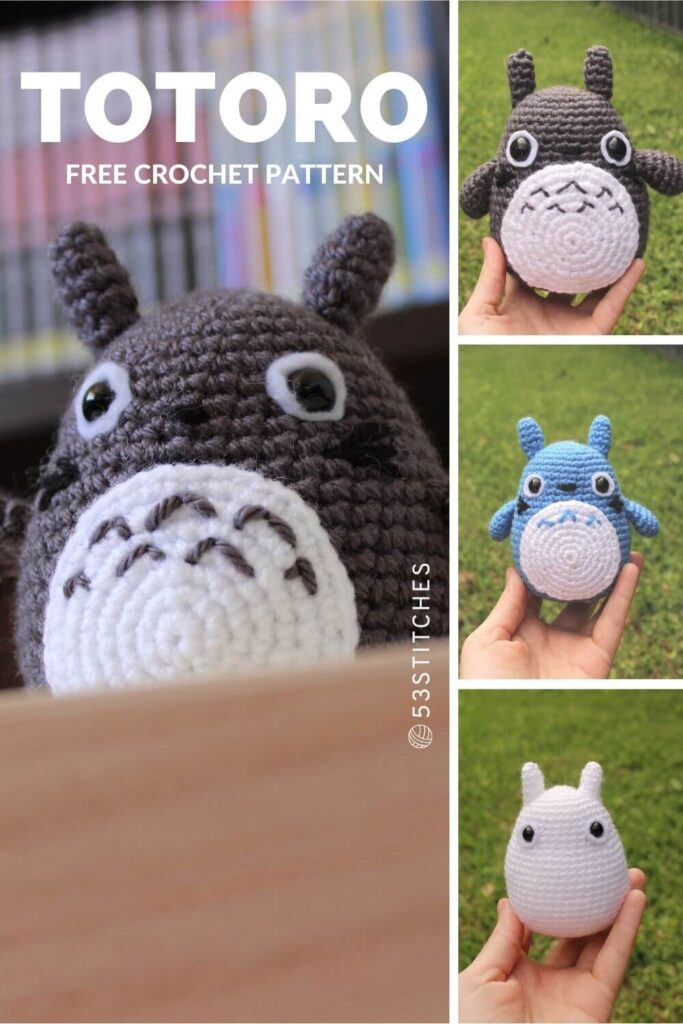
Here’s an easy to pin graphic so you can save this pattern for later. And you can see the different variations you can make from this pattern. For more info on how I did that check out my post on resizing patterns.


Opale
December 21, 2020 at 5:01 amHey ! Thanks fort the pattern, it’s awesome 😀
There’s just a little mistake for the tail : round 2, Inc x6 and not x2 I think 🙂
Love your work!
overlord
December 28, 2020 at 11:31 amGood catch, thank-you!
Lucy Alarid
March 21, 2021 at 1:17 pmI love your work. Do you have a tutorial on how to attach all the pieces.
I am making Piccuchu now.
brad
August 25, 2021 at 11:38 ami just finished making this and it turned out perfect. thank you!
Van
January 28, 2022 at 12:09 pmHi there what is the height of the amigurumi when completed? And how do you size up or down? Thanks! Super cute!
53stitches
February 25, 2022 at 11:43 amHello! Check out this post here for how to resize and what those sizes are: https://53stitches.com/resizing-amigurumi-crochet-patterns/ 😀