
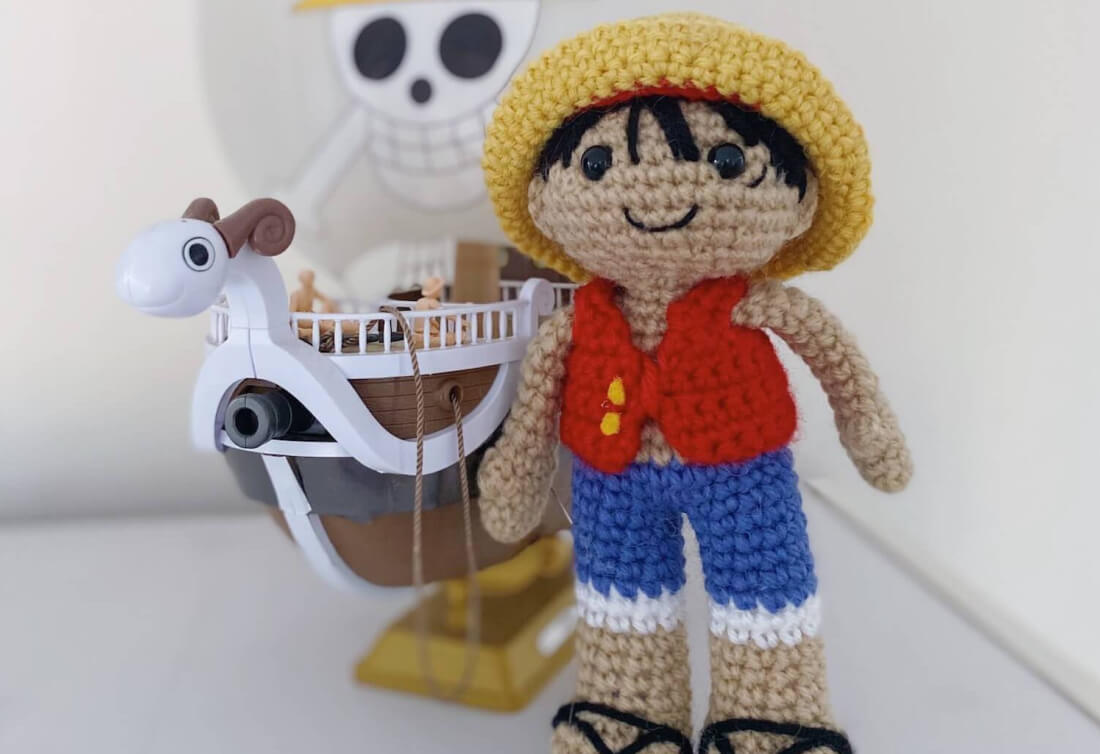
One Piece crochet characters are some of the very first amigurumi plush dolls that I put together when I was first working on human characters. I was heavily reading the manga at the time, and to this day it remains one of my absolute favourite pieces of media – and luckily I get to enjoy a new chapter almost every week! This Luffy amigurumi pattern is fairly easy to follow, so would be suitable for adventurous beginners.
These patterns were originally put together before the crew got spiffy new outfits, so they’re doubly nostalgic for me. And now you can have your very own mini future King of the Pirates!
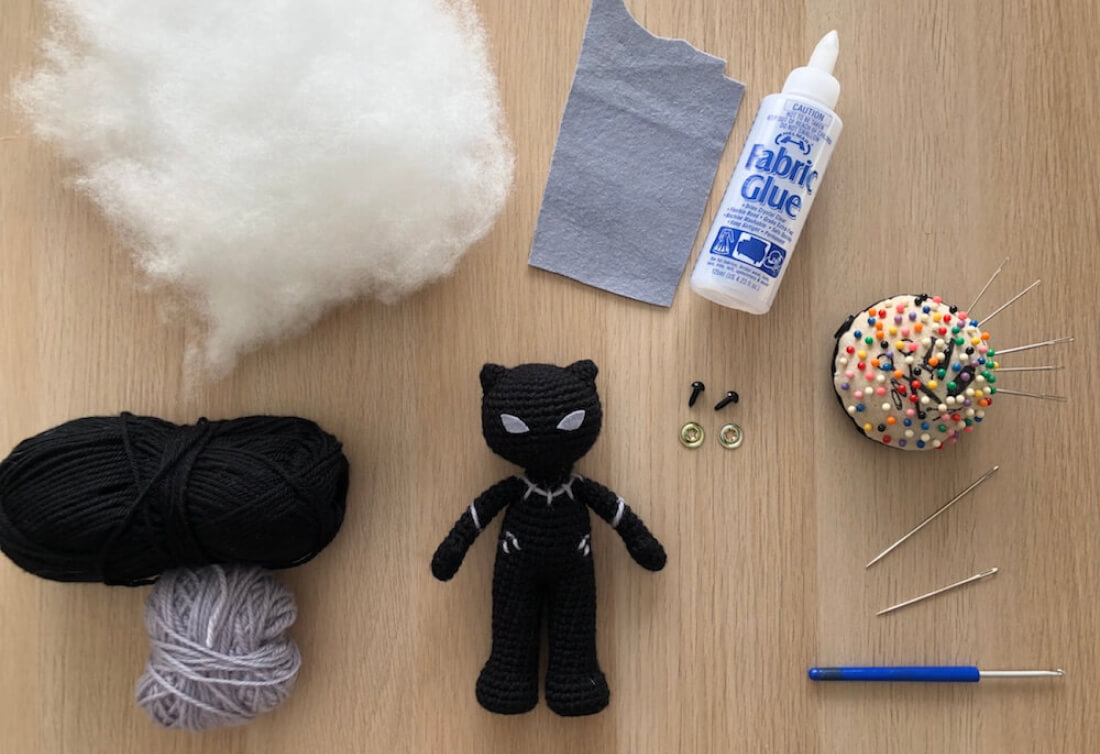
What materials will you need?
Note some of the links on this site are affiliate links. This means I get paid a small fee if you decide to purchase anything at no extra cost to you. I will only ever link products I happily use myself.
- Black yarn
- Beige yarn
- Red yarn
- Blue yarn
- White yarn
- Yellow yarn
- Yellow felt
- 2 x 7.5mm safety eyes
- Polyester filling
- Black thread
- 3.00 mm crochet hook
- Fabric glue
Quick reference for beginners
Check out some of the below tutorials if you get stuck on any of the stitches or techniques
- How to read patterns
- Magic ring
- Single crochet
- Increase
- Decrease
- Chain
- Front loop only
- Back loop only
- How to change colours
- Attaching amigurumi limbs
If you get stuck anywhere else, check out the FAQ.
Luffy amigurumi pattern
Head
1. (in Beige) MR 6 (6)
2. [ inc ]x 6 (12)
3. [ inc, sc ]x 6 (18)
4. sc, inc, [ sc 2, inc ]x 5, sc (24)
5. [ inc, sc 3 ]x 6 (30)
6. sc 2, inc, [ sc 4, inc ]x 5, sc 2 (36)
7-12. sc 36 (36)
13. sc 2, dec, [ sc 4, dec ]x 5, sc 2 (30)
14. [ dec, sc 3 ]x 6 (24)
15. sc, dec, [ sc 2, dec ]x 5, sc (18)
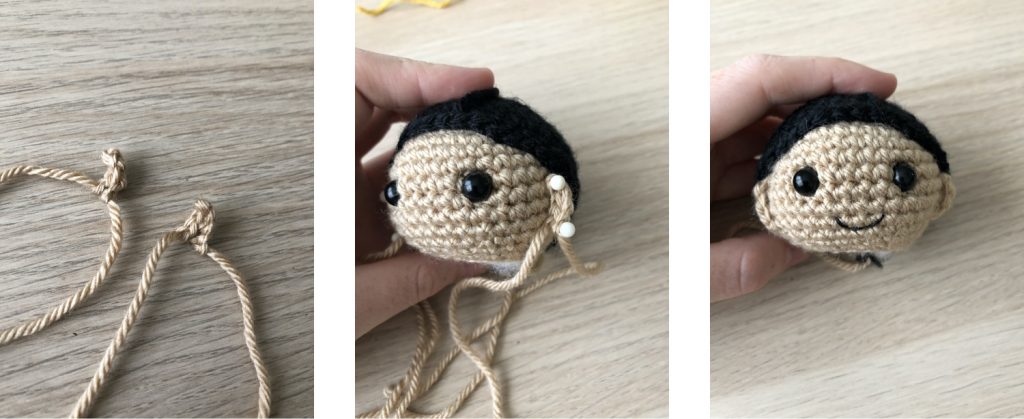
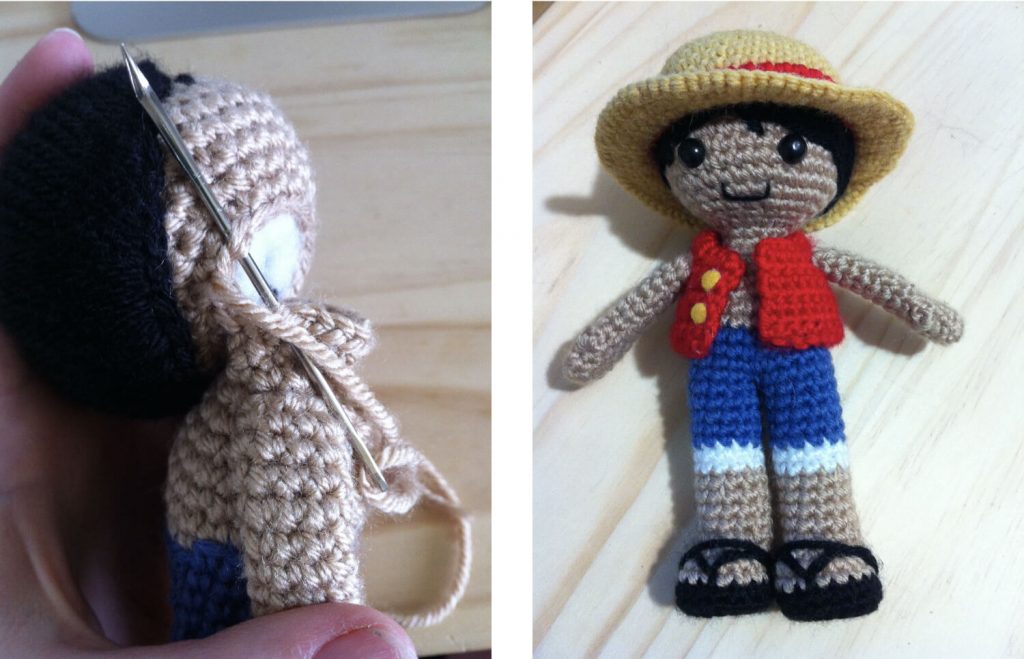
Insert safety eyes between rows 9 and 10, with approximately 4 stitches between them. Leave a tail for sewing, finish off and stuff firmly. Stitch on the mouth using a few threads of black embroidery or cross-stitch thread. Yarn works as well, but leaves the mouth a bit thicker than pictured.
Hair Cap
1. (in Black) MR 6 (6)
2. [ inc ]x 6 (12)
3. [ inc, sc ]x 6 (18)
4. sc, inc, [ sc 2, inc ]x 5, sc (24)
5. [ inc, sc 3 ]x 6 (30)
6. sc 2, inc, [ sc 4, inc ]x 5, sc 2 (36)
7-12. sc 36 (36)
Leave a tail for sewing, and finish off.
Ears (make 2)
1. (in Beige) ch 3 (3)
2. ch 1, turn, sl st, sc, sl st (3)
Leave a tail for attaching to the head and finish off.
Next I use pins to position the ears in place and then use the tails to attach them. I try to give them a little curve, like real ears would have. The top of the ear should line up with the middle of the eye. It should be about 5 stitches away from the eye, or wherever it meets the edge of the wig cap.
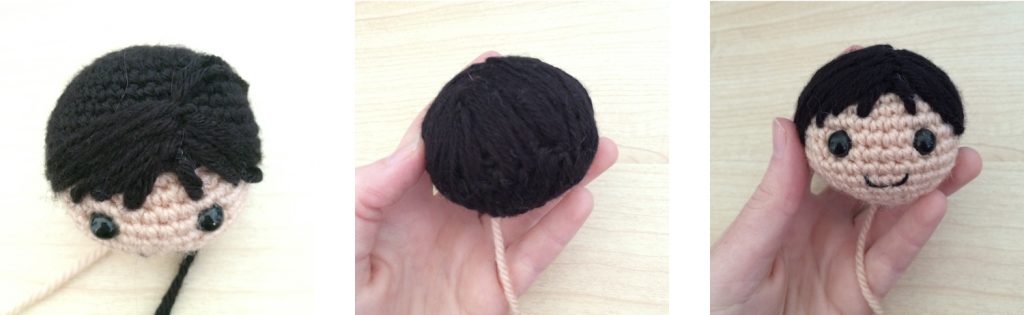
Attaching hair to the head
I learnt this technique from Owlishly, so I don’t want to take any credit for it, or imagine that I can explain it better than them. Here’s the link to the original tutorial: https://owlishly.typepad.com/owlishly/2007/08/amigurumi-hair.html
Use the tail of the wig cap to attach it to the head. It only needs to be attached in a few places, so no need to be overly thorough.
Then embroider on the hair as in the tutorial above. I usually like to google a picture of Luffy and keep it up so that I can use it as a reference for his hair as I work. He has a slight part, and usually a bit of his fringe falls on his face.
Arms (make 2)
1. (in Beige) MR 6 (6)
2. [ inc, sc 2 ]x 2 (8)
3-4. sc 8 (8)
5. 4sc popcorn, sc 7 (8)
6-15. sc 8 (8)
Leave a tail for attaching to the body later, and finish off. They don’t need any stuffing because they’re so thin.
TIP: The popcorn stitch in the arm is the thumb. If you prefer straight arms, simply replace the popcorn stitch with a sc.
Leg (make 2)
1. (in Black) MR 6 (6)
2. [ inc ]x 6 (12)
3. [inc, sc ]x 6 (18)
4. BLO sc 18 (18)
5. sc 18 (18)
6-7. (in Beige) sc 18 (18)
8. sc 3, dec 6, sc 3 (12)
9. sc 12 (12)
*sew on the sandal, see below*
10-12. sc 12 (12)
13-14. (in White) sc 12 (12)
15-19. (in Blue) sc 12 (12)
Finish off the first leg (no tail necessary), but leave the second one on your hook.
TIP: Crocheting one round in the back loop only makes it easier to give the foot its shape, as its easier to make the base flat.
Create the sandal by taking a piece of black yarn and threading it through the foot. There should be 4 “straps”.
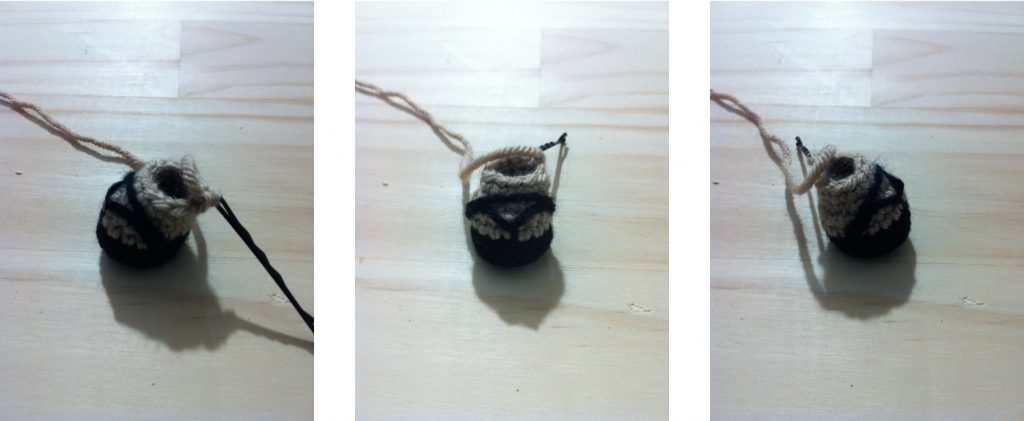
1. From the bottom of the shoe (where the black and beige yarn meet), to 1 row directly above.
2. From the left side of the sandal, back into this same stitch. When doing this step, to help keep the strap in place, I also like to come out of a stitch and go back into the same stitch, catching the yarn in place as you do. This way you can’t see it, but there is something to keep it in place.
3. From the right side fo the sandal to the same stitch. Secure as you did on the other strap.
4. And from the left outer strap stitch back into the right outer strap stitch.
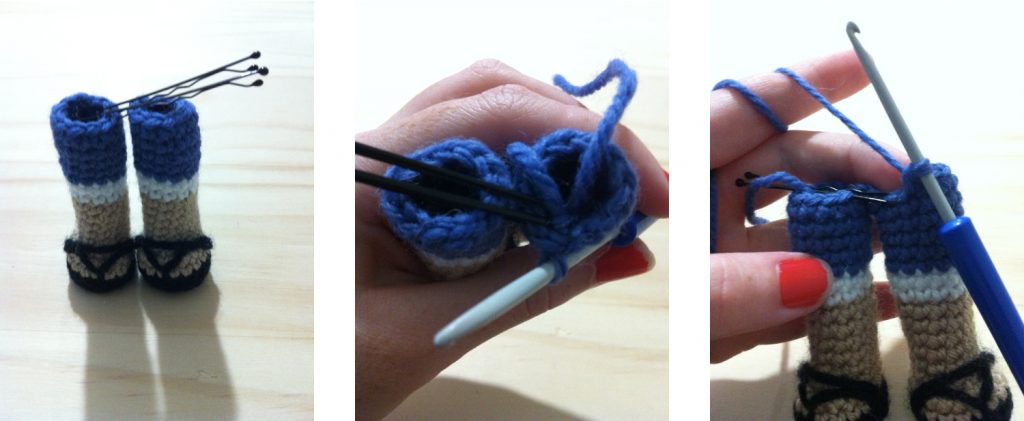
Joining the legs
Take the two legs and position them so that both feet are pointing correctly. I like to place two bobby pins across the stitches where the legs will join to make it a little easier to keep track of. The right leg should be the one still on your hook, so that the colour change at the start of the round later will be at the back of the doll.

Usually it’s four more stitches on the right leg before the fifth stitch jumps over to the left leg. Hopefully the pictures below will help illustrate.
Join with two bobby pins, this is where you’ll go from one leg to the other.
Make one sc in the right leg in the stitch the bobby pin marks. The next sc will be on the left leg, in the stitch the bobby pin marks.
Do the same when you reach the opposite bobby pin. This is what it should look like after the first round of the body.
Body
(row 1 is the one described above when joining the legs)
1-3. (in Blue) sc 24 (24)
4. (in Beige) sc 24 (24)
5-7. sc 24 (24)
(at this point stuff the legs)
8. sc 3, dec, [ sc 6, dec]x 2, sc 3 (21)
9. [ dec, sc 5 ]x 3 (18)
10. sc 2, dec [ sc 4, dec ]x 2, sc 2 (15)
11. [ dec, sc 3 ]x 3 (12)
12. FLO sc 12 (12)
13. [ sc, inc ]x 6 (18)
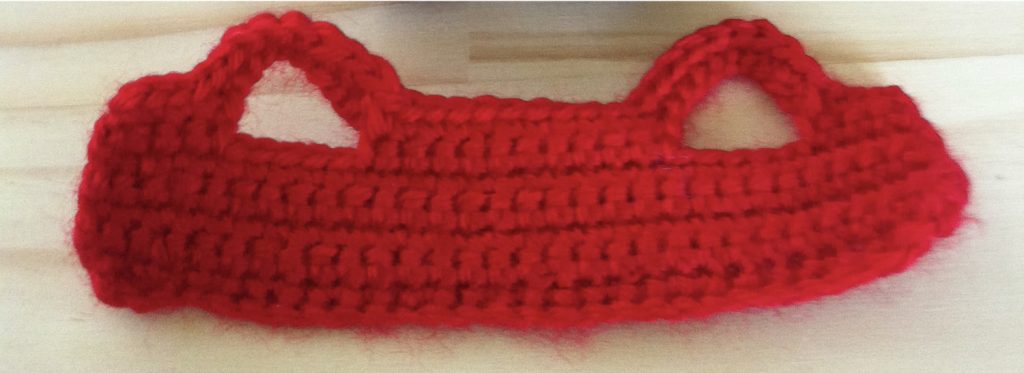
Shirt
1. (in Red) ch 31 (31)
(turn, next sc is in 2nd ch from hook)
2-6. sc 30, ch 1, turn (30)
7. dec 3, ch 8, skip 4, sc 1, dec 4, sc 1, ch 8, skip 4, dec 3, ch 1, turn (24)
8. sc until end of row (24)
The shirt has decreases in it to give it a curve and make it fit the doll better. If you find that the arm holes aren’t big enough, increase the number of ch’s in round 7. Since the dolls change slightly depending on how you crochet compared to me, on row 6-7 it’s a good idea to check that the shirt is matching the doll as you go, so you can make smaller changes instead of having to remake the entire shirt or unravel a lot of your work!
Cut out two tiny circles of yellow felt and glue them onto one side of the shirt for the buttons! You may have to sew the shirt shut once he’s on the doll – I like keeping it open because it’s fun to dress them 😀
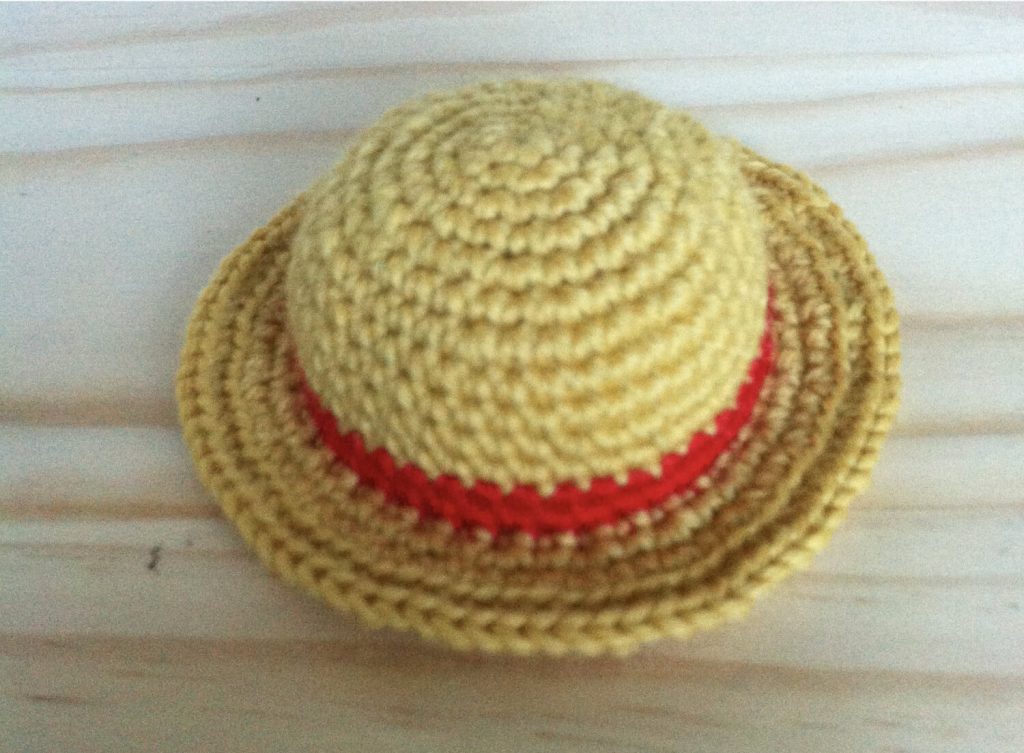
Straw Hat
1. (in Yellow) MR 6 (6)
2. [ inc ]x 6 (12)
3. [ inc, sc ]x 6 (18)
4. sc, inc, [ sc 2, inc ]x 5, sc (24)
5. [ inc, sc 3 ]x 6 (30)
6. sc 2, inc, [ sc 4, inc ]x 5, sc 2 (36)
7. [ inc, sc 11 ]x 3 (39)
8-11. sc 39 (39)
12-13. (in Red) sc 39 (39)
14. (in Yellow) FLO sc 39 (39)
15. sl st, [ inc, sc ] x(repeat until end of round)
16. [ inc, sc 3 ]x(repeat until end of round)
17. BLO sc around
For the last few rows of the hat the number of stitches aren’t important, which is why they’re missing.
Stitching the last round of the hat in the back loop only stops the hat brim from curving upwards so much, though I find it still wants to tilt upwards.
Final assembly!
I use pins to get a rough idea of the placement of the arms before I sew them on. The arm is pressed flat against the body and stitched there using the tail. Truthfully, you can be fairly messy with the arms as the shirt will cover the join anyway.
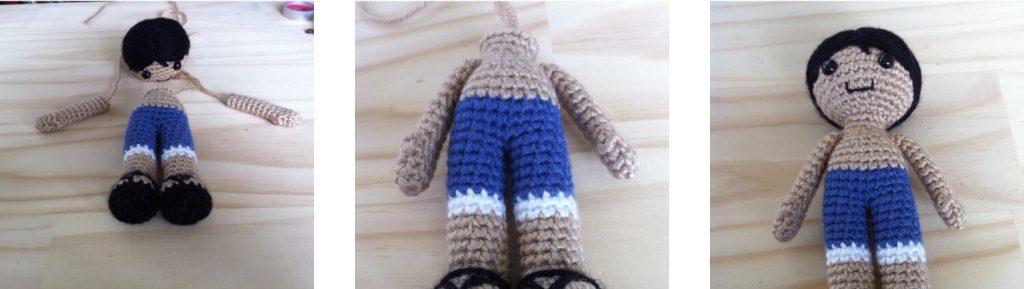
The last thing left to do is to attach the head. Both the base of the head and the top of the body had 18 stitches in their last rounds. That means that each stitch in the head should match a stitch in the body, which gives it a nice neat finish.
And done! I love his little hat so much, and it’s especially fun to put it on other characters too. Your Luffy amigurumi is complete!
And one last final tip: the straw hat makes an excellent pet hat; although how long your pet tolerates it is another story.


Mousih
January 3, 2021 at 7:47 pmMerci pour votre merveilleux tuto. J’ai hâte de le commencer.