
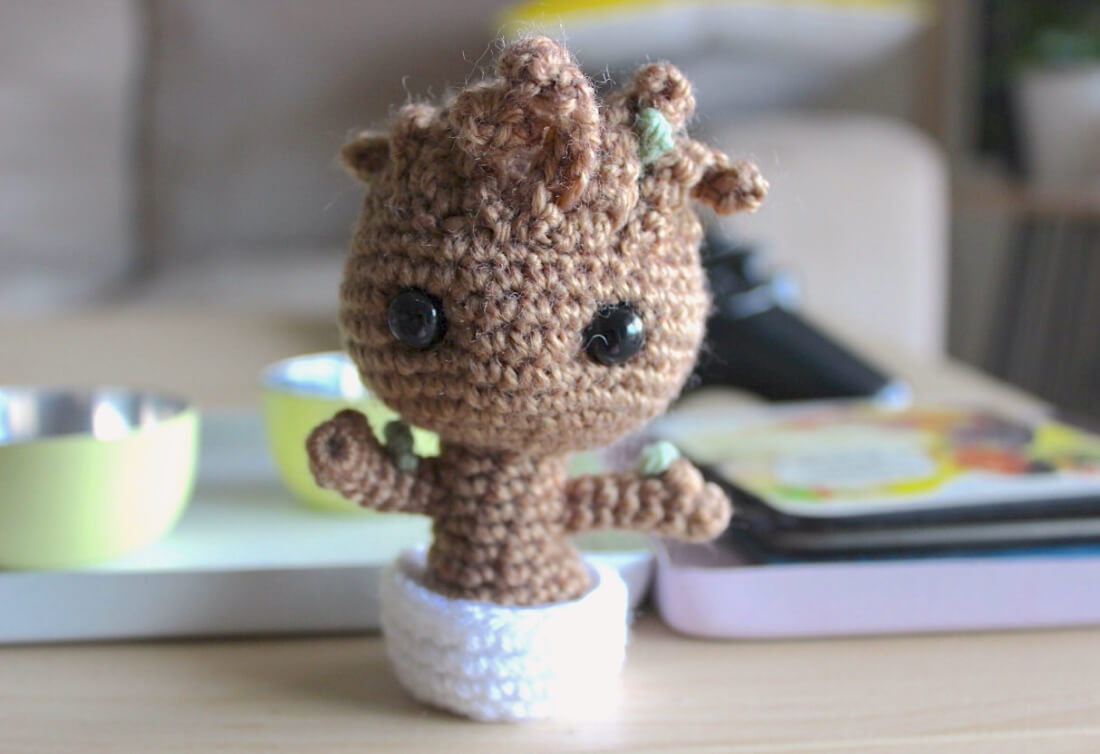
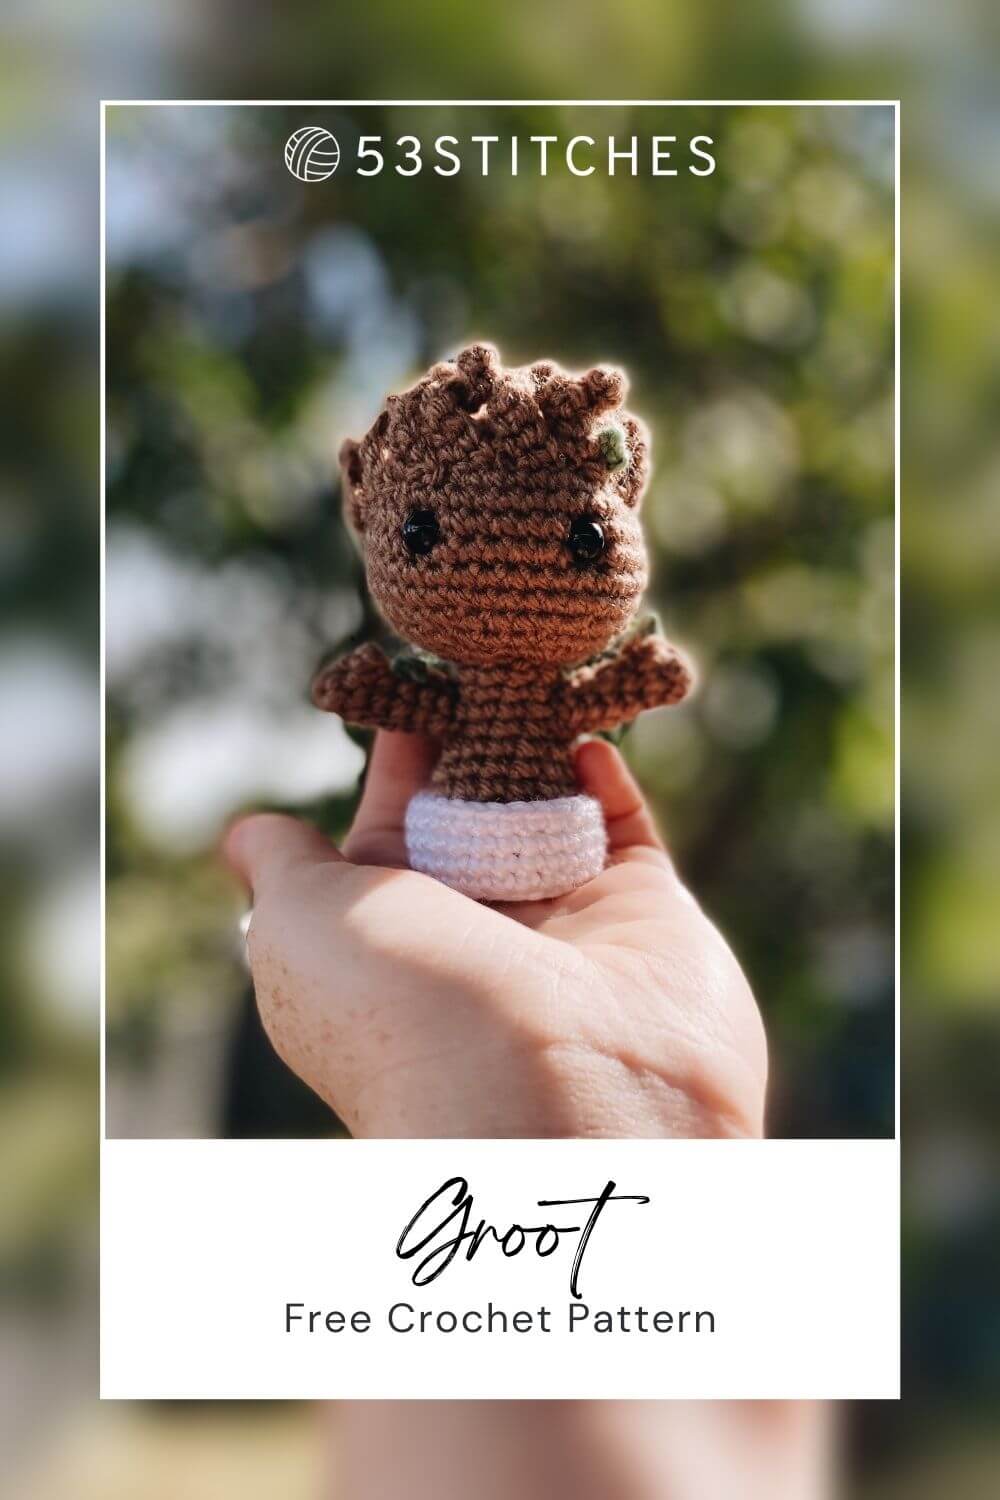
I don’t know about you, but I fell in love with Groot after watching Guardians of the Galaxy, and especially with the tiny potted Groot that appeared at the end. It took me over a year to get around to making one, which is absolutely typical, but here he is at last! This free Groot crochet pattern is suitable for beginners, but has some fiddly bits with the arms and hair, so a little patience for newbies is good
What materials will you need
Note some of the links on this site are affiliate links. This means I get paid a small fee if you decide to purchase anything at no extra cost to you. I will only ever link products I happily use myself.
- brown yarn
- green yarn
- white yarn
- 3.00 mm crochet hook
- polyester filling
- yarn needle
- 2 x 8.00mm safety eyes
Quick reference for beginners
Check out some of the below tutorials if you get stuck on any of the stitches or techniques
- How to read patterns
- Magic ring
- Single crochet
- Increase
- Decrease
- Chain
- Slip stitch
- Attaching amigurumi limbs
If you get stuck anywhere else, check out the FAQ.
Let’s crochet Groot!
HEAD
1. (in Brown) MR 6 (6)
2. [ inc ]x 6 (12)
3. [ inc, sc ]x 6 (18)
4. sc, [ inc, sc 2 ]x 5, inc, sc (24)
5. [ inc, sc 3 ]x 6 (30)
6. sc 2, [ inc, sc 4 ]x 5, inc, sc 2 (36)
7-12. sc 36 (36)
13. sc 2, [ dec, sc 4 ]x 5, dec, sc 2 (30)
14. sc 30 (30)
15. [ dec, sc 3 ]x 6 (24)
16. sc, [ dec, sc 2 ]x 5, dec, sc (18)
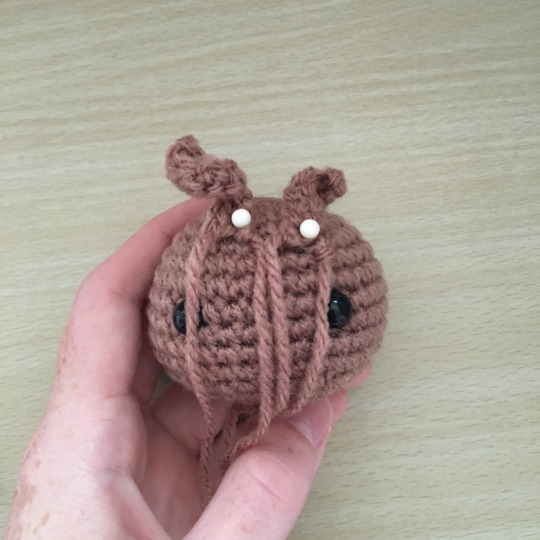
At this point, stuff the head and insert the eyes between rows 9 and 10, with about 6 stitches in between.
17. [ dec, sc ]x 6 (12)
18. dec 6 (6)
Finish off and close up the little gap. PlanetJune has a great tutorial for those of you who don’t close pieces very often (like myself).

HAIR
e.g. a piece 9 stitches long:
1. (in Brown) ch 9 (9)
2. ch 1, turn, sc 9 (9)
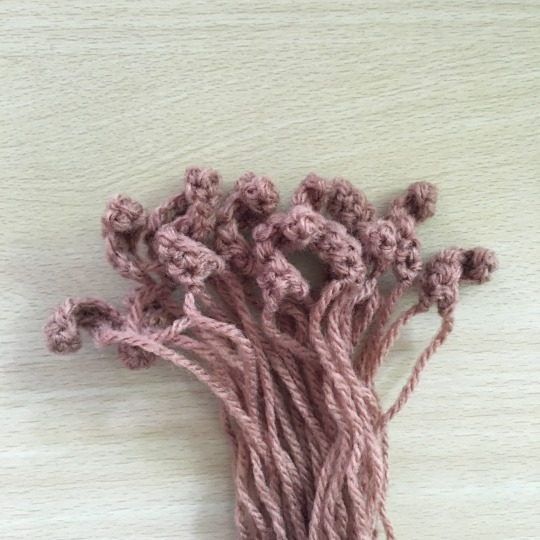
It’s not really hair, but I’m going to call it hair. For the hair/bark we’re going to crochet a bunch of curly pieces. This is in no way an exact science. You can make as many or few pieces as you want, of whatever lengths you want. The above example is for a piece that’s 9 stitches long. For a piece 4 pieces long, just replace the 4 with a 9.
I usually make the following lengths:
3 x 9 stitches long
2 x 8 stitches long
3 x 7 stitches long
2 x 6 stitches long
2 x 4 stitches long
3 x 3 stitches long
Leave a tail for each one, long enough to use it to attach to the head later on. The hair is probably the trickiest part of the pattern, and it’s not necessarily tricky, just time consuming.
ARM (make 2)
1. (in Brown) MR 6 (6)
2. sc 6 (6)
3. popcorn 4sc, sc 5 (6)
4-7. sc 6 (6)
Finish off, leaving enough of a tail to attach to the body later. I also like to crochet a small green leaf for each hand, one on the left thumb and one on the right elbow. Simple ch 2, sc into the second chain on the hook and then finish off. Then use the tail of the leaves to attach to
BODY
1. (in Brown) MR 6 (6)
2. inc 6 (12)
3. [ inc, sc ]x 6 (18)
4. BLO sc 18 (18)
5-6. sc 18 (18)
7. [ dec, sc 7 ]x 2 (16)
8. [ dec, sc 6 ]x 2 (14)
9. [ dec, sc 5 ]x 2 (12)
10. [ dec, sc 4 ]x 2 (10)
11-13. sc 10 (10)
Finish off, leaving a tail long enough to attach the head and stuff the body.
POT
1. (in White) MR 6 (6)
2. [ inc ]x 6 (12)
3. [ inc, sc ]x 6 (18)
4. sc, [ inc, sc 2 ]x 5, inc, sc (24)
5. BLO sc 24 (24)
6-8. sc 24 (24)
Finish off and hide the tail.
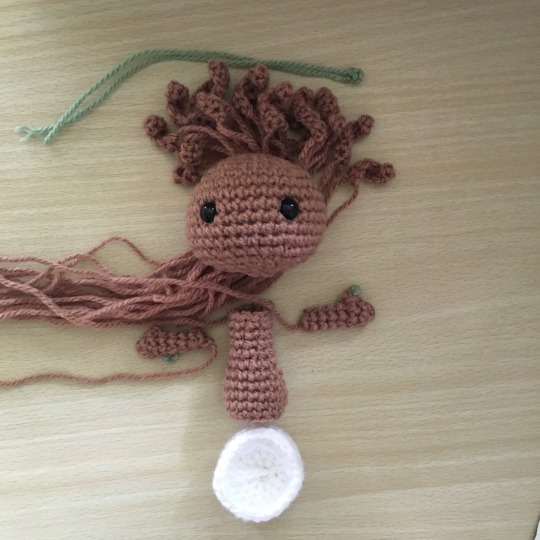
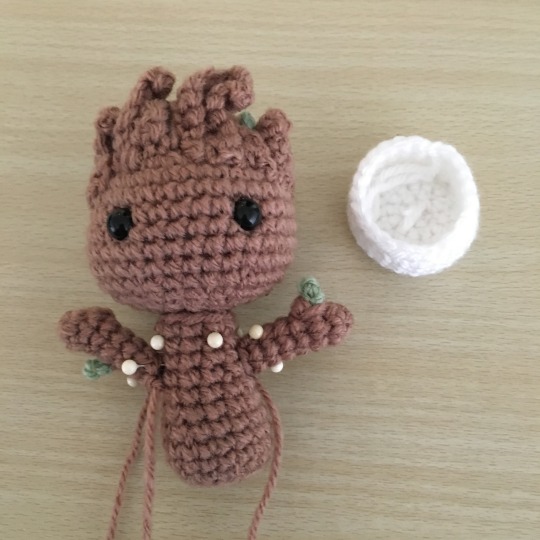
Putting it all together
That’s the crochet portion done, now time for assembly. The only tricky part of assembly is getting all of that hair in place (so much hair!). I like to put the longer hair pieces in the middle of the head and use slightly shorter pieces until I reach the edge. Some of them will have uneven lengths (for example, I usually make 3 pieces that are 7 stitches long). This just means that his hair won’t be completely symmetrical, which I like and do on purpose.
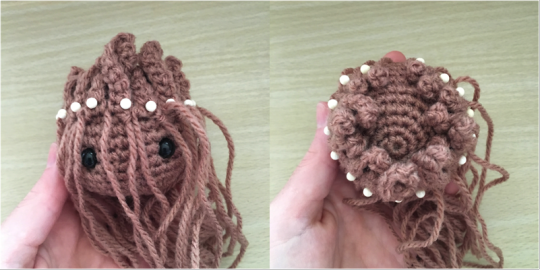
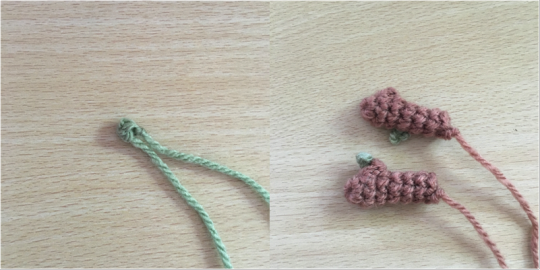
I also like to make sure that the curls are all going the same way. The way they twist will depend on what hand you crochet with (whether you’re right-handed or left-handed). I’m right handed, so they curl clockwise. I make sure the curls are turning towards the head, instead of poking out past the face; that way they look kind of swept back. (In the picture below, the left curl is pinned the wrong way, the right curl is pinned the right way, or at least the way I prefer).
After attaching all of the hair, all that’s left is to attach the arms to the body, and the body to the head. Optionally, you could try to put jewellery wire or pipe cleaners in his arms, to make them pose-able, but I usually don’t bother since they’re a little too small.
Then place him into his little pot plant, and he’s ready to dance! I have one of these sitting on my desk because he’s a great little desk companion. If you make one for yourself and share on Instagram or Tumblr, don’t forget to tag @53stitches so I can check it out!


Laine
January 2, 2021 at 5:34 amWhat do you mean by popcorn on the arms? How are you doing the stitch?
53stitches
January 11, 2021 at 12:43 pmHello! You can find a tutorial on how to do the popcorn stitch at https://53stitches.com/popcorn-stitch/. There should be a page for every stitch I use in my patterns, so if you ever get stuck check out the https://53stitches.com/category/tutorial/ section 😀
Darya
January 14, 2021 at 6:56 amSuch a great tutorial! Thanks!
I have some trouble understanding how to assemble all the pieces. Do I sew them together? How would I do that?
Marcela López
June 23, 2021 at 2:09 pmHola, ya lo terminé pero no sé cómo se sostiene parado en la maceta, se cose la base del cuerpo a la maceta o cómo se le hace?? Gracias.
53stitches
July 3, 2021 at 1:05 pmHello! You can do that if you want. I leave it unattached, so the pot comes off. You could also try gluing it in place.
¡Hola! Puedes hacerlo si quieres. Lo dejo suelto, para que se desprenda la olla. También puede intentar pegarlo en su lugar.
Gail
July 7, 2021 at 5:13 amVery beautiful work,ob groit the last one I made the too of head one of the rows u do it only in back stich so u can come back and leave a place to directly crochtet his hair 9n , not sure that makes sence,gail
Rosa
July 13, 2021 at 9:24 amHello, I was wondering how do you get your Groot to stand up? Mine is a little head heavy and falls over lol
Joshua
December 5, 2021 at 11:10 amThanks for the pattern! I’m going to gift a version to be placed in a pot with succulents. I think 2 x 8.00mm should have the words safety eyes next to it. Thanks again!
53stitches
January 4, 2022 at 5:21 pmThank-you! And you’re right, I’ll get that fixed 🙂