The slip stitch is almost a half-single crochet, and the both start the same way.
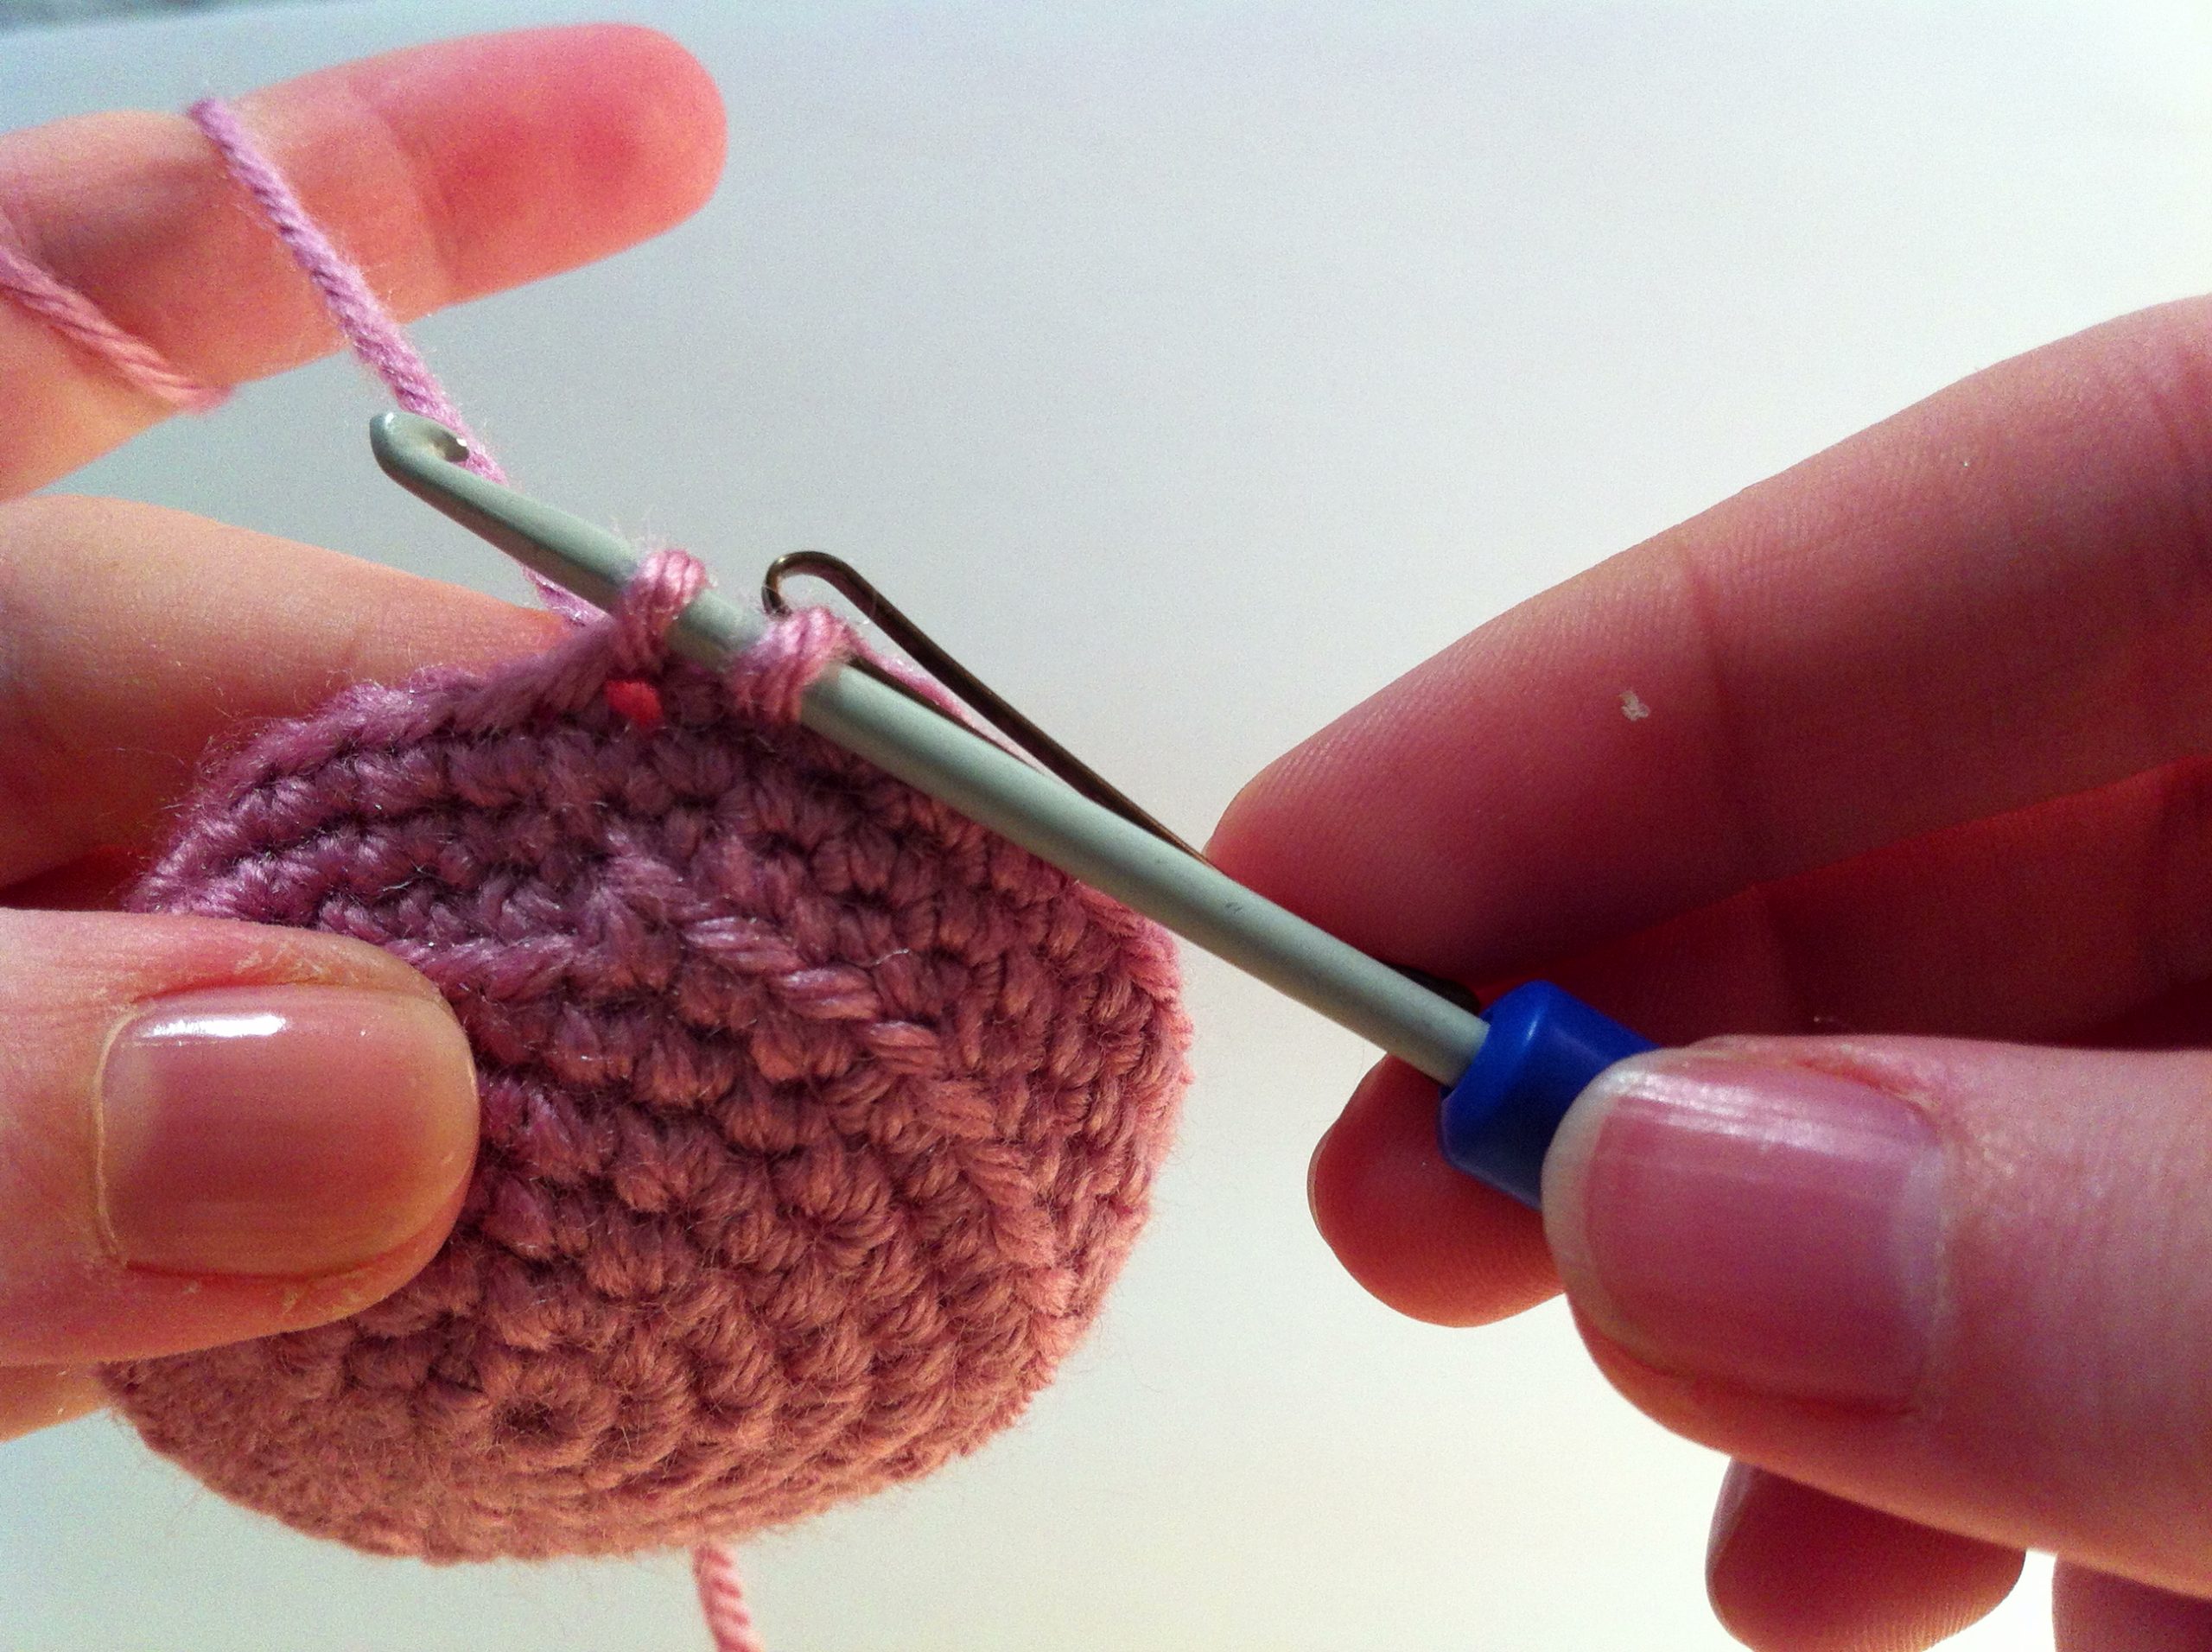
Insert your hook into the next stitch, yarn over and pull through. You now have two loops on your hook.
Instead of continuing a single crochet, draw the second loop (on the left) through the first loop (on the right).
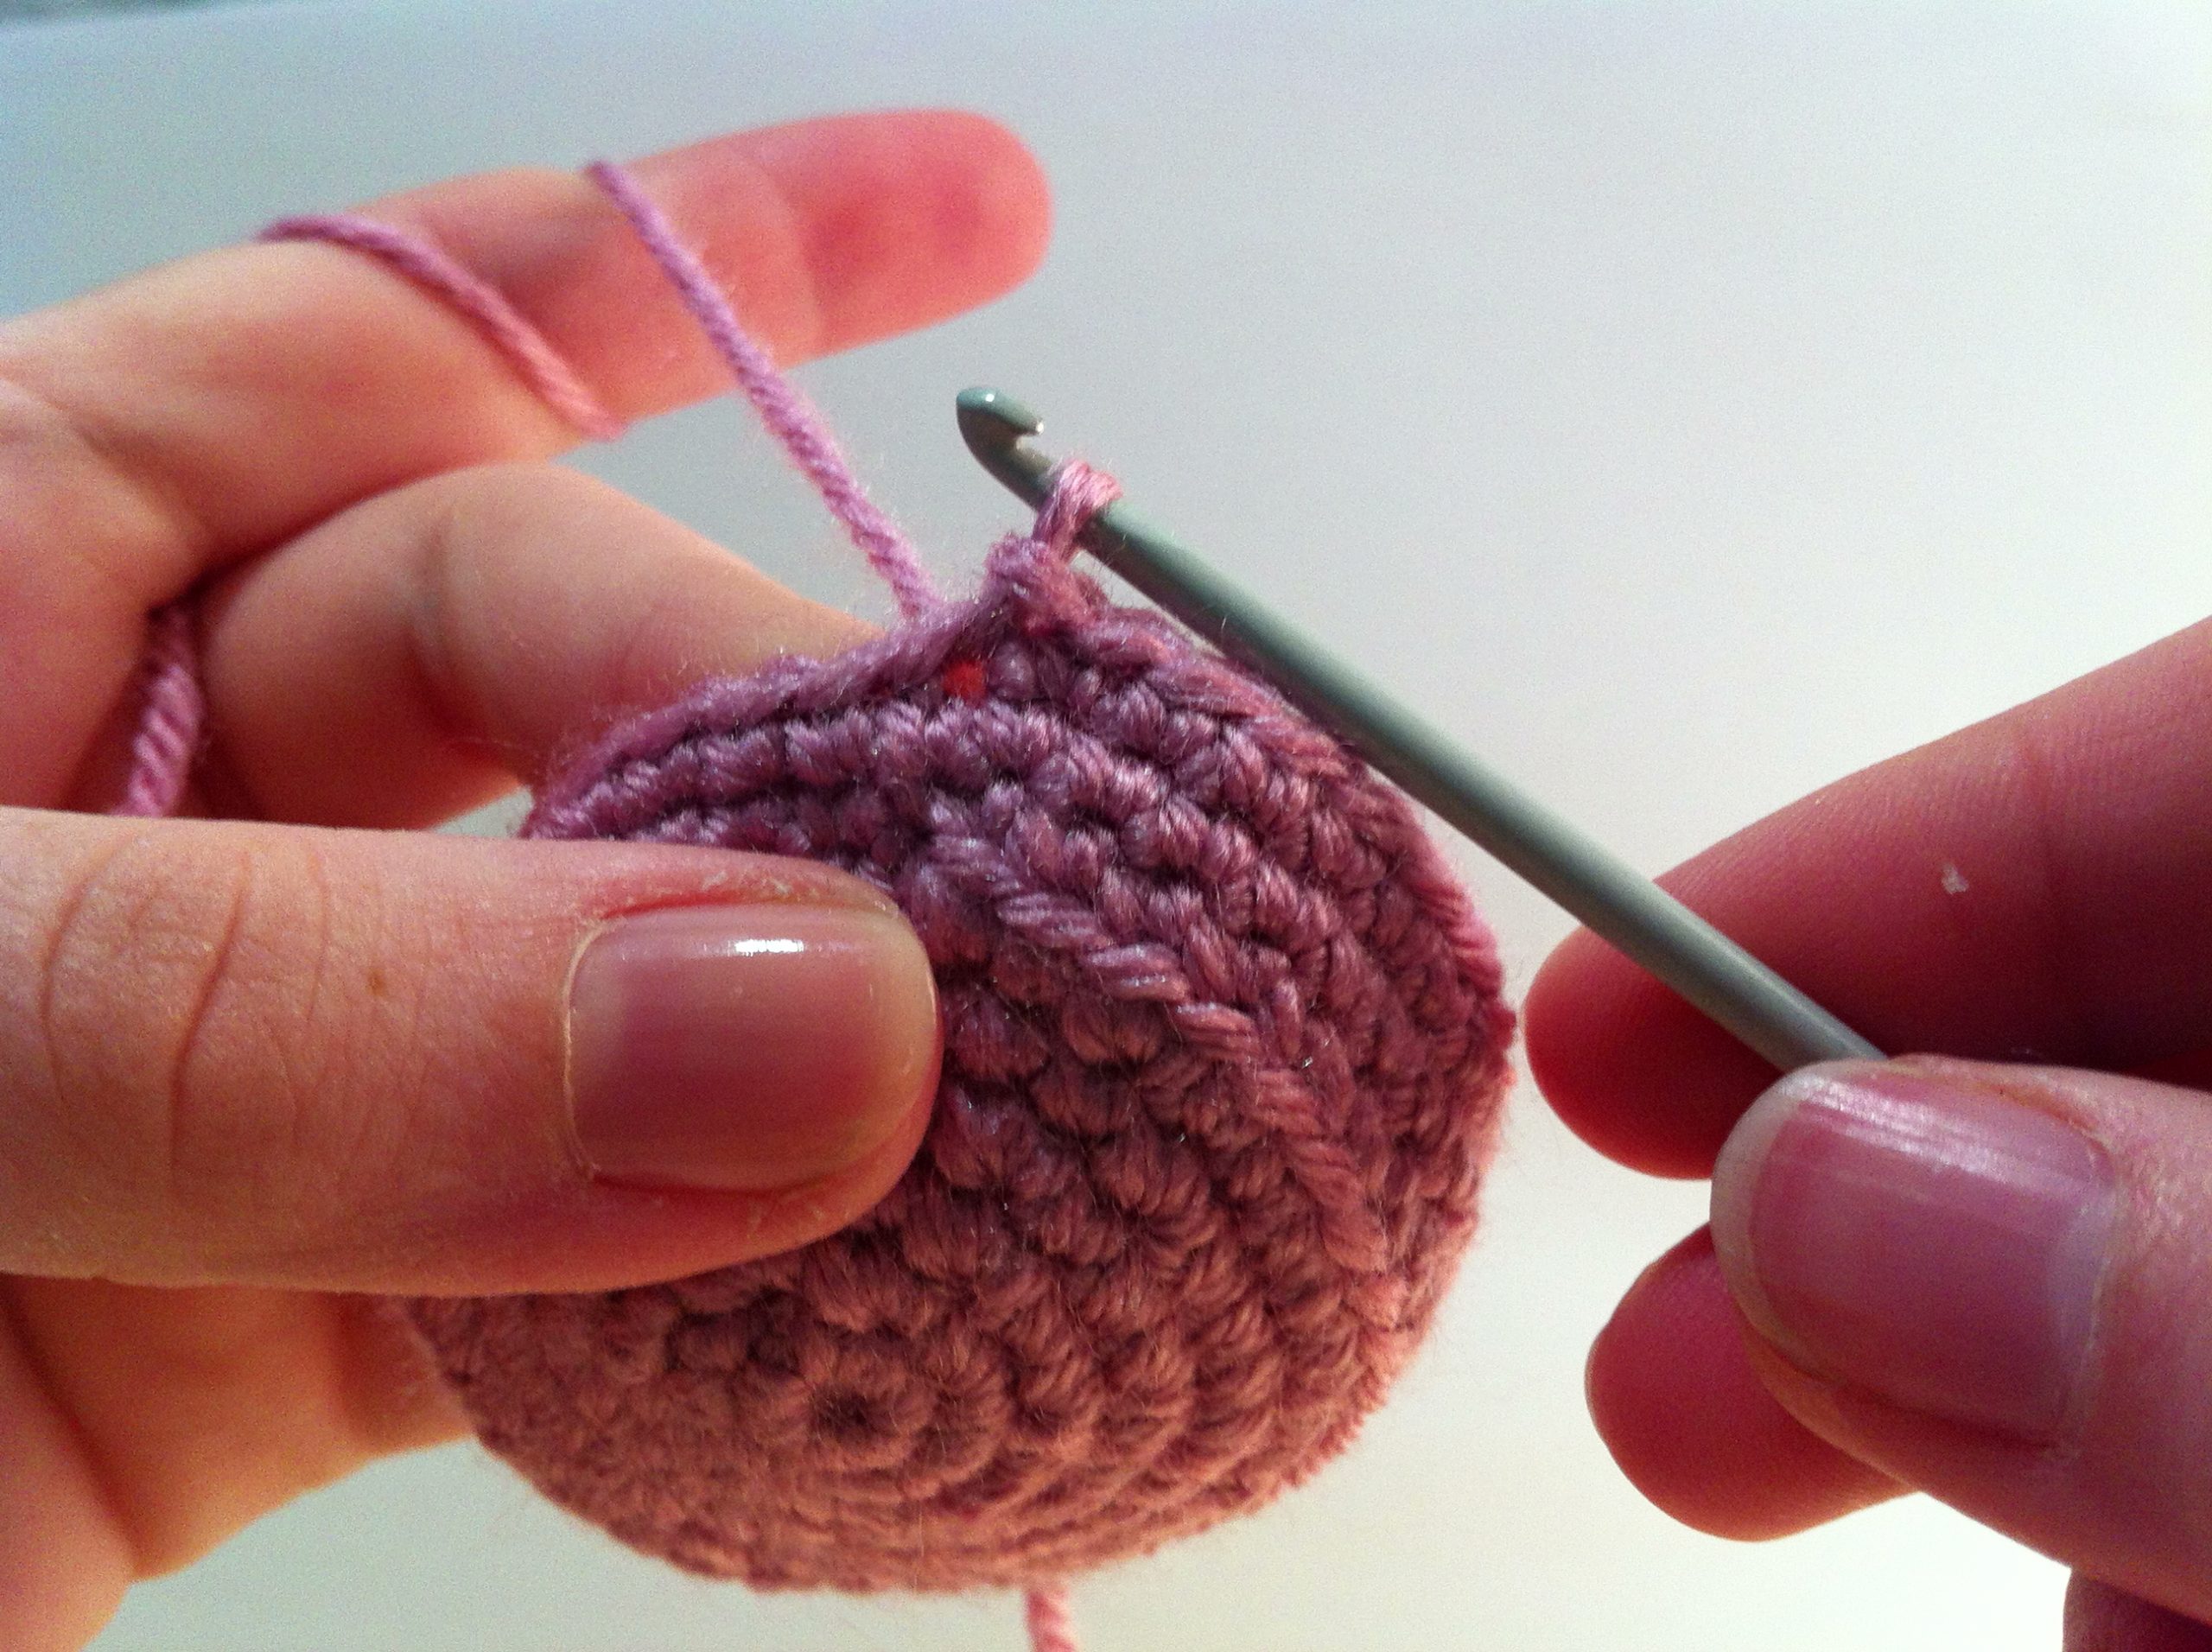
That’s a slip stitch done!
When you’re learning how to do a slip stitch as a beginner (or even as a well practiced crocheter!) take care to watch your tension. It’s very easy to accidentally make a slip stitch tighter than your other stitches. This makes it harder to work into the next round, and if there are enough of them in a row, can upset the consistency of your piece. You might want to crochet your slip stitches slightly looser, so they match your single crochet tension.
What is a slip stitch used for?
In amigurumi, slip stitches are often used to finish off a piece, or when doing a horizontal colour change. A slip stitch makes the height difference between the current and previous round more subtle.
Slip stitches can also be used as decorative edges. For example, if you’re crocheting a small doll’s jacket for your amigurumi, you can do a slip stitch around the edge of the flat piece to help smooth the edge and make the jacket look more polished.