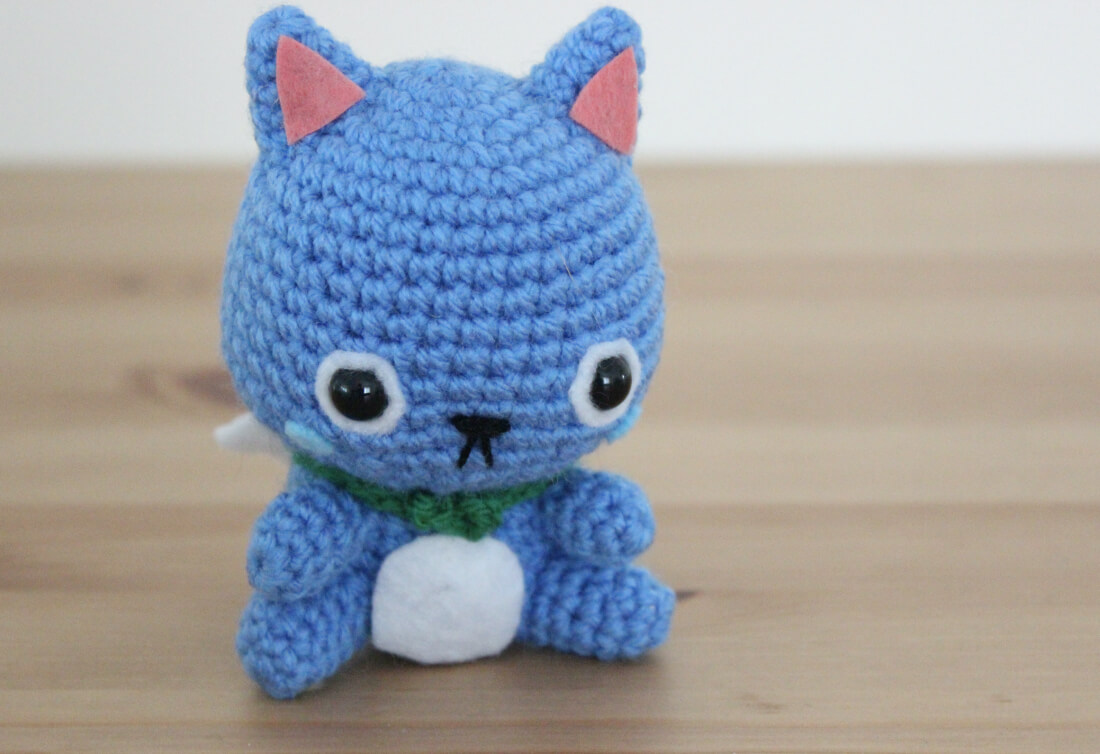
This latest pattern is for Happy, from the Fairy Tail series by Hiro Mashima. I’m behind on the series, but I wanted to try and make some more amigurumi anime characters and Happy is so adorable he had to be one of the first! This Happy Fairy Tail crochet pattern is a great project for beginners, since there’s nothing too tricky in it!
What materials you will need
Note some of the links on this site are affiliate links. This means I get paid a small fee if you decide to purchase anything at no extra cost to you. I will only ever link products I happily use myself.
- blue yarn
- white yarn
- green yarn
- black yarn
- 3.00mm crochet hook
- 10.00mm safety eyes (optional)
- white felt
- pink felt
- light blue felt
Quick reference for beginners
Check out some of the below tutorials if you get stuck on any of the stitches or techniques
If you get stuck anywhere else, check out the FAQ.
Happy Fairy Tail crochet pattern
HEAD
1. (in Blue) MR 6 (6)
2. [ inc ]x 6 (12)
3. [ inc, sc ]x 6 (18)
4. sc, [ inc, sc 2 ]x 5, inc, sc (24)
5. [ inc, sc 3 ]x 6 (30)
6. sc 2, [ inc, sc 4 ]x 5, inc, sc 2 (36)
7-11. sc 36 (36)
12. [ inc, sc 5 ]x 6 (42)
13. sc 42 (42)
14. [ dec, sc 5 ]x 6 (36)
15. sc 2, [ dec, sc 4 ]x 5, dec, sc 2 (30)
16. [ dec, sc 3 ]x 6 (24)
Leave a tail for sewing and finish off.
BODY
1. (in Blue) MR 6 (6)
2. [ inc ]x 6 (12)
3. [ inc, sc ]x 6 (18)
4. sc, [ inc, sc 2 ]x 5, inc, sc (24)
5. [ inc, sc 3 ]x 6 (30)
6-8. sc 30 (30)
9. [ dec, sc 3 ]x 6 (24)
10-12. sc 24 (24)
Finish off. No tail necessary.
LEG (make 2)
1. (in Blue) MR 6 (6)
2. [ inc, sc ]x 3 (9)
3-6. sc 9 (9)
Leave a tail for sewing and finish off.
ARM (make 2)
1. (in Blue) MR 6 (6)
2. [ inc, sc 2 ]x 2 (8)
3-4. sc 8 (8)
5. dec, sc 6, (7)
Leave a tail for sewing and finish off.
TAIL
1. (in White) MR 7 (7)
2-4. sc 7 (7)
5-16. (in Blue) sc 7 (7)
Leave a tail for sewing and finish off.
EARS (make 2)
1. (in Blue) MR 6 (6)
2. sc 6 (6)
3. [ inc, sc ]x 3 (9)
4. sc 9 (9)
5. [ inc, sc 2 ]x 3 (12)
Leave a tail for sewing and finish off.
At this point you can choose between two different types of eyes: crocheted eyes or felt and safety eyes. You can see the difference between the two of them below and choose which you prefer.
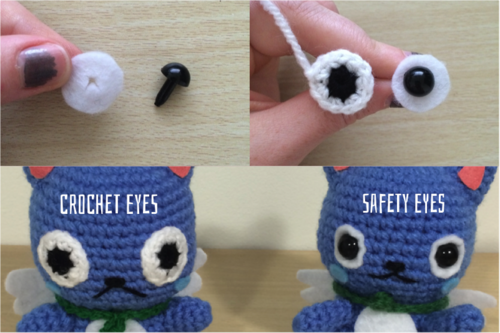
For felt and safety eyes, cut out a circle from white felt, a bit larger then your safety eyes. Then cut a small cross in the centre of the circle so that the safety eye can be poked through (see picture above).
For crocheted eyes, follow the instructions below.
EYES (make 2)
1. (in Black) MR 6 (6)
2. (in White) [ inc ]x 6 (12)
Leave a tail for sewing and finish off. You could choose to work the eyes in joined rounds rather than continuous/spiral rounds for a neater circle. Read about the difference here.
The last thing left to crochet is the bag, but we’ll leave that for now until the rest of the doll is assembled. For now, we’re finished with all the pieces for the body.
Putting it all together
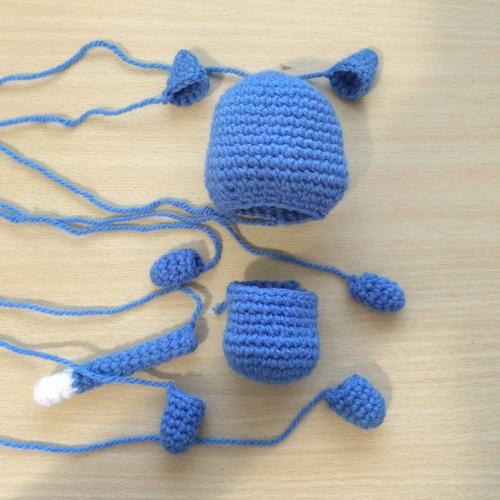
Stuff the head, body, legs and ears. The arms and tail are too small for stuffing. Then I like to pin all the pieces in place to get an idea of placement before sewing them in place.
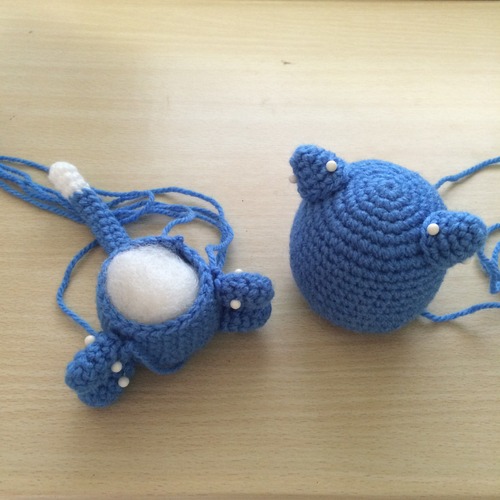
First I attach the legs, tail, then arms. Then I either insert the safety eyes between rows 11 and 12, or sew on the crocheted eyes so that the black centre lines up between rows 11 and 12. After I’ve attached the eyes, I then attach the head, and the ears. I attach the ears after the head because I find it easier to make sure they’re in the correct position once the head is secure.
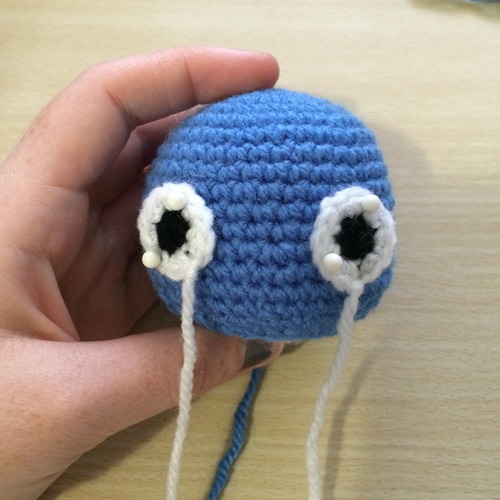
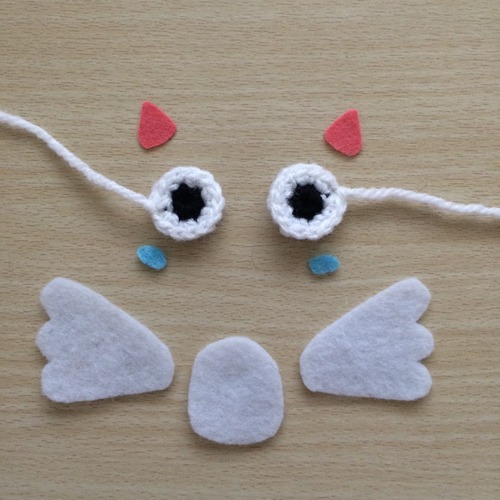
Next we need to cut out all of the felt detailing (the crocheted eyes are pictured here as well). You’ll need: two pink triangles for the ears, two small light blue ovals for the cheeks, two white wings and a white oval-like shape for the belly. The exact shape and size of each of these will be different depending on the size of your doll.
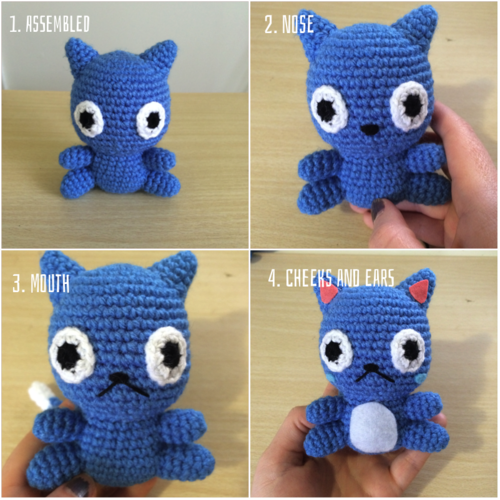
Stitch on the nose and mouth using black yarn. Then glue on the ears, cheeks and belly.
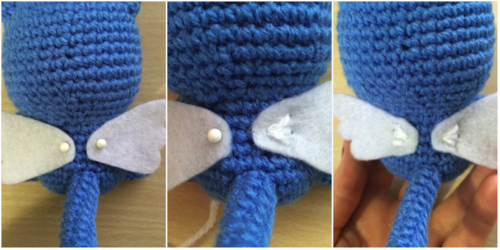
The next thing is to stitch on the wings. Take a length of white yarn. I usually make three small stitches, each going from a single point towards the edge of each of the “feathers”. See pictures below.
Almost finished! The last thing left to do is to crochet and attach the bag.
BAG
1. (in Green) ch 7 (7)
2. (starting in second chain from hook) sc 12 (6 either side of chain) (12)
3-6. sc 12 (12)
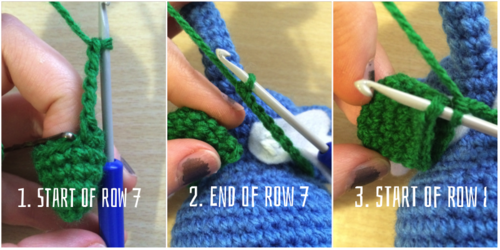
7. ch 28 (28)
8. sl st 2
The bag starts out the same way that Pikachu’s tail did in the last pattern. Start with a chain of 7 (1), then, starting in the second chain from the hook, sc 6 (2). When you reach the end, sc 6 in the other side of the original chain (3).
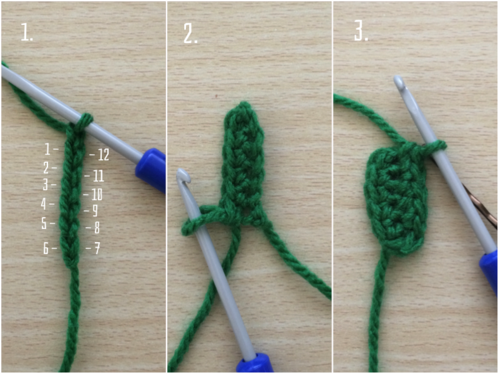
Then continue with rows 3-6 normally. When you get to row 7, you want to chain approximately 28 stitches. You might not need as many, you might need more, it depends on your amigurumi so far. The chain should wrap around Happy’s neck, with a little bit of extra space so that we can create the “knot” at the front.
Then when you get to row 8, insert your hook back into a stitch at the other side of the bag and slip stitch 2 to join them.
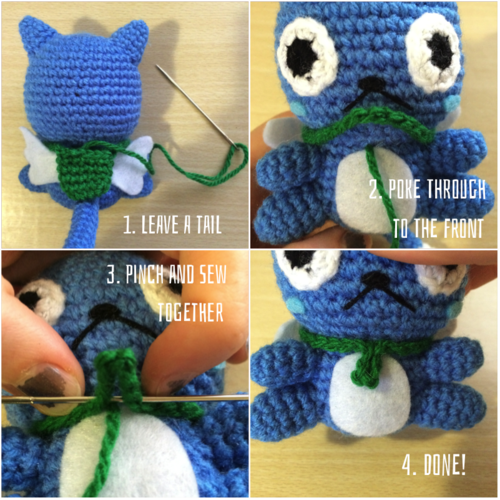
Cut the green yarn, but leave a bit of tail. We’ll use this to create the knot at the front. Take a yarn needle, and poke it through the amigurumi to the front of his head. Then join the extra part of the chain and hide the tail!
Done!
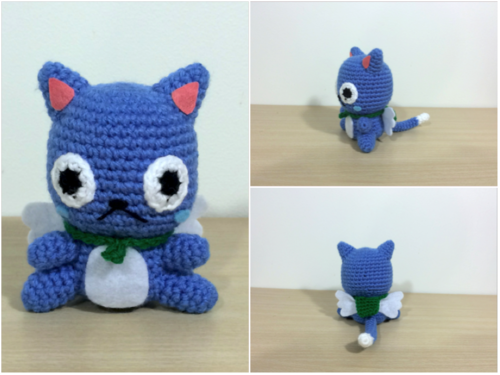
I’ll have to make a Natsu to go with him, but for now he just hangs out with the Pokemon haha. I hope you like him and if you share on Instagram or Tumblr, don’t forget to tag @53stitches so I can check it out.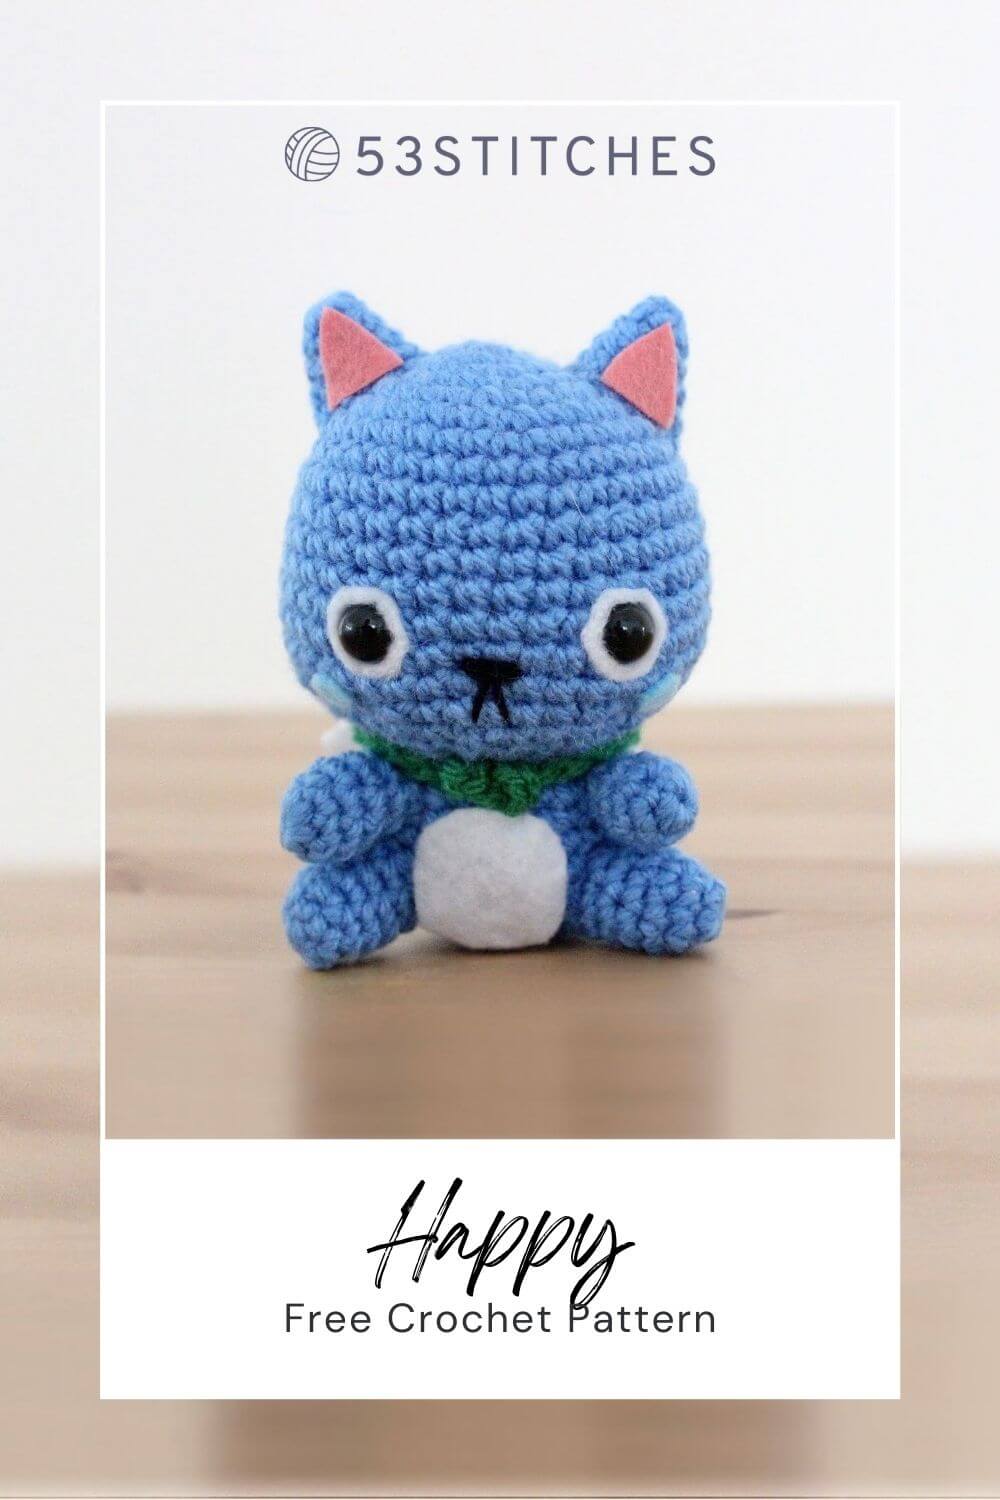


No Comments